Brother International DreamWeaver„ VQ3000 Users Manual - English - Page 96
Sewing The Stitches
 |
View all Brother International DreamWeaver„ VQ3000 manuals
Add to My Manuals
Save this manual to your list of manuals |
Page 96 highlights
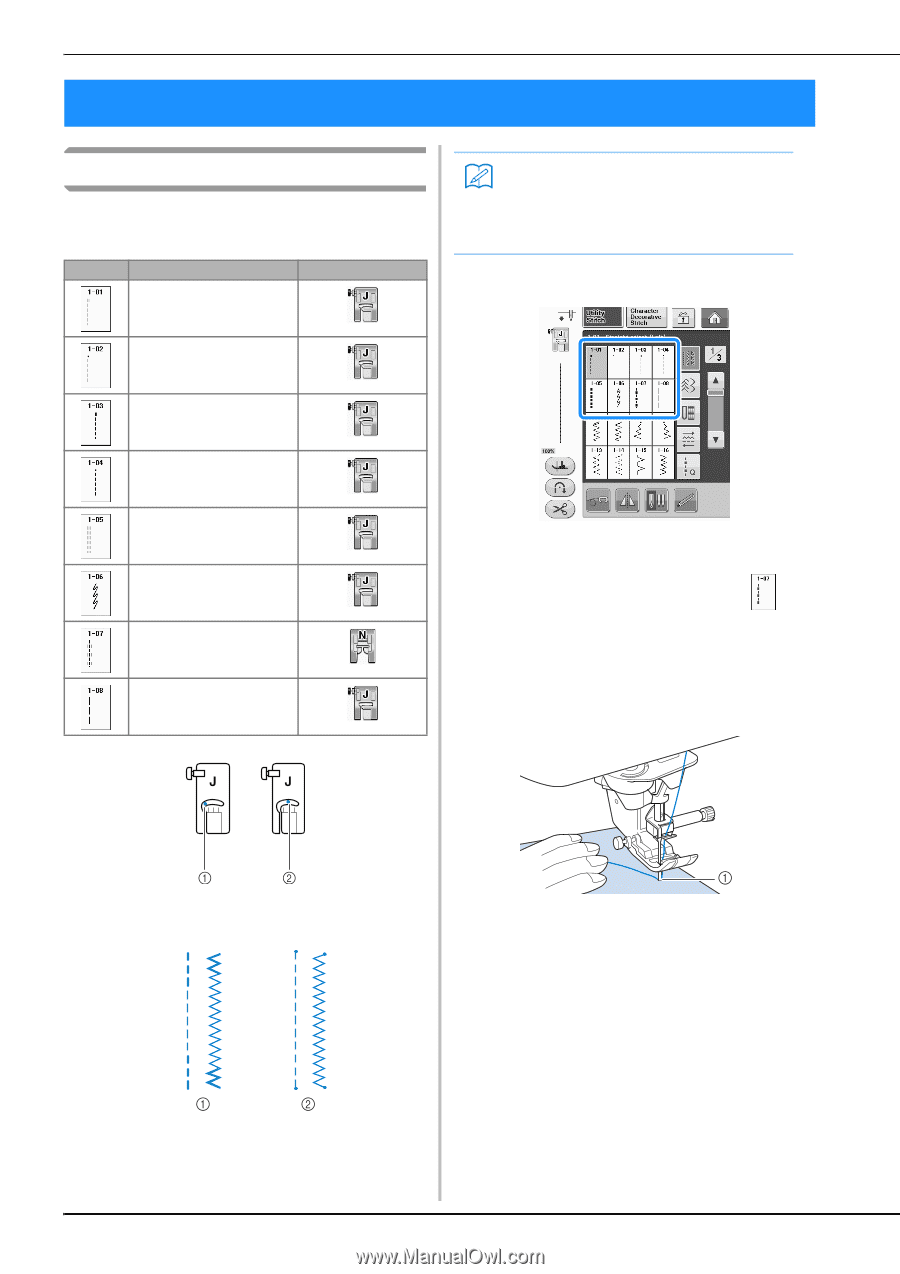
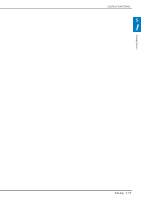
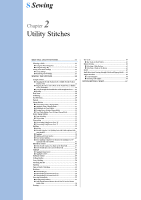
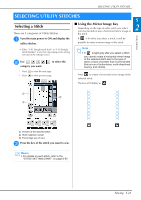
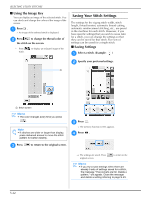
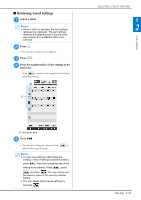
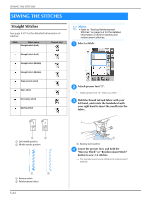
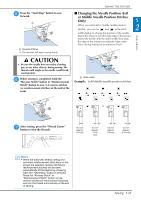
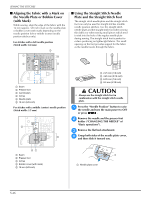
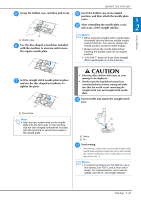
SEWING THE STITCHES SEWING THE STITCHES Straight Stitches See page S-67 for the detailed information of stitches. Stitch Stitch name Straight stitch (Left) Presser foot Straight stitch (Left) Straight stitch (Middle) Straight stitch (Middle) Triple stretch stitch Stem stitch Decorative stitch Basting stitch Memo • Refer to "Sewing Reinforcement Stitches" on page S-5 for the detailed information of reverse stitches and reinforcement stitches. a Select a stitch. b Attach presser foot "J". * Attach presser foot "N" when you select . c Hold the thread tail and fabric with your left hand, and rotate the handwheel with your right hand to insert the needle into the fabric. a Left needle position b Middle needle position a Reverse stitch b Reinforcement stitch S-24 a Sewing start position d Lower the presser foot, and hold the "Reverse Stitch" or "Reinforcement Stitch" button to sew 3-4 stitches. → The machine sews reverse stitches (or reinforcement stitches).
-
 1
1 -
2
-
3
-
4
-
5
-
6
-
7
-
8
-
9
-
10
-
11
-
12
-
13
-
14
-
15
-
16
-
17
-
18
-
19
-
20
-
21
-
22
-
23
-
24
-
25
-
26
-
27
-
28
-
29
-
30
-
31
-
32
-
33
-
34
-
35
-
36
-
37
-
38
-
39
-
40
-
41
-
42
-
43
-
44
-
45
-
46
-
47
-
48
-
49
-
50
-
51
-
52
-
53
-
54
-
55
-
56
-
57
-
58
-
59
-
60
-
61
-
62
-
63
-
64
-
65
-
66
-
67
-
68
-
69
-
70
-
71
-
72
-
73
-
74
-
75
-
76
-
77
-
78
-
79
-
80
-
81
-
82
-
83
-
84
-
85
-
86
-
87
-
88
-
89
-
90
-
 91
91 -
 92
92 -
 93
93 -
 94
94 -
 95
95 -
 96
96 -
 97
97 -
 98
98 -
 99
99 -
 100
100 -
 101
101 -
102
-
103
-
104
-
105
-
106
-
107
-
108
-
109
-
110
-
111
-
112
-
113
-
114
-
115
-
116
-
117
-
118
-
119
-
120
-
121
-
122
-
123
-
124
-
125
-
126
-
127
-
128
-
129
-
130
-
131
-
132
-
133
-
134
-
135
-
136
-
137
-
138
-
139
-
140
-
141
-
142
-
143
-
144
-
145
-
146
-
147
-
148
-
149
-
150
-
151
-
152
-
153
-
154
-
155
-
156
-
157
-
158
-
159
-
160
-
161
-
162
-
163
-
164
-
165
-
166
-
167
-
168
-
169
-
170
-
171
-
172
-
173
-
174
-
175
-
176
-
177
-
178
-
179
-
180
-
181
-
182
-
183
-
184
-
185
-
186
-
187
-
188
-
189
-
190
-
191
-
192
-
193
-
194
-
195
-
196
-
197
-
198
-
199
-
200
-
201
-
202
-
203
-
204
-
205
-
206
-
207
-
208
-
209
-
210
-
211
-
212
-
213
-
214
-
215
-
216
-
217
-
218
-
219
-
220
-
221
-
222
-
223
-
224
 |
 |