HP 2605dn HP Color LaserJet 2605/2605dn/2605dtn - User Guide - Page 93
Using the printer control panel, Network configuration Configuration IP configuration - color laserjet printer manual
 |
View all HP 2605dn manuals
Add to My Manuals
Save this manual to your list of manuals |
Page 93 highlights
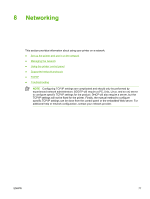
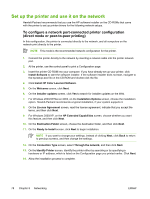
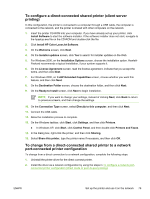
Using the printer control panel The HP Color LaserJet 2605 series allows you to set up an IP address automatically using BOOTP or DHCP. For more information, see Default IP address configuration (AutoIP). Network configuration page The Network configuration page lists the current settings and properties of the printer. To print the Network configuration page from the printer, complete the following steps. 1. On the control panel menu, press (Select). 2. Use the (Left arrow) or (Right arrow) button to select Reports, and then press (Select). 3. Use the (Left arrow) or (Right arrow) button to select Network report, and then press (Select). Configuration page The Configuration page lists the current settings and properties of the printer. You can print a Configuration page from the printer or HP ToolboxFX. To print the Configuration page from the printer, complete the following steps. 1. On the control panel menu, press (Select). 2. Use the (Left arrow) or (Right arrow) button to select Reports, and then press (Select). 3. Use the (Left arrow) or (Right arrow) button to select Config report, and then press (Select). IP configuration You can configure the IP address manually or automatically. Configure a static IP address for my printer Use the following steps to manually configure a static IP address from the control panel. 1. Press (Left arrow) or (Right arrow) to select the Network config menu. 2. Press (Select). 3. Press (Left arrow) or (Right arrow) to select the TCP/IP menu. 4. Press (Select). 5. Press (Left arrow) or (Right arrow) to select Manual. 6. Press (Select). 7. Press (Left arrow) or (Right arrow) to enter the first three digits of the IP address. 8. Press (Select) to save those digits and move to the next three digits of the IP address. ENWW Using the printer control panel 81
-
 1
1 -
2
-
3
-
4
-
5
-
6
-
7
-
8
-
9
-
10
-
11
-
12
-
13
-
14
-
15
-
16
-
17
-
18
-
19
-
20
-
21
-
22
-
23
-
24
-
25
-
26
-
27
-
28
-
29
-
30
-
31
-
32
-
33
-
34
-
35
-
36
-
37
-
38
-
39
-
40
-
41
-
42
-
43
-
44
-
45
-
46
-
47
-
48
-
49
-
50
-
51
-
52
-
53
-
54
-
55
-
56
-
57
-
58
-
59
-
60
-
61
-
62
-
63
-
64
-
65
-
66
-
67
-
68
-
69
-
70
-
71
-
72
-
73
-
74
-
75
-
76
-
77
-
78
-
79
-
80
-
81
-
82
-
83
-
84
-
85
-
86
-
87
-
 88
88 -
 89
89 -
 90
90 -
 91
91 -
 92
92 -
 93
93 -
 94
94 -
 95
95 -
 96
96 -
 97
97 -
 98
98 -
99
-
100
-
101
-
102
-
103
-
104
-
105
-
106
-
107
-
108
-
109
-
110
-
111
-
112
-
113
-
114
-
115
-
116
-
117
-
118
-
119
-
120
-
121
-
122
-
123
-
124
-
125
-
126
-
127
-
128
-
129
-
130
-
131
-
132
-
133
-
134
-
135
-
136
-
137
-
138
-
139
-
140
-
141
-
142
-
143
-
144
-
145
-
146
-
147
-
148
-
149
-
150
-
151
-
152
-
153
-
154
-
155
-
156
-
157
-
158
-
159
-
160
-
161
-
162
-
163
-
164
-
165
-
166
-
167
-
168
-
169
-
170
-
171
-
172
-
173
-
174
-
175
-
176
-
177
-
178
-
179
-
180
-
181
-
182
-
183
-
184
-
185
-
186
-
187
-
188
-
189
-
190
-
191
-
192
-
193
-
194
-
195
-
196
-
197
-
198
-
199
-
200
-
201
-
202
-
203
-
204
-
205
-
206
-
207
-
208
-
209
-
210
-
211
-
212
-
213
-
214
-
215
-
216
-
217
-
218
-
219
-
220
-
221
-
222
-
223
-
224
-
225
-
226
-
227
-
228
 |
 |