HP 5550dn HP Color LaserJet 5550 series - User Guide - Page 123
Mopier mode, Deleting a private job - formatter
 |
UPC - 829160126913
View all HP 5550dn manuals
Add to My Manuals
Save this manual to your list of manuals |
Page 123 highlights
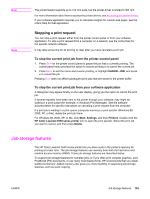
13. Press to print the job. Deleting a private job A private job can be deleted from the printer control panel. You can delete a job without printing it, or IT WILL BE AUTOMATICALLY DELETED after it is printed. 1. Press MENU to enter MENUS. RETRIEVE JOB is highlighted. 2. Press to select RETRIEVE JOB. 3. Press to highlight your USER NAME. 4. Press to select your USER NAME. 5. Press to highlight a JOB NAME. 6. Press to select the JOB NAME. 7. Press to highlight DELETE. 8. Press to select DELETE. 9. Press or to select the first digit of the PIN. 10. Press to select the digit. The number changes to an asterisk. 11. Repeat steps 9 and 10 for the remaining three digits of the PIN. 12. Press when finished entering PIN. 13. Press to delete the job. Mopier mode When Mopier Mode is enabled in the driver, the printer produces multiple, collated copies from a single print job. Multiple-original printing (mopying) increases printer performance and reduces network traffic by sending the job to the printer once, then storing it in the printer's RAM. The remainder of the copies are printed at the printer's fastest speed. All documents can be created, controlled, managed, and finished from the desktop, which eliminates the extra step of using a photocopier. The HP Color LaserJet 5550 series printers support the mopying feature, provided they have enough total memory (at least 192 MB of total memory: 160 MB DDR plus 32 MB on the formatter board), and the mopying feature is enabled by default if the Mopier Mode setting is Enabled in the Device Settings tab. ENWW Job storage features 109
-
 1
1 -
2
-
3
-
4
-
5
-
6
-
7
-
8
-
9
-
10
-
11
-
12
-
13
-
14
-
15
-
16
-
17
-
18
-
19
-
20
-
21
-
22
-
23
-
24
-
25
-
26
-
27
-
28
-
29
-
30
-
31
-
32
-
33
-
34
-
35
-
36
-
37
-
38
-
39
-
40
-
41
-
42
-
43
-
44
-
45
-
46
-
47
-
48
-
49
-
50
-
51
-
52
-
53
-
54
-
55
-
56
-
57
-
58
-
59
-
60
-
61
-
62
-
63
-
64
-
65
-
66
-
67
-
68
-
69
-
70
-
71
-
72
-
73
-
74
-
75
-
76
-
77
-
78
-
79
-
80
-
81
-
82
-
83
-
84
-
85
-
86
-
87
-
88
-
89
-
90
-
91
-
92
-
93
-
94
-
95
-
96
-
97
-
98
-
99
-
100
-
101
-
102
-
103
-
104
-
105
-
106
-
107
-
108
-
109
-
110
-
111
-
112
-
113
-
114
-
115
-
116
-
117
-
 118
118 -
 119
119 -
 120
120 -
 121
121 -
 122
122 -
 123
123 -
 124
124 -
 125
125 -
 126
126 -
 127
127 -
 128
128 -
129
-
130
-
131
-
132
-
133
-
134
-
135
-
136
-
137
-
138
-
139
-
140
-
141
-
142
-
143
-
144
-
145
-
146
-
147
-
148
-
149
-
150
-
151
-
152
-
153
-
154
-
155
-
156
-
157
-
158
-
159
-
160
-
161
-
162
-
163
-
164
-
165
-
166
-
167
-
168
-
169
-
170
-
171
-
172
-
173
-
174
-
175
-
176
-
177
-
178
-
179
-
180
-
181
-
182
-
183
-
184
-
185
-
186
-
187
-
188
-
189
-
190
-
191
-
192
-
193
-
194
-
195
-
196
-
197
-
198
-
199
-
200
-
201
-
202
-
203
-
204
-
205
-
206
-
207
-
208
-
209
-
210
-
211
-
212
-
213
-
214
-
215
-
216
-
217
-
218
-
219
-
220
-
221
-
222
-
223
-
224
-
225
-
226
-
227
-
228
-
229
-
230
-
231
-
232
-
233
-
234
-
235
-
236
-
237
-
238
-
239
-
240
-
241
-
242
-
243
-
244
-
245
-
246
-
247
-
248
-
249
-
250
-
251
-
252
-
253
-
254
-
255
-
256
-
257
-
258
-
259
-
260
-
261
-
262
-
263
-
264
-
265
-
266
-
267
-
268
-
269
-
270
-
271
-
272
-
273
-
274
-
275
-
276
-
277
-
278
-
279
-
280
-
281
-
282
-
283
-
284
-
285
-
286
-
287
-
288
-
289
-
290
-
291
-
292
-
293
-
294
 |
 |