HP 5550dn HP Color LaserJet 5550 series - User Guide - Page 77
Configuring TCP/IP parameters, To manually con TCP/IP parameters from the printer control panel
 |
UPC - 829160126913
View all HP 5550dn manuals
Add to My Manuals
Save this manual to your list of manuals |
Page 77 highlights
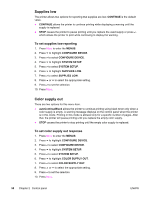
ENWW Configuring TCP/IP parameters You can use the printer control panel to configure the following TCP/IP parameters: ● usage of the BOOTP file for configuration parameters (the default is to use the BOOTP file) ● IP address (4 bytes) ● subnet mask (4 bytes) ● default gateway (4 bytes) ● idle TCP/IP connection timeout (in seconds) To automatically configure TCP/IP parameters from the printer control panel 1. Press MENU to enter the MENUS. 2. Press to highlight CONFIGURE DEVICE. 3. Press to select CONFIGURE DEVICE. 4. Press to highlight I/O. 5. Press to select I/O. 6. Press to highlight EIO X (where X = 1, 2, or 3). 7. Press to select EIO X. 8. Press to highlight TCP/IP. 9. Press to select TCP/IP. 10. Press to select CONFIG METHOD. 11. Press to highlight AUTO IP. 12. Press to select AUTO IP. 13. Press the MENU button to return to the Ready state. To manually configure TCP/IP parameters from the printer control panel Use manual configuration to set an IP address, subnet mask, and local and default gateway. Setting an IP address 1. Press MENU to enter the MENUS. 2. Press to highlight CONFIGURE DEVICE. 3. Press to select CONFIGURE DEVICE. 4. Press to highlight I/O. 5. Press to select I/O. 6. Press to select EIO X. 7. Press to highlight TCP/IP. 8. Press to select TCP/IP. 9. Press to highlight MANUAL SETTINGS. Network configuration 63
-
 1
1 -
2
-
3
-
4
-
5
-
6
-
7
-
8
-
9
-
10
-
11
-
12
-
13
-
14
-
15
-
16
-
17
-
18
-
19
-
20
-
21
-
22
-
23
-
24
-
25
-
26
-
27
-
28
-
29
-
30
-
31
-
32
-
33
-
34
-
35
-
36
-
37
-
38
-
39
-
40
-
41
-
42
-
43
-
44
-
45
-
46
-
47
-
48
-
49
-
50
-
51
-
52
-
53
-
54
-
55
-
56
-
57
-
58
-
59
-
60
-
61
-
62
-
63
-
64
-
65
-
66
-
67
-
68
-
69
-
70
-
71
-
 72
72 -
 73
73 -
 74
74 -
 75
75 -
 76
76 -
 77
77 -
 78
78 -
 79
79 -
 80
80 -
 81
81 -
 82
82 -
83
-
84
-
85
-
86
-
87
-
88
-
89
-
90
-
91
-
92
-
93
-
94
-
95
-
96
-
97
-
98
-
99
-
100
-
101
-
102
-
103
-
104
-
105
-
106
-
107
-
108
-
109
-
110
-
111
-
112
-
113
-
114
-
115
-
116
-
117
-
118
-
119
-
120
-
121
-
122
-
123
-
124
-
125
-
126
-
127
-
128
-
129
-
130
-
131
-
132
-
133
-
134
-
135
-
136
-
137
-
138
-
139
-
140
-
141
-
142
-
143
-
144
-
145
-
146
-
147
-
148
-
149
-
150
-
151
-
152
-
153
-
154
-
155
-
156
-
157
-
158
-
159
-
160
-
161
-
162
-
163
-
164
-
165
-
166
-
167
-
168
-
169
-
170
-
171
-
172
-
173
-
174
-
175
-
176
-
177
-
178
-
179
-
180
-
181
-
182
-
183
-
184
-
185
-
186
-
187
-
188
-
189
-
190
-
191
-
192
-
193
-
194
-
195
-
196
-
197
-
198
-
199
-
200
-
201
-
202
-
203
-
204
-
205
-
206
-
207
-
208
-
209
-
210
-
211
-
212
-
213
-
214
-
215
-
216
-
217
-
218
-
219
-
220
-
221
-
222
-
223
-
224
-
225
-
226
-
227
-
228
-
229
-
230
-
231
-
232
-
233
-
234
-
235
-
236
-
237
-
238
-
239
-
240
-
241
-
242
-
243
-
244
-
245
-
246
-
247
-
248
-
249
-
250
-
251
-
252
-
253
-
254
-
255
-
256
-
257
-
258
-
259
-
260
-
261
-
262
-
263
-
264
-
265
-
266
-
267
-
268
-
269
-
270
-
271
-
272
-
273
-
274
-
275
-
276
-
277
-
278
-
279
-
280
-
281
-
282
-
283
-
284
-
285
-
286
-
287
-
288
-
289
-
290
-
291
-
292
-
293
-
294
 |
 |