HP Designjet 4000 Service Manual
HP Designjet 4000 Manual
 |
View all HP Designjet 4000 manuals
Add to My Manuals
Save this manual to your list of manuals |
HP Designjet 4000 manual content summary:
- HP Designjet 4000 | Service Manual - Page 1
- HP Designjet 4000 | Service Manual - Page 2
errors contained herein or for incidental or consequential damages in connection with the furnishing, performance, or use of this material. WARNING The procedures described in this manual are to be performed by HP-qualified service result in damage to or destruction of part or all of the product. Do - HP Designjet 4000 | Service Manual - Page 3
- HP Designjet 4000 | Service Manual - Page 4
4000 printer (Model Q1273A) „ hp designjet 4000ps printer (Model Q1274A) For information about using these printers, refer to the corresponding User and Quick Reference Guides. Readership The procedures described in this Service Manual are to be performed by HP Certified service personnel only. Part - HP Designjet 4000 | Service Manual - Page 5
of Contents 1 Troubleshooting 1-1 System Error Codes 2-1 Ink Supplies Troubleshooting 3-1 Service Tests and Utilities 4-1 Service Calibrations 5-1 Print Quality 6-1 Parts and Diagrams 7-1 Removal and Installation 8-1 Preventive Maintenance 9-1 hp designjet 4000 series printers service manual 3 - HP Designjet 4000 | Service Manual - Page 6
Table of Contents 4 hp designjet 4000 series printers service manual - HP Designjet 4000 | Service Manual - Page 7
Problems 1-8 Using the Buzzer at Power-up to Troubleshoot 1-9 Using the Power-up Sequence to Troubleshoot 1-10 Using the Power Switch LEDs to Troubleshoot 1-13 Using the PCA LEDs to Troubleshoot 1-14 How to Interpret the Service Information Pages 1-17 hp designjet 4000 series printer service manual - HP Designjet 4000 | Service Manual - Page 8
, just to make sure that is the component/assembly that has failed. If the test on that component/assembly passes, you should NOT replace it. For information on the Service Tests and how to use them see Chapter 4 Service Tests and Utilities. 1-2 hp designjet 4000 series printer service manual - HP Designjet 4000 | Service Manual - Page 9
Printheads) then perform the Electronic Systems Test ⇒ Page 4-17. Cover Sensors are not Working 1 Perform the Sensors Test ⇒ Page 4-28. 2 Check if the cable for the faulty sensor is not damaged and is connected correctly. 3 Replace the faulty Sensor. hp designjet 4000 series printer service manual - HP Designjet 4000 | Service Manual - Page 10
is specially formulated to avoid cockle, one of the primary causes of head crashes). If the media is not HP approved, advise the customer to use HP media and check to see if the problem is now solved. 3 Check that the Vacuum Fan works correctly. 1-4 hp designjet 4000 series printer service manual - HP Designjet 4000 | Service Manual - Page 11
obstacles restricting the movement of the Carriage Assembly. Try and move the Carriage Assembly manually, checking for smooth and free movement. 2 Check that the Encoder Strip is clean. If necessary, clean Encoder Strip using a damp cloth. hp designjet 4000 series printer service manual 1-5 - HP Designjet 4000 | Service Manual - Page 12
the media. To solve the problem, try the following: „ Check in the Front Panel if Ink Limiting is ON or OFF. If Ink Limiting is OFF, turn it ON. „ Never use HP Coated Media for High Density prints. As a substitute use HP Heavy Coated Media. 1-6 hp designjet 4000 series printer service manual - HP Designjet 4000 | Service Manual - Page 13
if the level of Humidity is very low (below 30%). Increasing humidity may help in reducing the severity of the problem. The media is causing the problem and NOT the Printer. Do not attempt to try and replace Printer parts to solve this problem. hp designjet 4000 series printer service manual 1-7 - HP Designjet 4000 | Service Manual - Page 14
purchased sheet media should be used in the Printer. „ If the overdrive is covered in dust, it will have problems picking up the sheet media during the load process. Clean the Overdrive using the Turn Drive Roller Service Utility ⇒ Page 4-53. 1-8 hp designjet 4000 series printer service manual - HP Designjet 4000 | Service Manual - Page 15
is not spinning, then it could be damaged. In this case, replace the HDD ⇒ Page 8-76. „ Make sure that ALL cables connected to the HDD are not damaged and are connected correctly. „ Replace the HDD ⇒ Page 8-76 „ Replace the Main PCA ⇒ Page 8-74 hp designjet 4000 series printer service manual 1-9 - HP Designjet 4000 | Service Manual - Page 16
Troubleshoot When the Printer is powered up, it performs the Boot-UP sequence which initializes the major components of the Printer. If for some reason the BootUp sequence fails because a components has failed if fsck was run on root 19 Setup pnp hp designjet 4000 series printer service manual - HP Designjet 4000 | Service Manual - Page 17
Troubleshooting Step 18 17 16 15 14 13 12 11 10 /etc, (w/u)tmpx files, /var. „ Reset pam_console permissions. „ Cleanup utmp/wtmp. „ the Serial Ports. „ If a SCSI tape has been detected, load the st module unconditionally. „ Load usb storage to hp designjet 4000 series printer service manual 1-11 - HP Designjet 4000 | Service Manual - Page 18
: „ Switch the Power OFF from the back of the Printer and disconnect the Power cord. Reconnect the power cord and power On the Printer. „ If the Printer continues to stop during the power-up process, replace the Hard Disk Drive ⇒ Page 8-76. 1-12 hp designjet 4000 series printer service manual - HP Designjet 4000 | Service Manual - Page 19
Red (Front Panel Black) Green (flashing) Green Green Any Red (Front Panel Black) Printer Status Standby (with Embedded Web Server up and running) Initializing Ready (but not printing) Printing or preparing to print Not possible Not possible hp designjet 4000 series printer service manual 1-13 - HP Designjet 4000 | Service Manual - Page 20
troubleshoot the Printer. The LEDs can either be ON or Off and using different combinations can indicate different problems Power Supply Unit. 5V - Comes from the Power Supply Unit. ERIDANI - Specific power line from PSU which powers ERIDANI chip after hp designjet 4000 series printer service manual - HP Designjet 4000 | Service Manual - Page 21
PCA. „ If connection OK, replace the Interconnect PCA ⇒ Page 8-64. „ Check the connection between the Front Panel and the Interconnect PCA. „ If connection OK, replace the Interconnect PCA ⇒ Page 8-84 and the Front Panel ⇒ Page 8-20. hp designjet 4000 series printer service manual 1-15 - HP Designjet 4000 | Service Manual - Page 22
If connection OK, replace the Interconnect PCA ⇒ Page 8-64. „ Check the System Error that is produced and run the corresponding Diagnostic Test (either Scan-Axis or Media to further diagnose the problem. „ Replace the PrintMech PCA ⇒ Page 8-84. 1-16 hp designjet 4000 series printer service manual - HP Designjet 4000 | Service Manual - Page 23
using the Embedded Web Server (File ⇒ Send ⇒ Page by E-mail). „ You can see the same information through the Front Panel or the Embedded Web Server. hp designjet 4000 series printer service manual 1-17 - HP Designjet 4000 | Service Manual - Page 24
(at the top of the Ink Cartridges). „ Active Paper Path: Whether Roll or Cut Sheet is currently loaded. „ Remaining Media Length: Currently this will show "not available" all the time since the media length tracking function in not available. 1-18 hp designjet 4000 series printer service manual - HP Designjet 4000 | Service Manual - Page 25
Nozzles Out < 5 > or = 5 and < 10 > or = 10 and < 20 > or = 20 and < 30 > or = 30 and < 50 > or = 50 and < 70 > or = 70 and < 100 > or = 100 and < 150 > or = 150 and < 200 > or = 200 and < 400 > or = 400 Printhead Health 10 9 8 7 6 5 4 3 2 1 0 hp designjet 4000 series printer service manual 1-19 - HP Designjet 4000 | Service Manual - Page 26
. Printer Usage Information This page contains the following information: „ Printer Usage. „ Usage per Printhead Slot. „ Usage per Cartridge Slot. „ Media Usage per Media Type. „ Component Usage. „ Spittoon Usage. „ Preventive Maintenance Usage. 1-20 hp designjet 4000 series printer service manual - HP Designjet 4000 | Service Manual - Page 27
as we only have one size of Black Ink Cartridge (400cc). Preventive Maintenance Section Once the value reaches 100%, the corresponding Preventive Maintenance Kit should be used. For further details, refer to Chapter 9 - Preventive Maintenance. hp designjet 4000 series printer service manual 1-21 - HP Designjet 4000 | Service Manual - Page 28
used no longer uses third-party ink. Spittoon Section This section contains information on the different Spittoons located in the Printer. Black Cleaner Spittoon #2 Black Cleaner Spittoon #1 1-22 Spittoon #1 Spittoon #2 Spittoon #3 Spittoon #4 hp designjet 4000 series printer service manual - HP Designjet 4000 | Service Manual - Page 29
„ Error Code: Specific error code generated by the Printer when the Printhead has been replaced. „ Max Recovery: - 0: No manual Printhead recovery has been performed on the Printhead. - 1 or higher: At least one Printhead recovery has been performed. hp designjet 4000 series printer service manual - HP Designjet 4000 | Service Manual - Page 30
the Printer does not know that there is a new part installed. Media Specific Calibrations This section shows the following for each type of media: „ Color Calibration. „ Paper Advance per media type and 'optimized for' Text/drawing and Graphics. 1-24 hp designjet 4000 series printer service manual - HP Designjet 4000 | Service Manual - Page 31
2 System Error Codes 21 Introduction 2-2 Continuable and Non-Continuable Error Codes 2-2 System Error Codes and Warnings - Explanation 2-25 hp designjet 4000 series printer service manual 2-1 - HP Designjet 4000 | Service Manual - Page 32
Error Code reappears, then the Printer requires an on-site visit in order to resolve the problem. Even though the customer can continue working with a Continuable Error Code, an on-site visit should still be planned to troubleshoot the problem. 2-2 hp designjet 4000 series printer service manual - HP Designjet 4000 | Service Manual - Page 33
System Error continues, replace the Gamut PCI PCA ⇒ Page 8-69. Only replace one component at a time and check if the error has gone before replacing another component. Using this procedure you will be able to determine exactly which component failed. hp designjet 4000 series printer service manual - HP Designjet 4000 | Service Manual - Page 34
Error continues, replace the Gamut PCI PCA ⇒ Page 8-69. Only replace one component at a time and check if the error has gone before replacing another component. Using this procedure you will be able to determine exactly which component failed. 2-4 hp designjet 4000 series printer service manual - HP Designjet 4000 | Service Manual - Page 35
Corrective Action: Try the following: „ Switch the Power OFF from the back of the Printer and disconnect the Power cord. Reconnect the power cord and power On the Printer. „ If the System Error continues, replace the Hard Disk Drive ⇒ Page 8-76. hp designjet 4000 series printer service manual 2-5 - HP Designjet 4000 | Service Manual - Page 36
version. „ Replace the Main PCA ⇒ Page 8-74. „ Replace the Hard Disk Drive ⇒ Page 8-76. „ Replace the Memory Module ⇒ Page 8-72. „ Replace the Interconnect PCA ⇒ Page 8-64. „ If the System Error continues, replace the Front Panel ⇒ Page 8-20. 2-6 hp designjet 4000 series printer service manual - HP Designjet 4000 | Service Manual - Page 37
⇒ Page 8-84. „ Replace the Interconnect PCA ⇒ Page 8-64. Only replace one component at a time and check if the error has gone before replacing another component. Using this procedure you will be able to determine exactly which component failed. hp designjet 4000 series printer service manual 2-7 - HP Designjet 4000 | Service Manual - Page 38
Error continues, replace the Gamut PCI PCA ⇒ Page 8-69. Only replace one component at a time and check if the error has gone before replacing another component. Using this procedure you will be able to determine exactly which component failed. 2-8 hp designjet 4000 series printer service manual - HP Designjet 4000 | Service Manual - Page 39
to Cartridge cable (Magenta Ink Cartridge) is not damaged and is correctly connected to the Ink Supply Tubes PCA. „ Replace the ISS to Cartridge cable (Magenta Ink Cartridge) ⇒ Page 8-38. „ Replace the Ink Supply Tubes and Trailing Cable ⇒ Page 8-33. hp designjet 4000 series printer service manual - HP Designjet 4000 | Service Manual - Page 40
Try the following: „ Remove the Ink Cartridges and check that they are the correct ones for this Printer. „ Check that the Printer has the latest Firmware version. If not, update the Firmware to the latest version. „ Replace the Ink Cartridges. 2-10 hp designjet 4000 series printer service manual - HP Designjet 4000 | Service Manual - Page 41
Printhead Cleaner Access Door and check that the Yellow Printhead Cleaner is correctly seated in slot 2 of the Service Station and then close the Printhead Cleaner Access Door. „ Replace the Yellow Printhead Cleaner in slot 2 of the Service Station. hp designjet 4000 series printer service manual - HP Designjet 4000 | Service Manual - Page 42
Cleaner Access Door and check that the Black Printhead Cleaner is correctly seated in slot 6 of the Service Station and then close the Printhead Cleaner Access Door. „ Replace the Black Printhead Cleaner in slot 6 of the Service Station. 2-12 hp designjet 4000 series printer service manual - HP Designjet 4000 | Service Manual - Page 43
and power On the Printer. „ Check that the Media-Axis Motor cable is not damaged and is correctly connected to the PrintMech PCA. „ Replace the Media-Axis Motor ⇒ Page 8-62. „ If the System Error continues, replace the PrintMech PCA ⇒ Page 8-84. hp designjet 4000 series printer service manual 2-13 - HP Designjet 4000 | Service Manual - Page 44
PCA. „ Also check that the cables between the Interconnect PCA and the PrintMech PCA are not damaged and are correctly connected. „ Replace the Vacuum Fan ⇒ Page 8-27. „ If the System Error continues, replace the PrintMech PCA ⇒ Page 8-84. 2-14 hp designjet 4000 series printer service manual - HP Designjet 4000 | Service Manual - Page 45
.1:10 Problem Description: PHC Access Door Sensor failure. Corrective Action: Try the following: „ Check that the PHC Access Door Sensor cable is not damaged and is correctly connected to the Interconnect PCA. „ Replace the PHC Access Door Sensor. hp designjet 4000 series printer service manual - HP Designjet 4000 | Service Manual - Page 46
: „ Switch the Power OFF from the back of the Printer and disconnect the Power cord. Reconnect the power cord and power On the Printer. „ Replace the Line Sensor ⇒ Page 8-31. „ If the System Error continues, replace the Carriage PCA ⇒ Page 8-48. 2-16 hp designjet 4000 series printer service manual - HP Designjet 4000 | Service Manual - Page 47
the Firmware to the latest version. System Error: 61:04.1 Problem Description: The Postscript fonts are missing. Upgrading the Firmware will re-install the fonts. Corrective Action: Perform a full firmware upgrade that includes package 'B'. hp designjet 4000 series printer service manual 2-17 - HP Designjet 4000 | Service Manual - Page 48
file cannot be printed on the paper type currently loaded. Corrective Action: Try the following: „ Resend the file to be printed on the current paper type. „ Change the paper type to the type that was loaded when the file was originally sent. 2-18 hp designjet 4000 series printer service manual - HP Designjet 4000 | Service Manual - Page 49
and the Ink Supply Tubes and Trailing Cable at the same time. If both parts need to replaced, you MUST first replace one part and then power ON the Printer until it completely initializes. Then you can power OFF the Printer and replace the other part. hp designjet 4000 series printer service manual - HP Designjet 4000 | Service Manual - Page 50
„ Perform the "Scan-Axis" Diagnostic (⇒ Page 4-7) to further troubleshoot the error code. „ If the System Error continues, perform the "Media Drive" Diagnostic (⇒ Page 4-12) to further troubleshoot the error code. System Error: 74:00 Problem Description: Failed getting Part Number/Serial Number - HP Designjet 4000 | Service Manual - Page 51
: „ Switch the Power OFF from the back of the Printer and disconnect the Power cord. Reconnect the power cord and power On the Printer. „ Check that the Printer has the latest Firmware version. If not, update the Firmware to the latest version. hp designjet 4000 series printer service manual 2-21 - HP Designjet 4000 | Service Manual - Page 52
path, lift the Pinchwheels (using the Media Lever) and clear the obstruction. „ Perform the "Media Drive" Diagnostic (⇒ Page 4-12) to further troubleshoot the error code. „ If the System Error continues, replace the Media-Axis Motor ⇒ Page 8-62. 2-22 hp designjet 4000 series printer service manual - HP Designjet 4000 | Service Manual - Page 53
, replace the Scan-Axis Motor ⇒ Page 8-59. System Error: 86:03 Problem Description: Scan-Axis length test failure. Corrective Action: Try the following: „ Perform the "Scan-Axis" Diagnostic (⇒ Page 4-7) to further troubleshoot the error code. hp designjet 4000 series printer service manual - HP Designjet 4000 | Service Manual - Page 54
Action: In this case, it is possible that the Printer is damaging the Printhead. If, after replacing the Printhead a third time, it is found to be defective again, you may need to troubleshoot the Carriage Flex Cables or the Carriage PCA. 2-24 hp designjet 4000 series printer service manual - HP Designjet 4000 | Service Manual - Page 55
the action (1 digit) - (User or Service Engineer). „ Z: Action to perform (1 digit). „ m: additional actions/information to consider (1 digit) - Optional. - e.g. Non-authorized ink was detected, PM was triggered or Printhead in/out of Warranty. hp designjet 4000 series printer service manual 2-25 - HP Designjet 4000 | Service Manual - Page 56
(color n) Setup Printhead (color n) Printhead Cleaner (color n) Cutter Take-up Reel Sheet Feeder Dryer/Blower Cleanout Assembly Duplexer ARSS/Rollfeed Output Tray Paper Loading Failure Paper-Axis Motor Scan-Axis Motor Vacuum Fan Aerosol Fan 2-26 hp designjet 4000 series printer service manual - HP Designjet 4000 | Service Manual - Page 57
WebAccess Application Assertion (Uncontrollable Firmware Error) Warning (Uncontrollable Recoverable Firmware Error) Media Advance Media Cut Single-Sheet Feeding Roll Feeding Media-Axis Encoder Reading Carriage Movement Scan-Axis Encoder Reading hp designjet 4000 series printer service manual 2-27 - HP Designjet 4000 | Service Manual - Page 58
Color Calibration Printhead Alignment Image Quality Troubleshooting Paper Advance Calibration Automatic Backup Printmode Enabled The following table explains the YZ part of the System Error Code or Warning: Code 00 01 02 03 04 05 06 07 08 09 10 11 12 13 14 15 16 17 18 19 Recovery Action Replace - HP Designjet 4000 | Service Manual - Page 59
Printhead Status Messages While Printing 3-10 Printhead Status Messages While Replacing 3-10 Printhead Cleaner Status Messages While Printing 3-11 Printhead Cleaner Status Messages While Replacing 3-11 Summary of Solving Ink Supplies Problems 3-12 Troubleshooting Printhead Error Codes 3-13 Carriage - HP Designjet 4000 | Service Manual - Page 60
- HP Designjet 4000 | Service Manual - Page 61
- HP Designjet 4000 | Service Manual - Page 62
- HP Designjet 4000 | Service Manual - Page 63
- HP Designjet 4000 | Service Manual - Page 64
- HP Designjet 4000 | Service Manual - Page 65
- HP Designjet 4000 | Service Manual - Page 66
- HP Designjet 4000 | Service Manual - Page 67
⇒ - HP Designjet 4000 | Service Manual - Page 68
⇒ ⇒ ⇒ . ⇒ . - HP Designjet 4000 | Service Manual - Page 69
- HP Designjet 4000 | Service Manual - Page 70
⇒ - HP Designjet 4000 | Service Manual - Page 71
- HP Designjet 4000 | Service Manual - Page 72
- HP Designjet 4000 | Service Manual - Page 73
- HP Designjet 4000 | Service Manual - Page 74
- HP Designjet 4000 | Service Manual - Page 75
4-51 Entering the Service Utilities Menu 4-52 1. Turn Drive Roller 4-54 2. Prime Tubes 4-56 3. Set SN 4-60 4. Reset Life Counters 4-61 5. Diagnostic Print 4-63 6. Sleep Mode 4-64 7. Replace Cutter 4-65 8. Set RTC Clock 4-66 9. Carriage Setup 4-67 hp designjet 4000 series printer service manual 4-1 - HP Designjet 4000 | Service Manual - Page 76
initialization sequences. If any of the parts fail, a system error will appear and you should consult Chapter 2 - System Error Codes. Phone Support In certain circumstances, a Call Agent can try and troubleshoot the Printer by requesting the Customer to perform a Service Test via the phone. Using - HP Designjet 4000 | Service Manual - Page 77
the Aerosol Fan. 8 Air Pump System Test ⇒ Page 4-34 The purpose of this test is to verify the operation of the Air Pressurization System (APS). 9 Vacuum Fan Test ⇒ Page 4-35 The purpose of this test is to verify the operation of the Vacuum Fans. hp designjet 4000 series printer service manual 4-3 - HP Designjet 4000 | Service Manual - Page 78
utility is to set the Serial Number and Part Number in case both the Hard Disk Drive and the Ink Supply Tubes are replaced at the same time. 14 I/O Tests ⇒ Page 4-49 The purpose of this test is to check the installed and active I/O Interfaces. 4-4 hp designjet 4000 series printer service manual - HP Designjet 4000 | Service Manual - Page 79
the Up arrow key and the Cancel key down and switch the printer ON using the front power switch. Wait until you hear one beep (usually after 5 seconds) before releasing ALL 3 keys. ON-SITE REPAIR Switch Printer ON Hold UP key Hold Cancel key hp designjet 4000 series printer service manual 4-5 - HP Designjet 4000 | Service Manual - Page 80
press of a button may not be recognized by the Printer. When pressing a button, be sure to press it deliberately and all the way to the bottom of its travel. If the Printer hangs up during a test, switch the Printer OFF and restart from step 1. 4-6 hp designjet 4000 series printer service manual - HP Designjet 4000 | Service Manual - Page 81
„ Checking voltage. If there is a failure at this point, the Front Panel will display System Error Code 03:10. For more information on troubleshooting this error code, refer to Page 2-5. Check also System Error Code 01.0:10 (refer to Page 2-3). hp designjet 4000 series printer service manual 4-7 - HP Designjet 4000 | Service Manual - Page 82
point, the Front Panel will display System Error Code 02.1:10. For more information on troubleshooting this error code, refer to Page 2-4. Check also System Error Code 11:10 (refer to Page 2-7) or System Error Code 01.1:10 (refer to Page 2-3). 4-8 hp designjet 4000 series printer service manual - HP Designjet 4000 | Service Manual - Page 83
Panel will display System Error Code 01.0:10. For more information on troubleshooting this error code, refer to Page 2-3. If the Carriage only moves in one direction, troubleshoot the problem as System Error Code 01.1:10 (refer to Page 2-3). hp designjet 4000 series printer service manual 4-9 - HP Designjet 4000 | Service Manual - Page 84
Code 86:10. For more information on troubleshooting this error code, refer to Page 2-24. 11 The Printer checks the complete length of the Scan-Axis and displays the result on the Front Panel. The length has to be between 1158629 and 1164616. 4-10 hp designjet 4000 series printer service manual - HP Designjet 4000 | Service Manual - Page 85
is installed correctly. If there is a failure processing the PWM results, the Front Panel will display System Error Code 86:11. In this case try repeating the test again. 14 Once the test is completed, OK will be displayed on the Front Panel. hp designjet 4000 series printer service manual 4-11 - HP Designjet 4000 | Service Manual - Page 86
2-3. „ Checking voltage. If there is a failure at this point, the Front Panel will display System Error Code 03:10. For more information on troubleshooting this error code, refer to Page 2-5. Check also System Error Code 01.0:10 (refer to Page 2-3). hp designjet 4000 series printer service manual - HP Designjet 4000 | Service Manual - Page 87
on troubleshooting this error code, refer to Page 2-3. 5 Before continuing, the following message will appear on the Front Panel. Remove the media if it is still loaded and make sure you stay out of the Print Platen area if the Window is open. hp designjet 4000 series printer service manual 4-13 - HP Designjet 4000 | Service Manual - Page 88
not move, the Front Panel will display System Error Code 41:10. For more information on troubleshooting this error code, refer to Page 2-13. d A "FAIL" message will be displayed on the Front Panel and the test will be terminated at this point. 4-14 hp designjet 4000 series printer service manual - HP Designjet 4000 | Service Manual - Page 89
will display System Error Code 56:10. For more information on troubleshooting this error code, refer to Page 2-17. 9 The Printer will now check the Media Drive PWM. You must load media in to the Printer and press any key to continue the test. hp designjet 4000 series printer service manual 4-15 - HP Designjet 4000 | Service Manual - Page 90
Service Tests and Utilities 10 When the PWM check is being performed, the following message will be displayed on the Front Panel: „ PWM test with paper. 11 Once the PWM check is done, the completed, OK will be displayed on the Front Panel. 4-16 hp designjet 4000 series printer service manual - HP Designjet 4000 | Service Manual - Page 91
test and goes to the next one: Press Enter to confirm selection Use UP and DOWN keys to select 3 If you select Yes, the printer will get the CPU information and display the information on the Front Panel. Press any key to continue the test: hp designjet 4000 series printer service manual 4-17 - HP Designjet 4000 | Service Manual - Page 92
Panel. Press any key to continue the test: If the CPU Fan Speed is less than 2500, the Front Panel will display System Error Code 05.1:10. For more information on troubleshooting this error code, refer to Page 2-5. 6 The printer will now calculate the amount of memory installed and display the - HP Designjet 4000 | Service Manual - Page 93
according to the part number, the Front Panel will display a fail message. In this case, re-enter in to the Service Tests submenu and use the diagnostic "12. Set Unit Configuration" to set the correct configuration (refer to Page 4-46). hp designjet 4000 series printer service manual 4-19 - HP Designjet 4000 | Service Manual - Page 94
Front Panel: „ Starting Gamut. „ Starting Tests GPIO. „ Set GPIO psu_lpm. If there is a failure at this point, the Front Panel will display System Error Code 01.0:10. For more information on troubleshooting this error code, refer to Page 2-3. 4-20 hp designjet 4000 series printer service manual - HP Designjet 4000 | Service Manual - Page 95
this error code, refer to Page 2-3. „ Checking PCA rev. The value for the PCA revision must be more than 0.625V, if not the Front Panel will display System Error Code 01.1:10. For more information on troubleshooting this error code, refer to Page 2-3. hp designjet 4000 series printer service manual - HP Designjet 4000 | Service Manual - Page 96
Service Tests and Utilities „ Clear GPIO psu_lpm. If there is a failure at this point, the Front Panel will display System Error Code 01.0:10. For more information on troubleshooting this error code, refer to Page 2-3. „ Disable Vacuum Fans. „ Checking Vacuum Fans. „ Enable Vacuum Fans. „ Checking - HP Designjet 4000 | Service Manual - Page 97
on troubleshooting this error code, refer to Page 2-3. If any of the read values do not match the expected default, the Front Panel will display System Error Code 07:10. For more information on troubleshooting this error code, refer to Page 2-6. hp designjet 4000 series printer service manual 4-23 - HP Designjet 4000 | Service Manual - Page 98
Panel will display System Error Code 02.1:10. For more information on troubleshooting this error code, refer to Page 2-4. Check also System Error Code 11:10 (refer to Page 2-7) or System Error Code 01.0:10 (refer to Page 2-3). „ Checking Carriage rev. hp designjet 4000 series printer service manual - HP Designjet 4000 | Service Manual - Page 99
and the following messages will be displayed on the Front Panel: „ Starting ISS Ink Sup. If there is a failure at this point, the Front Panel will display System Error Code 13.n:10. For more information on troubleshooting this error code, refer hp designjet 4000 series printer service manual 4-25 - HP Designjet 4000 | Service Manual - Page 100
display System Error Code 26.n:10. For more information on troubleshooting this error code, refer to Page 2-10. Check also System Error Code 13.n:10 (refer to Page 2-7). 26 Once the test is completed, OK will be displayed on the Front Panel. 4-26 hp designjet 4000 series printer service manual - HP Designjet 4000 | Service Manual - Page 101
TEST PASSES, DO NOT REPLACE THE CARRIAGE ASSEMBLY. Perform the Carriage Assembly test as follows: 1 In the Service Tests submenu, scroll to "4. Carriage Assembly Test" and press Enter. Press Enter 2 This test has not yet been implemented. hp designjet 4000 series printer service manual 4-27 - HP Designjet 4000 | Service Manual - Page 102
point, the Front Panel will display System Error Code 01.0:10. For more information on troubleshooting this error code, refer to Page 2-3. 4 Before starting to test the sensors, the following message will be displayed. Press any key to continue: 4-28 hp designjet 4000 series printer service manual - HP Designjet 4000 | Service Manual - Page 103
continue. If the PHC Access Door Sensor fails the test, the Front Panel will display System Error Code 51.1:10. For more information on troubleshooting this error code, refer to Page 2-15. Check also System Error Code 07:10 (refer to Page 2-6). hp designjet 4000 series printer service manual 4-29 - HP Designjet 4000 | Service Manual - Page 104
key to continue. 4-30 If the Media Lever Sensor fails the test, the Front Panel will display System Error Code 53:10. For more information on troubleshooting this error code, refer to Page 2-16. Check also System Error Code 07:10 (refer to Page 26). hp designjet 4000 series printer service manual - HP Designjet 4000 | Service Manual - Page 105
will display System Error Code 01.0:10. For more information on troubleshooting this error code, refer to Page 2-3. Check also System Error Code 07:10 (refer to Page 2-6). 13 Once the test is completed, OK will be displayed on the Front Panel. hp designjet 4000 series printer service manual 4-31 - HP Designjet 4000 | Service Manual - Page 106
verify the operation of the Ink Delivery System. Perform the Ink Delivery System test as follows: 1 In the Service Tests submenu, scroll to "6. Ink Delivery System Test" and press Enter. Press Enter 2 This test has not yet been implemented. 4-32 hp designjet 4000 series printer service manual - HP Designjet 4000 | Service Manual - Page 107
PASSES, DO NOT REPLACE THE SERVICE STATION/AEROSOL FAN. Perform the SVS/Aerosol Fan test as follows: 1 In the Service Tests submenu, scroll to "7. SVS/Aerosol Fan Test" and press Enter. Press Enter 2 This test has not yet been implemented. hp designjet 4000 series printer service manual 4-33 - HP Designjet 4000 | Service Manual - Page 108
THE APS. IF THIS TEST PASSES, DO NOT REPLACE THE APS. Perform the Air Pump System test as follows: 1 In the Service Tests submenu, scroll to "8. Air Pump System Test" and press Enter. Press Enter 2 This test has not yet been implemented. 4-34 hp designjet 4000 series printer service manual - HP Designjet 4000 | Service Manual - Page 109
VACUUM FAN. IF THIS TEST PASSES, DO NOT REPLACE THE VACUUM FAN. Perform the Vacuum Fans test as follows: 1 In the Service Tests submenu, scroll to "9. Vacuum Fans Test" and press Enter. Press Enter 2 This test has not yet been implemented. hp designjet 4000 series printer service manual 4-35 - HP Designjet 4000 | Service Manual - Page 110
more information on troubleshooting this error code, refer to Page 2-3. Check also System Error Code 01.2:10 (refer to Page 2-4). 0 = Yellow 1 = Magenta 2 = Black 3 = Cyan If the Printer detects that one or more of the Ink Cartridges have a broken bag, then the message "Please, replace one of the - HP Designjet 4000 | Service Manual - Page 111
confirm your selection. Press Enter to confirm selection Use UP and DOWN keys to select If you select No, the Front Panel will display System Error Code 23:10. For more information on troubleshooting this error code, refer to Page 2-8. hp designjet 4000 series printer service manual 4-37 - HP Designjet 4000 | Service Manual - Page 112
a problem at this stage, the Front Panel will display System Error Code 01.0:10. For more information on troubleshooting this error code, refer to Page 2-3. „ Removing leakage. 10 Once the process is completed, OK will be displayed on the Front Panel. 4-38 hp designjet 4000 series printer service - HP Designjet 4000 | Service Manual - Page 113
, it is displayed on the Front Panel. Press any key to exit. 5 Once the process is completed, OK will be displayed on the Front Panel. hp designjet 4000 series printer service manual 4-39 - HP Designjet 4000 | Service Manual - Page 114
Serial Number (refer to Page 4-47). „ Getting PS Language (for HP Designjet 4000PS). If there is a failure at this point, the Front Panel will display System Error Code 74:00. For more information on troubleshooting this error code, refer to Page 2-20. hp designjet 4000 series printer service manual - HP Designjet 4000 | Service Manual - Page 115
Service Tests and Utilities 4 Once the Unit information is obtained, it is displayed on the Front Panel. Press any key to exit. 5 Once the process is completed, OK will be displayed on the Front Panel. hp designjet 4000 series printer service manual 4-41 - HP Designjet 4000 | Service Manual - Page 116
or System Error Code 01.0:10 (refer to Page 2-3). „ Reading Ink Supplies. If there is a failure at this point, the Front Panel will display the message "Replace failing ink supplies after running this utility: (Yellow, Magenta, Black or Cyan)". 4-42 hp designjet 4000 series printer service manual - HP Designjet 4000 | Service Manual - Page 117
any part of the Acumen information is invalid, the Front Panel will display System Error Code 74:00. For more information on troubleshooting this error code, refer to Page 2-20. 5 Once the process is completed, OK will be displayed on the Front Panel. hp designjet 4000 series printer service manual - HP Designjet 4000 | Service Manual - Page 118
Page 2-3. „ Starting NVM. „ Setting default config. „ Restoring tubes state. If there is a failure at this point, the Front Panel will display System Error Code 79:03. For more information on troubleshooting this error code, refer to Page 2-21. 4-44 hp designjet 4000 series printer service manual - HP Designjet 4000 | Service Manual - Page 119
. Press any key to continue. After rebooting the Printer, make sure you select Printhead replacement through the Front Panel in order to launch the Printhead calibration. 5 Once the process is completed, OK will be displayed on the Front Panel. hp designjet 4000 series printer service manual 4-45 - HP Designjet 4000 | Service Manual - Page 120
. If there is a failure at this point, the Front Panel will display System Error Code 79:03. For more information on troubleshooting this error code, refer to Page 2-21. 4 Once the process is completed, OK will be displayed on the Front Panel. 4-46 hp designjet 4000 series printer service manual - HP Designjet 4000 | Service Manual - Page 121
Number and Part Number in case both the Hard Disk Drive and the Ink Supply Tubes are replaced at the same time. Set the Serial Number as follows: 1 In the Service Tests submenu, scroll to "Error 71:19 Recovery" and press Enter. Press Enter 2 The Printer will check if the System Error Code 71:19 - HP Designjet 4000 | Service Manual - Page 122
the System Error Code 71:19, the Printer will be configured as HP Designjet 4000 (part number Q1273A). If the Printer was originally a HP Designjet 4000ps (part number Q1274A), you must contact the HP Customer Support Center for further information. hp designjet 4000 series printer service manual - HP Designjet 4000 | Service Manual - Page 123
now in the Service Tools Menu. Press Cancel Press UP OR DOWN 3 Use the Arrow keys to scroll to the "Service Tests" menu and press the Enter key. Press Enter 4 In the Service Tests submenu, scroll to "I/O Tests" and press Enter. Press Enter hp designjet 4000 series printer service manual 4-49 - HP Designjet 4000 | Service Manual - Page 124
as DOWN. 7 If an active interface is installed, the Printer will test the active interface and if it passes it will display the following message on the Front Panel: 8 Once the process is completed, OK will be displayed on the Front Panel. 4-50 hp designjet 4000 series printer service manual - HP Designjet 4000 | Service Manual - Page 125
RTC Clock ⇒ Page 4-66 The purpose of this Service Utility is to set the Real Time Clock (RTC) of the Printer. 9 Carriage Setup ⇒ Page 4-67 The purpose of this Service Utility is to reset the ink short thresholds after replacing the Carriage PCA. hp designjet 4000 series printer service manual 4-51 - HP Designjet 4000 | Service Manual - Page 126
SUPPORT Press Cancel key Press DOWN key 3 For On-Site Engineers, once inside the "Printer Setup" menu, press the Up arrow key and the Cancel key together. You are now in the Service Tools Menu. ON-SITE REPAIR Press UP key Press Cancel key 4-52 hp designjet 4000 series printer service manual - HP Designjet 4000 | Service Manual - Page 127
you must repeat the above steps to enter Service Utilities again. In some cases a quick press of a button may not be recognized by the Printer. When pressing a button, be sure to press it deliberately and all the way to the bottom of its travel. hp designjet 4000 series printer service manual 4-53 - HP Designjet 4000 | Service Manual - Page 128
Utilities submenu, scroll to "Turn Drive Roller" and press Enter. Press Enter 2 The Printer checks to see if media is loaded. If media is loaded, the Front Panel will display the following message. Unload the media and start again from step 1: 4-54 hp designjet 4000 series printer service manual - HP Designjet 4000 | Service Manual - Page 129
Cancel key to finish the utility. 6 If the utility exits correctly, OK will be displayed on the Front Panel. PLEASE REMEMBER TO REMOVE THE PIECE OF PAPER FROM THE WINDOW SENSOR BEFORE CLOSING THE WINDOW AS THIS COULD DAMAGE THE WINDOW AND THE SENSOR. hp designjet 4000 series printer service manual - HP Designjet 4000 | Service Manual - Page 130
. Replace the installed Ink Cartridges with Ink Cartridges that are new or contain less than 88% of ink. Printer will reboot. Press Back or Cancel to exit the procedure at this point. Press Cancel or the Back key to Exit Press Enter to proceed 4-56 hp designjet 4000 series printer service manual - HP Designjet 4000 | Service Manual - Page 131
message will appear on the front panel. Close the carriage cover and close the window. 7 The printer will begin to purge the tubes system. 8 Once the tubes system has been purged, the following message will instruct you to open the Window: hp designjet 4000 series printer service manual 4-57 - HP Designjet 4000 | Service Manual - Page 132
the Printhead Alignment and the following message will be displayed on the Front Panel. To continue with the Printhead Alignment, select "Align now" and press the Enter key. Press Enter to confirm selection Use UP and DOWN keys to select 4-58 hp designjet 4000 series printer service manual - HP Designjet 4000 | Service Manual - Page 133
Service Tests and Utilities 14 Once the Printhead Alignment is completed, the following message will be displayed on the Front Panel. Press the Enter key to continue. hp designjet 4000 series printer service manual 4-59 - HP Designjet 4000 | Service Manual - Page 134
If the new Serial Number cannot be set, the Front Panel will display System Error Code 74:00. For more information on troubleshooting this error code, refer to Page 2-20. 5 If the utility exits correctly, OK will be displayed on the Front Panel. 4-60 hp designjet 4000 series printer service manual - HP Designjet 4000 | Service Manual - Page 135
Counter for a particular part, you will be given an option to reset the Life Counter of the: - Scan-Axis Motor. - Trailing Cable and Tubes. - Carriage Belt. - Carriage (Bushing). - Most Left Spittoon. - Middle Left Spittoon. - PHC Spittoons. hp designjet 4000 series printer service manual 4-61 - HP Designjet 4000 | Service Manual - Page 136
Enter If the Usage Counter information cannot be read, the Front Panel will display "Unable to get usage counter". This could point to a possible Firmware error. 4 If the utility exits correctly, OK will be displayed on the Front Panel. 4-62 hp designjet 4000 series printer service manual - HP Designjet 4000 | Service Manual - Page 137
without printing the Diagnostic Print. Press Cancel or the Back key to Exit Press Enter to print 4 The selected Diagnostic Print will now be printed. For further information on how to use troubleshoot Image Quality problems, refer to Chapter 6. hp designjet 4000 series printer service manual - HP Designjet 4000 | Service Manual - Page 138
and Utilities PHONE SUPPORT 6. Sleep Mode The purpose of this Service Utility is to enable/disable the sleep mode so that the Printer is never switched Firmware error. 4 If the utility exits correctly, OK will be displayed on the Front Panel. 4-64 hp designjet 4000 series printer service manual - HP Designjet 4000 | Service Manual - Page 139
to the Cutter replacement position and the following message will be displayed on the Front Panel. After a few seconds the Printer will begin to shutdown. 4 Before replacing the Cutter, make sure that you switch the Printer OFF from the rear. hp designjet 4000 series printer service manual 4-65 - HP Designjet 4000 | Service Manual - Page 140
or the Back key to modify again. Press Cancel to exit Press Enter to confirm If the current RTC Clock cannot be set, it could point to a possible Firmware error. 4 If the utility exits correctly, OK will be displayed on the Front Panel. 4-66 hp designjet 4000 series printer service manual - HP Designjet 4000 | Service Manual - Page 141
any key to exit: If any of the Printhead ink short thresholds cannot be reset or if the Printheads info cannot be accessed, it could point to a possible Firmware error. 4 If the utility exits correctly, OK will be displayed on the Front Panel. hp designjet 4000 series printer service manual 4-67 - HP Designjet 4000 | Service Manual - Page 142
Service Tests and Utilities 4-68 hp designjet 4000 series printer service manual - HP Designjet 4000 | Service Manual - Page 143
1. Scan Axis Calibration 5-4 2. Service Station Calibration 5-8 3. Paper Advance Calibration 5-9 4. Drop Detector Calibration 5-15 5. Line Sensor Calibration 5-16 6. Platen Blue Line Calibration 5-20 7. Vacuum Calibration 5-22 8. Carriage Setup 5-23 hp designjet 4000 series printer service manual - HP Designjet 4000 | Service Manual - Page 144
the ISS PCA have been replaced), you must perform them in the following order: „ Vacuum Calibration. „ Drop Detector/Service Station Calibration. „ Line Sensor/Scan Axis Calibration. „ Paper Advance Calibration. „ Platen Blue Line Calibration. 5-2 hp designjet 4000 series printer service manual - HP Designjet 4000 | Service Manual - Page 145
a specific operation when the required Service Calibration is highlighted. If the printer is not used for 135 seconds, the printer exits out of the Service Calibrations Menu and you must repeat the above steps to enter Service Calibrations again. hp designjet 4000 series printer service manual 5-3 - HP Designjet 4000 | Service Manual - Page 146
Calibrations 1. Scan Axis Calibration The purpose of this Service Calibration is to carry out a PWM check, calibrate the intensity of the Line Sensor and calibrate the Line Sensor position to the Black Printhead. Perform the Scan Axis Calibration whenever: „ Carriage is disassembled or replaced - HP Designjet 4000 | Service Manual - Page 147
Back or Cancel to exit the calibration. If the values are not within the range specified, an error will appear on the Front Panel. In this case, try the following: „ Try the Scan-Axis Calibration again. „ Replace the Line Sensor ⇒ Page 8-31. hp designjet 4000 series printer service manual 5-5 - HP Designjet 4000 | Service Manual - Page 148
Service Calibrations 6 The Printer will start to calibrate the Line Sensor position to the Black Printhead. It will print a line of black dots and then scan them: 7 Once the Line Sensor has been calibrated, the results will be displayed on the Front Panel. Press Enter to finish the calibration or - HP Designjet 4000 | Service Manual - Page 149
the Printheads are printing incorrectly. If necessary, perform a Printhead Recovery through the Front Panel and retry the Calibration. 13 Once the complete Scan Axis calibration is completed successfully, OK will be displayed on the Front Panel. hp designjet 4000 series printer service manual 5-7 - HP Designjet 4000 | Service Manual - Page 150
Station. Once the Service Station has been calibrated, the results will be displayed on the Front Panel. Press any key on the Front Panel to finish the calibration. 4 Once the calibration is completed, OK will be displayed on the Front Panel. 5-8 hp designjet 4000 series printer service manual - HP Designjet 4000 | Service Manual - Page 151
problems. Perform the Paper Advance Calibration as follows: Make sure that you unload media from the Printer before performing the Paper Advance Calibration. 1 In the Service Calibrations submenu, scroll to "Paper Advance Calibration" and press Enter. Press Enter hp designjet 4000 series printer - HP Designjet 4000 | Service Manual - Page 152
following: „ Check that the Printer has the latest Firmware version. If not, update the Firmware to the latest version. „ Retry the Paper Advance Calibration. „ If the problem continues, replace the Encoder Strip and Encoder Sensor ⇒ Page 8-45. 5-10 hp designjet 4000 series printer service manual - HP Designjet 4000 | Service Manual - Page 153
Pattern has been printed successfully, the following message will be displayed on the Front panel. Press the Enter key to continue. SCAN AXIS FORWARD Avg PWM: XXX Max PWM: XXX Stabilizat Dist: XXX Avg speed offset: XXX STD speed offset: XXX hp designjet 4000 series printer service manual 5-11 - HP Designjet 4000 | Service Manual - Page 154
go into the printer first. Press the Enter key to continue. SCAN AXIS FORWARD Avg PWM: XXX Max PWM: XXX Stabilizat Dist: XXX Avg speed offset: XXX STD speed offset: XXX Take note that the Calibration Pattern will be loaded as a Roll and NOT as a Sheet. hp designjet 4000 series printer service manual - HP Designjet 4000 | Service Manual - Page 155
. If this is NOT done, the Printer will not perform correctly and could cause Print Quality problems. Before starting the Clean Drive Roller procedure, make sure you first load media into the Printer that the customer will normally use to print. hp designjet 4000 series printer service manual 5-13 - HP Designjet 4000 | Service Manual - Page 156
Service Calibrations 15 You will need to re-enter the Paper Advance Calibration submenu and scroll to "Clean Drive Roller" Front Panel. SCAN AXIS FORWARD Avg PWM: XXX Max PWM: XXX Stabilizat Dist: XXX Avg speed offset: XXX STD speed offset: XXX 5-14 hp designjet 4000 series printer service manual - HP Designjet 4000 | Service Manual - Page 157
Detector. Once the Drop Detector has been calibrated, the results will be displayed on the Front Panel. Press any key on the Front Panel to finish the calibration. 4 Once the calibration is completed, OK will be displayed on the Front Panel. hp designjet 4000 series printer service manual 5-15 - HP Designjet 4000 | Service Manual - Page 158
for alignment or calibration. Perform the Line Sensor Calibration whenever: „ Edge detect procedure fails during media loading. „ Carriage is disassembled or replaced. „ Line Sensor is disassembled or replaced. „ Banding is detected in prints. „ Misalignment between colors is detected. Perform the - HP Designjet 4000 | Service Manual - Page 159
case, try the following: „ Try the Scan-Axis Calibration again. „ Replace the Line Sensor ⇒ Page 8-31. 5 The Printer will start to calibrate the Line Sensor position to the Black Printhead. It will print a line of black dots and then scan them: hp designjet 4000 series printer service manual 5-17 - HP Designjet 4000 | Service Manual - Page 160
the Color Calibration. „ If the Alignment fails again, check the Alignment pattern to see if any of the Printheads are printing incorrectly. If necessary, perform a Printhead Recovery through the Front Panel and retry the Printhead Alignment. 5-18 hp designjet 4000 series printer service manual - HP Designjet 4000 | Service Manual - Page 161
Printheads are printing incorrectly. If necessary, perform a Printhead Recovery through the Front Panel and retry the Calibration. 11 Once the complete Line Sensor calibration is completed successfully, OK will be displayed on the Front Panel. hp designjet 4000 series printer service manual 5-19 - HP Designjet 4000 | Service Manual - Page 162
Front Panel requesting you to raise the Media Lever and to place a sheet of white media on the Print Platen aligned with the Blue Line. Press the Enter key to continue once the sheet is in placed. Align sheet with Blue Line without covering it 5-20 hp designjet 4000 series printer service manual - HP Designjet 4000 | Service Manual - Page 163
the sheet of media has been removed. 6 The results of the calibration will be displayed on the Front Panel. Press any key on the Front Panel to finish the calibration. 7 Once the calibration is completed, OK will be displayed on the Front Panel. hp designjet 4000 series printer service manual 5-21 - HP Designjet 4000 | Service Manual - Page 164
to exit the calibration. Press Cancel or the Back key to Exit Press Enter to proceed 3 The Printer will set the default nominal and real values of the Vacuum Fan. 4 Once the calibration is completed, OK will be displayed on the Front Panel. 5-22 hp designjet 4000 series printer service manual - HP Designjet 4000 | Service Manual - Page 165
any key to exit: If any of the Printhead ink short thresholds cannot be reset or if the Printheads info cannot be accessed, it could point to a possible Firmware error. 4 If the utility exits correctly, OK will be displayed on the Front Panel. hp designjet 4000 series printer service manual 5-23 - HP Designjet 4000 | Service Manual - Page 166
Service Calibrations 5-24 hp designjet 4000 series printer service manual - HP Designjet 4000 | Service Manual - Page 167
with Stepped Lines 6-23 Lines are Printed Double or in Wrong Colors 6-23 Lines are Blurred (Ink Bleeds from Lines) 6-24 Problems with Color Accuracy 6-24 Problems with PANTONE Color Accuracy 6-25 Color Matching Between Different HP Designjet Printers 6-26 Problems with Image Clipping 6-28 Image is - HP Designjet 4000 | Service Manual - Page 168
- HP Designjet 4000 | Service Manual - Page 169
- HP Designjet 4000 | Service Manual - Page 170
- HP Designjet 4000 | Service Manual - Page 171
- HP Designjet 4000 | Service Manual - Page 172
- HP Designjet 4000 | Service Manual - Page 173
- HP Designjet 4000 | Service Manual - Page 174
- HP Designjet 4000 | Service Manual - Page 175
- HP Designjet 4000 | Service Manual - Page 176
- HP Designjet 4000 | Service Manual - Page 177
- HP Designjet 4000 | Service Manual - Page 178
- HP Designjet 4000 | Service Manual - Page 179
- HP Designjet 4000 | Service Manual - Page 180
, replace the faulty Printhead. no yes / no yes Our printers are able to achive optimal Image Quality performance even with some nozzles out (see image 3 on page 6-16). Are you seeing white banding somewhere in Part 2 of the Image Quality Diagnostic Print and it matches with the color where - HP Designjet 4000 | Service Manual - Page 181
using HP media. - If the problem persists, Heavyweight Coated paper should be used. This problem mainly occurs after inserting new Printheads (specially cyan), or when loading Heavyweight Coated paper for the first few meters. Dark Light Zone Banding actions: - Select the correct Print Quality - HP Designjet 4000 | Service Manual - Page 182
- HP Designjet 4000 | Service Manual - Page 183
- HP Designjet 4000 | Service Manual - Page 184
- HP Designjet 4000 | Service Manual - Page 185
- HP Designjet 4000 | Service Manual - Page 186
- HP Designjet 4000 | Service Manual - Page 187
- HP Designjet 4000 | Service Manual - Page 188
- HP Designjet 4000 | Service Manual - Page 189
- HP Designjet 4000 | Service Manual - Page 190
- HP Designjet 4000 | Service Manual - Page 191
- HP Designjet 4000 | Service Manual - Page 192
- HP Designjet 4000 | Service Manual - Page 193
- HP Designjet 4000 | Service Manual - Page 194
- HP Designjet 4000 | Service Manual - Page 195
- HP Designjet 4000 | Service Manual - Page 196
- HP Designjet 4000 | Service Manual - Page 197
- HP Designjet 4000 | Service Manual - Page 198
- HP Designjet 4000 | Service Manual - Page 199
- HP Designjet 4000 | Service Manual - Page 200
- HP Designjet 4000 | Service Manual - Page 201
- HP Designjet 4000 | Service Manual - Page 202
- HP Designjet 4000 | Service Manual - Page 203
- HP Designjet 4000 | Service Manual - Page 204
- HP Designjet 4000 | Service Manual - Page 205
7-12 Left Hand Assemblies 7-14 Carriage Assembly 7-16 Scan-Axis Assemblies 7-18 Drive Roller and Media-Axis Motor 7-20 Paper Path Assemblies 7-22 Center Guide and Pinchwheel Assembly 7-24 Media Entry Assemblies 7-26 Miscellaneous Parts 7-28 hp designjet 4000 series printer service manual 7-1 - HP Designjet 4000 | Service Manual - Page 206
Q1271-60456 Q1271-60457 Q1271-60458 Q1271-60459 2 Foot Assembly 2 Legs Assembly 1 X-Brace Assembly 1 Bin Assembly 1 Hardware Kit (Includes screws for Legs Assembly) 2 Leg Cover 7-2 hp designjet 4000 series printer service manual - HP Designjet 4000 | Service Manual - Page 207
Parts and Diagrams 3 5 2 4 1 Figure 1: Printer Support hp designjet 4000 series printer service manual 7-3 - HP Designjet 4000 | Service Manual - Page 208
5 6 Center Covers HP Part Number Quantity Description/Comments Q1273-60057 Q1273-60052 Q1273-60107 Q1273-60105 Q1273-60106 Q1273-60072 1 Window 1 Top Cover 1 Rear Door 1 Left Connector Cover 1 Right Connector Cover 1 Window Sensor 7-4 hp designjet 4000 series printer service manual - HP Designjet 4000 | Service Manual - Page 209
Parts and Diagrams 2 4 3 1 6 5 Figure 2: Center Covers hp designjet 4000 series printer service manual 7-5 - HP Designjet 4000 | Service Manual - Page 210
Supply Unit - Refurbished 1 Interconnect PCA 1 Memory Module 256MB 1 EIO2PCI Interface 1 Empty Electronics Module Assembly 1 Electronics Module Cables Kit 1 Electronics Module Metal Parts Kit 1 PCI USB PCA 1 Gigabit Ethernet PCI Card 7-6 hp designjet 4000 series printer service - HP Designjet 4000 | Service Manual - Page 211
Parts and Diagrams 10 5 4 3 11 7 8 1 2 6 9 Figure 3: Electronics Module hp designjet 4000 series printer service manual 7-7 - HP Designjet 4000 | Service Manual - Page 212
Cable) 1 Front Panel Bezel 1 Printhead Cleaner Access Door (for hp designjet 4000) Printhead Cleaner Access Door (for hp 1 designjet 4000ps) (includes Adobe and Pantone Logo) 1 Push-Push Mechanism 1 Quick Reference Guide Holder 7-8 hp designjet 4000 series printer service manual - HP Designjet 4000 | Service Manual - Page 213
Parts and Diagrams 7 1 6 3 4 2 5 Figure 4: Right Hand Cover hp designjet 4000 series printer service manual 7-9 - HP Designjet 4000 | Service Manual - Page 214
Reference on Drawing 1 2 3 4 Left Hand Cover HP Part Number Quantity Description/Comments Q1273-60053 Q1273-60096 Q1273-60091 Q1273-60092 1 Left Hand Cover (without Door) 1 Left Hand Trim 1 Cartridge Access Door 1 Push-Push Mechanism 7-10 hp designjet 4000 series printer service manual - HP Designjet 4000 | Service Manual - Page 215
Parts and Diagrams 4 1 2 3 Figure 5: Left Hand Cover hp designjet 4000 series printer service manual 7-11 - HP Designjet 4000 | Service Manual - Page 216
60067 Q1273-60084 Q1273-60086 1 Service Station (Includes Drop Detector) 1 Aerosol Fan Assembly 1 Vacuum Fan Assembly 1 Drop Detector 1 Service Station Cable (Includes Printhead Cleaner Door Switch) 1 Aerosol Filter 1 Right Bracket 7-12 hp designjet 4000 series printer service manual - HP Designjet 4000 | Service Manual - Page 217
Parts and Diagrams 1 6 2 4 7 3 5 Figure 6: Right Hand Assemblies hp designjet 4000 series printer service manual 7-13 - HP Designjet 4000 | Service Manual - Page 218
Q1273-60102 Q1273-60085 Q1273-60117 Q1273-60099 Q1273-60100 1 Ink Supply Station (without APS) 1 Air Pressurization Pump (APS) 4 Cartridge Trays 1 Left Bracket 1 ISS to Cartridge Cable 1 Most Left Spittoons 1 Middle Left Spittoons 7-14 hp designjet 4000 series printer service manual - HP Designjet 4000 | Service Manual - Page 219
Parts and Diagrams 3 5 1 2 6 7 4 Figure 7: Left Hand Assemblies hp designjet 4000 series printer service manual 7-15 - HP Designjet 4000 | Service Manual - Page 220
Sensor Kit, pn Q1273-60070) 1 Setup Printhead Kit 1 Carriage Flex Cables 1 Carriage PCA 1 Carriage PCA - Refurbished Carriage Stopper (includes Carriage 1 Stopper Screw and Media-Axis Motor Bracket) 1 GW Maintenance Kit Generic 7-16 hp designjet 4000 series printer service manual - HP Designjet 4000 | Service Manual - Page 221
Parts and Diagrams 6 3 7 4 5 2 6 1 Figure 8: Carriage Assembly hp designjet 4000 series printer service manual 7-17 - HP Designjet 4000 | Service Manual - Page 222
Q1273-60069 Q1273-60071 Q1273-60070 Q1273-60108 Q1273-60112 1 Ink Supply Tubes and Trailing Cable 1 Belt and Tensioner Assembly 1 Scan-Axis Motor 1 Encoder Strip and Encoder Sensor Kit 5 Ink Supply Tubes Clips 2 Rear Tube Brackets 7-18 hp designjet 4000 series printer service manual - HP Designjet 4000 | Service Manual - Page 223
Parts and Diagrams 3 2 4 5 6 1 Figure 9: Scan-Axis Assemblies hp designjet 4000 series printer service manual 7-19 - HP Designjet 4000 | Service Manual - Page 224
Drawing 1 2 3 4 5 Drive Roller and Media-Axis Motor HP Part Number Quantity Description/Comments Q1273-60039 Q1273-60094 Q1273-60087 Q1273- Media-Axis Motor Carriage Stopper (includes Carriage 1 Stopper Screw and Media-Axis Motor Bracket) 7-20 hp designjet 4000 series printer service manual - HP Designjet 4000 | Service Manual - Page 225
Parts and Diagrams 2 5 3 1 4 Figure 10: Drive Roller and Media-Axis Motor hp designjet 4000 series printer service manual 7-21 - HP Designjet 4000 | Service Manual - Page 226
1 2 3 4 5 Paper Path Assemblies HP Part Number Quantity Description/Comments Q1273-60041 Q1273-60060 Q1273-60058 Q1273-60103 Q1273-60073 1 Center Platen 1 Front Platen 1 Input Roller 2 Input Roller Levers 1 Media Deflectors Kit 7-22 hp designjet 4000 series printer service manual - HP Designjet 4000 | Service Manual - Page 227
Parts and Diagrams 1 2 5 3 4 Figure 11: Paper Path Assemblies hp designjet 4000 series printer service manual 7-23 - HP Designjet 4000 | Service Manual - Page 228
/Comments Q1273-60059 Q1273-60040 Q1273-60104 Q1273-60082 Q1273-60093 Q1273-60079 1 Center Guide 1 Complete Pinchwheels Assembly 1 Pinchwheels Kit (only contains the wheels) 1 Media Lever Sensor 1 Media Lever Assembly 1 Media Sensor 7-24 hp designjet 4000 series printer service manual - HP Designjet 4000 | Service Manual - Page 229
Parts and Diagrams 2 1 5 3 4 Figure 12: Center Guide and Pinchwheel Assembly hp designjet 4000 series printer service manual 7-25 - HP Designjet 4000 | Service Manual - Page 230
C6090-60112 Q1273-60136 1 Left Roll Module Assembly 1 Right Roll Module Assembly (Also includes Right Spindle Lever p/n Q1273-60136) 1 42" Spindle (does NOT include Blue Hub) 1 Blue Hub 1 3" Spindle Adaptors 1 Right Spindle Lever 7-26 hp designjet 4000 series printer service manual - HP Designjet 4000 | Service Manual - Page 231
Parts and Diagrams 2 3 6 1 5 4 Figure 13: Media Entry Assemblies hp designjet 4000 series printer service manual 7-27 - HP Designjet 4000 | Service Manual - Page 232
Carriage PCA), Ink Supply Tubes and Trailing Cable, Scan- 1 Axis Motor, Belt, Encoder Strip (includes Spring and Nut but does not include Encoder Reader), Most Left and Middle Left Spittoons), Scraper and the Media-Axis Drive Motor Brake (with the corresponding support Part) 1 2 Sheets of HP - HP Designjet 4000 | Service Manual - Page 233
Parts and Diagrams 1 2 Figure 14: Arc Assemblies hp designjet 4000 series printer service manual 7-29 - HP Designjet 4000 | Service Manual - Page 234
Parts and Diagrams 7-30 hp designjet 4000 series printer service manual - HP Designjet 4000 | Service Manual - Page 235
Mechanism 8-100 Media Sensor 8-101 Encoder Disc and Sensor 8-103 Media Lever Assembly 8-106 Media Lever Sensor 8-108 Pinchwheel Assembly 8-111 Center Guide 8-115 Drive Roller 8-118 Right Rollfeed Module Assembly 8-125 Right Spindle Lever 8-128 8 hp designjet 4000 series printer service manual 8-1 - HP Designjet 4000 | Service Manual - Page 236
Touch all tools to earth ground to remove static charges before using them on the Printer. 6. After removing any PCA from the Printer, place it on a conductive foam pad or into its conductive packaging to prevent ESD damage to any ICs on the PCA. 8-2 hp designjet 4000 series printer service manual - HP Designjet 4000 | Service Manual - Page 237
- Sheet Metal - Machined Taptite Taptite Part Number 0515-1743 0515-2282 0515-4613 0515-2850 C3180-20001 0515-2981 0624-0769 0515-4706 0515-2200 0624-0771 0624-0680 0624-0768 0515-2521 C6071-20025 0624-1062 C2847-20018 0515-2916 0515-1916 hp designjet 4000 series printer service manual 8-3 - HP Designjet 4000 | Service Manual - Page 238
2. Unclip the Window hinges from the Top Cover. Since the hinges are very hard to unclip, it is recommended that you use a screwdriver or other tool to forcefully unclip the Window hinges from the Top Cover. 3. Remove the Window from the Printer. 8-4 hp designjet 4000 series printer service manual - HP Designjet 4000 | Service Manual - Page 239
the Window and the other to the Top Cover. Window 2. Slide the Window Hinges on to the Window. 3. Clip the Window Hinges to the Top Cover. Since the hinges are very hard to clip, you will need to forcefully clip the Window hinges to the Top Cover. hp designjet 4000 series printer service manual - HP Designjet 4000 | Service Manual - Page 240
the power cable. 1. Unclip the Quick reference Guide Holder from the rear of the Printer. 2 1 2. Using a small flat-blade screwdriver, unclip the Front Panel Bezel from the Right Cover. 3. Remove the Front Panel Bezel from the Right Cover. 8-6 hp designjet 4000 series printer service manual - HP Designjet 4000 | Service Manual - Page 241
Removal and Installation 4. Remove two T-15 screws (Type G) that secure the Front Panel to the Right Cover. 5. Open the Printhead Cleaner Door. 6. Remove one T-15 screw (Type J) that secures the Right Cover. hp designjet 4000 series printer service manual 8-7 - HP Designjet 4000 | Service Manual - Page 242
secure the Right Cover from the rear of the Printer. 9. Remove the Right Cover from the Printer. When installing the Right Cover, make sure you leave the Printhead Cleaner Door open, otherwise you could damage the Printhead Cleaner Door Sensor. 8-8 hp designjet 4000 series printer service manual - HP Designjet 4000 | Service Manual - Page 243
Removal and Installation Left Cover Removal Switch off the product and remove the power cable. 1. Open the Ink Cartridge Door. 2. Remove the Ink Cartridges from the Printer. 3. Remove one T-15 screw (Type J) that secures the Left Cover. hp designjet 4000 series printer service manual 8-9 - HP Designjet 4000 | Service Manual - Page 244
4. Open the Window and remove two T-15 (Type J) screws that secure the Left Cover. Type J 5. Remove one T-15 screw (Type J) and one T-20 screw (Type A) that secure the Left Cover. Type A 6. Remove the Left Cover from the Printer. 8-10 hp designjet 4000 series printer service manual - HP Designjet 4000 | Service Manual - Page 245
and the Trailing Cable to the Top Cover. 4. Release the Ink Supply Tubes and Trailing Cable from the clip underneath the Top Cover. 5. Remove the Ink Supply Tubes and Trailing Cable from within the Top Cover and lay them on the Print Platen. hp designjet 4000 series printer service manual 8-11 - HP Designjet 4000 | Service Manual - Page 246
the ESD Strip to the Top Cover (on the left hand side of the Printer). 7. Disconnect the ESD Strip from the Top Cover. 8. Remove three T-15 screws (Type G) that secure the Rear Door. Each screw includes a washer (part number 3050-1267). 8-12 hp designjet 4000 series printer service manual - HP Designjet 4000 | Service Manual - Page 247
Removal and Installation 9. Open the Rear Door. 10. Remove four T-15 screws (Type H) that secure the Top Cover from the rear of the Printer. 11. Using a flat-head screwdriver, release the Top Cover from the right hand side of the Printer. hp designjet 4000 series printer service manual 8-13 - HP Designjet 4000 | Service Manual - Page 248
hand side of the Top Cover and pull out to the right. If a NEW Top Cover is to be installed, take note of the following instructions before assembling the Top Cover on to the Printer: 1. Position the Metallic Support on to the Top Cover. 8-14 hp designjet 4000 series printer service manual - HP Designjet 4000 | Service Manual - Page 249
the Ink Supply Tubes and Trailing Cable on to the Top Cover, take note of the of the two red marks on the Ink Supply Tubes. These two red marks should be aligned with the first slot in the Top Cover as this will help with the rest of the installation. hp designjet 4000 series printer service manual - HP Designjet 4000 | Service Manual - Page 250
screws (Type G) from the Rear Door. Each screw includes a washer (part number 3050-1267). 2. Open the Rear Door slightly (as shown). 3. To release the right hand hinge of the Rear Door, move the Rear Door to the right and then towards you. 1 2 8-16 hp designjet 4000 series printer service manual - HP Designjet 4000 | Service Manual - Page 251
1 2 Removal and Installation 4. To release the left hand hinge of the Rear Door, move the Rear Door to the right and then bend the hinge slightly (as shown). 5. Remove the Rear Door from the Printer. hp designjet 4000 series printer service manual 8-17 - HP Designjet 4000 | Service Manual - Page 252
power cable. 1. Remove the Rear Door ⇒ Page 8-16. 2. Remove two T-20 screws (Type B) from the Right Connector Cover. 3. Remove the Right Connector Cover from the Printer. 8-18 hp designjet 4000 series printer service manual - HP Designjet 4000 | Service Manual - Page 253
power cable. 1. Remove the Rear Door ⇒ Page 8-16. 2. Remove two T-20 screws (Type B) from the Left Connector Cover. 3. Remove the Left Connector Cover from the Printer. hp designjet 4000 series printer service manual 8-19 - HP Designjet 4000 | Service Manual - Page 254
the Front Panel Cable from the Interconnect PCA. 5. Disconnect the Ferrite clip (located on the rear of the Electronics Module) from the front of the Printer. 8-20 hp designjet 4000 series printer service manual - HP Designjet 4000 | Service Manual - Page 255
Removal and Installation 6. Move the Front Panel Cable (including the ferrite) out of the Electronics Module. 7. Release the Front Panel Cable from the Right Arc. 8. Disconnect the Ferrite clip from the Right Arc. hp designjet 4000 series printer service manual 8-21 - HP Designjet 4000 | Service Manual - Page 256
Removal and Installation 9. Remove two T-15 screws (Type G) that secure the Front Panel to the Printer. 10. Remove the Front Panel from the Printer. 8-22 hp designjet 4000 series printer service manual - HP Designjet 4000 | Service Manual - Page 257
⇒ Page 8-6. 2. Remove the Rear Door ⇒ Page 8-16. 3. Remove the Right Connector Cover ⇒ Page 8-18. 4. Disconnect the cable from the Printhead Cleaner Door Switch. 5. Disconnect the Service Station and Aerosol Fan Cables from the Interconnect PCA. hp designjet 4000 series printer service manual 8-23 - HP Designjet 4000 | Service Manual - Page 258
Cleaner tray. 7. Move the Carriage Assembly out of the Service Station. 8. Remove four T-15 screws (Type J) that secure the Service Station to the Chassis. When removing the screws, please be very careful NOT to damage the Encoder Strip. 8-24 hp designjet 4000 series printer service manual - HP Designjet 4000 | Service Manual - Page 259
Station, make sure you perform the following Service Utility: „ Reset Counter PHC spittoon ⇒ Chapter 4. After installing the NEW Service Station, make sure you perform the following Service Calibration: „ Service Station Calibration ⇒ Chapter 5. hp designjet 4000 series printer service manual 8-25 - HP Designjet 4000 | Service Manual - Page 260
Removal and Installation Removal of the Service Station Scraper 1. Release the clip securing the Scraper to the Service Station. 2. Remove the Scraper from the Service Station. 8-26 hp designjet 4000 series printer service manual - HP Designjet 4000 | Service Manual - Page 261
Rear Door ⇒ Page 8-16. 3. Remove the Right Connector Cover ⇒ Page 8-18. 4. Remove the Service Station ⇒ Page 8-23. 5. Release the Pinchwheel Lever Sensor Cable from the Vacuum Fan. 6. Disconnect both Vacuum Fan cables from the Interconnect PCA. hp designjet 4000 series printer service manual 8-27 - HP Designjet 4000 | Service Manual - Page 262
, make sure you connect the cable with the label marked Vacuum Fan 1 to connector 1 and the cable with the label marked Vacuum Fan 2 to connector 2. You can verify if both cables are labelled correctly by the actual markings on the Vacuum Fan. 8-28 hp designjet 4000 series printer service manual - HP Designjet 4000 | Service Manual - Page 263
⇒ Page 8-16. 3. Remove the Right Connector Cover ⇒ Page 8-18. 4. Remove the Service Station ⇒ Page 8-23. 5. Unclip the bottom cover from the Aerosol Fan. 6. Remove four T-15 screws (Type G) that secure the Aerosol Fan to the Service Station. hp designjet 4000 series printer service manual 8-29 - HP Designjet 4000 | Service Manual - Page 264
Removal and Installation 7. Remove the Aerosol Fan from the Service Station. 8. If necessary, remove the Aerosol Fan Filter from the Aerosol Fan. 8-30 hp designjet 4000 series printer service manual - HP Designjet 4000 | Service Manual - Page 265
Right Cover ⇒ Page 8-6. 2. Disconnect the Drop Detector Cable from the Service Station Cable. 3. Release the Drop Detector Cable from the Service Station. 4. Remove one T-8 screw (Type K) that secures the Drop Detector to the Service Station. hp designjet 4000 series printer service manual 8-31 - HP Designjet 4000 | Service Manual - Page 266
Removal and Installation 1 2 5. Remove the Drop Detector from the Printer. After installing the NEW Drop Detector, make sure you perform the following Service Calibration: „ Drop Detector Calibration ⇒ Chapter 5. 8-32 hp designjet 4000 series printer service manual - HP Designjet 4000 | Service Manual - Page 267
replace both the Hard Disk Drive and the Ink Supply Tubes and Trailing Cable at the same time. If both parts need to replaced, you MUST first replace one part and then power ON the Printer the two plastic clips securing the Trailing Cable. hp designjet 4000 series printer service manual 8-33 - HP Designjet 4000 | Service Manual - Page 268
1 2 8. Press the two side of the Carriage PCA Cover and unclip from the Carriage Assembly. 1 9. Disconnect the Trailing Cable from the Carriage PCA. 10. Open the Carriage Cover and remove ALL the Printheads from the Carriage Assembly. 8-34 hp designjet 4000 series printer service manual - HP Designjet 4000 | Service Manual - Page 269
(Type G) that secure the Ink Supply Tubes to the Carriage Assembly. 12. Remove one T-20 screw (Type B) from each plastic holder at the rear of the Printer. 13. Disconnect the Electrical Cable from the rear of the Ink Cartridge Tube Connector. hp designjet 4000 series printer service manual 8-35 - HP Designjet 4000 | Service Manual - Page 270
1 2 14. Disconnect the Air Tube from the Ink Supply Tubes. 15. Twist the 2 latches at the rear of the Ink Cartridge Tube Connector and release the complete assembly. 16. Remove the Ink Supply Tubes and Trailing Cable from the Printer. 8-36 hp designjet 4000 series printer service manual - HP Designjet 4000 | Service Manual - Page 271
the Ink Supply Tubes and Trailing Cable on to the Top Cover, take note of the of the two red marks on the Ink Supply Tubes. These two red marks should be aligned with the first slot in the Top Cover as this will help with the rest of the installation. hp designjet 4000 series printer service manual - HP Designjet 4000 | Service Manual - Page 272
product and remove the power cable. 1. Remove the Left Cover ⇒ Page 8-4. 2. Disconnect the ISS to Cartridge Cable from the ISS PCA. 3. Release the clips securing the ISS to Cartridge Cable. 4. Remove the ISS to Cartridge Cable from the Printer. 8-38 hp designjet 4000 series printer service manual - HP Designjet 4000 | Service Manual - Page 273
to Chapter 4) and follow the instructions on the Front Panel. 2. Open the Window. 3. Remove one T-15 screw (Type G) that secures the Cutter Assembly to the Carriage Assembly. 4. Slide the Cutter Assembly to the left and remove from the Printer. hp designjet 4000 series printer service manual 8-39 - HP Designjet 4000 | Service Manual - Page 274
the Electrical Cable from the rear of the Ink Cartridge Tube Connector. 1 2 4. Disconnect the Air Tube from the Ink Supply Tubes. 5. Twist the 2 latches at the rear of the Ink Cartridge Tube Connector and release the complete assembly. 8-40 hp designjet 4000 series printer service manual - HP Designjet 4000 | Service Manual - Page 275
Removal and Installation 6. Disconnect the two Ink Supply Station cables from the PrintMech PCA. 7. Release the Ink Supply Station from the Chassis. 8. Remove the Ink Supply Station from the Printer. 1 2 hp designjet 4000 series printer service manual 8-41 - HP Designjet 4000 | Service Manual - Page 276
Connector Cover ⇒ Page 8-19. 3. Remove the ISS ⇒ Page 8-40. 4. Release the Air Tube from the Slot in the Ink Supply Station. 5. Unclip the APS Assembly from the Ink Supply Station. 6. Remove the APS Assembly from the Ink Supply Station. 1 8-42 2 hp designjet 4000 series printer service manual - HP Designjet 4000 | Service Manual - Page 277
so that the screw can be removed easily. 3. Remove the Most Left Spittoons from the Printer. After installing the NEW Most Left Spittoons, make sure you perform the following Service Utility: „ Reset life counter most left spittoon ⇒ Chapter 4. hp designjet 4000 series printer service manual 8-43 - HP Designjet 4000 | Service Manual - Page 278
T-10 screw (Type C) that secures the Middle Left Spittoons. 3. Remove the Middle Left Spittoons from the Printer. After installing the NEW Middle Left Spittoons, make sure you perform the following Service Utility: „ Reset life counter mid left spittoon ⇒ Chapter 4. hp designjet 4000 series printer - HP Designjet 4000 | Service Manual - Page 279
3. Uncap the Carriage Assembly by manually pulling out the Printhead Cleaner tray. 4. Move the Carriage Assembly out of the Service Station. 5. Remove one T-10 screw (Type I) that secures the Encoder Strip on the right hand side of the Printer. hp designjet 4000 series printer service manual 8-45 - HP Designjet 4000 | Service Manual - Page 280
pins on the right hand side of the Printer. 7. Release the Spring Clip from the Bracket on the left hand side of the Printer. 1 2 8. Pull the Encoder Strip out of the left hand side of the Printer. 8-46 9. Remove the Carriage PCA ⇒ Page 8-48. hp designjet 4000 series printer service manual - HP Designjet 4000 | Service Manual - Page 281
the plastic cover from the Encoder Sensor. 12. Remove the Encoder Sensor from the Printer. After installing the NEW Encoder Strip and Encoder Sensor, make sure you perform the following Service Calibration: „ Scan-Axis Calibration ⇒ Chapter 5. hp designjet 4000 series printer service manual 8-47 - HP Designjet 4000 | Service Manual - Page 282
side of the Carriage PCA 1 Cover and unclip from the Carriage Assembly. 1 2 3. Disconnect the Trailing Cable from the Carriage PCA. 4. Release the ALL the clips, securing the Carriage Flex Cables to the Carriage PCA, by pulling upwards. 8-48 hp designjet 4000 series printer service manual - HP Designjet 4000 | Service Manual - Page 283
Removal and Installation 5. Disconnect the Flex Cables from the Carriage PCA. 6. Disconnect the Line Sensor Cable and the Encoder Sensor Cable from the Carriage PCA. 7. Push inwards the four clips that secure the Carriage PCA. hp designjet 4000 series printer service manual 8-49 - HP Designjet 4000 | Service Manual - Page 284
Printer. 2. Execute the "Carriage Setup" Utility from the Service Utility Menu (Refer to Chapter 4 for more information). 3. Install the Printheads once the Utility has been completed successfully. 4. Reset life counter Carriage PCA ⇒ Chapter 4. 8-50 hp designjet 4000 series printer service manual - HP Designjet 4000 | Service Manual - Page 285
side of the Carriage PCA 1 Cover and unclip from the Carriage Assembly. 1 2 3. Release the ALL the clips, securing the Carriage Flex Cables to the Carriage Assembly, by pulling upwards. 4. Disconnect the Flex Cables from the Carriage PCA. hp designjet 4000 series printer service manual 8-51 - HP Designjet 4000 | Service Manual - Page 286
5. Remove eight T-8 screws (Type L) that secure the Carriage Flex Cables to the Carriage Assembly. 6. Open the Carriage Cover and remove ALL the Printheads from the Carriage Assembly. 7. Remove the Carriage Flex Cable from the Printer. 8-52 hp designjet 4000 series printer service manual - HP Designjet 4000 | Service Manual - Page 287
Strip ⇒ Page 8-45. 4. Move the Carriage Assembly to the extreme right of the Printer. 5. Press the two side of the Carriage PCA 1 Cover and unclip from the Carriage Assembly. 2 1 6. Disconnect the Trailing Cable from the Carriage PCA. hp designjet 4000 series printer service manual 8-53 - HP Designjet 4000 | Service Manual - Page 288
the Printheads from the Carriage Assembly. 8. Remove five T-15 screws (Type G) that secure the Ink Supply Tubes to the Carriage Assembly. 9. Remove the Ink Supply Tubes from the Carriage Assembly and safely place to one side of the Printer. 8-54 hp designjet 4000 series printer service manual - HP Designjet 4000 | Service Manual - Page 289
Removal and Installation 10. Disconnect the Aerosol Fan Tube from the Chassis. 11. Remove one T-15 screw (Type A) that secures the Belt Tensioner to the Chassis. 12. Move the Carriage Assembly slightly away from the right Scan-Axis Bracket. hp designjet 4000 series printer service manual 8-55 - HP Designjet 4000 | Service Manual - Page 290
Scan-Axis Bracket. Note that these are Chassis screws and in normal circumstances should NEVER be removed, but in this case we need to remove them in order to remove the Carriage Assembly. 15. Remove the right Scan-Axis Bracket from the Printer. 8-56 hp designjet 4000 series printer service manual - HP Designjet 4000 | Service Manual - Page 291
„ Reset life counter Carriage ME ⇒ Chapter 4. After installing the NEW Carriage Assembly, make sure you perform the following Service Calibrations: „ Scan-Axis Calibration ⇒ Chapter 5. „ Service Station Calibration ⇒ Chapter 5. „ Line Sensor Calibration ⇒ Chapter 5. hp designjet 4000 series printer - HP Designjet 4000 | Service Manual - Page 292
the Carriage Assembly ⇒ Page 8- 53. 6. Release the Belt from the bottom of the Carriage Assembly. After installing the NEW Belt Assembly, make sure you perform the following Service Utility: „ Reset life counter scan cycles belt ⇒ Chapter 4. 8-58 hp designjet 4000 series printer service manual - HP Designjet 4000 | Service Manual - Page 293
Page 8-9. 3. Remove the Rear Door ⇒ Page 8-16. 4. Remove the Left Connector Cover ⇒ Page 8-19 5. Remove one T-15 screw that secures the Belt Tensioner to the Chassis. 6. Move the Carriage Assembly slightly away from the right Scan-Axis Bracket. hp designjet 4000 series printer service manual 8-59 - HP Designjet 4000 | Service Manual - Page 294
and Installation 7. Release the Carriage Belt from the ScanAxis Motor on the left hand side of the Printer. 8. Disconnect the Scan-Axis Motor cable from the PrintMech PCA. 9. Release the Scan-Axis Motor cable from the clips on the chassis. 8-60 hp designjet 4000 series printer service manual - HP Designjet 4000 | Service Manual - Page 295
the Scan-Axis Motor securely when removing the screws. 11. Remove the Scan-Axis Motor from the Printer. After installing the NEW Scan-Axis Motor, make sure you perform the following Service Utility: „ Reset life counter scan motor ⇒ Chapter 4. hp designjet 4000 series printer service manual 8-61 - HP Designjet 4000 | Service Manual - Page 296
PCA. 4. Remove two T-15 screws (Type R) that secure the Media-Axis Motor. 5. Loosen two T-20 screws (Type B) that secure the Media-Axis Motor Bracket. 8-62 hp designjet 4000 series printer service manual - HP Designjet 4000 | Service Manual - Page 297
reinstalling the parts, make sure you apply the grease (included with the support part) to the gears. After installing the NEW MediaAxis Motor, make sure you perform the following Service Calibration: „ Paper Advance Calibration ⇒ Chapter 5. hp designjet 4000 series printer service manual 8-63 - HP Designjet 4000 | Service Manual - Page 298
8-19. 3. Remove the JetDirect Card (if installed). 4. Remove three T-15 screws (Type A) that secure the Main PCA cover. 5. Remove the Main PCA Cover from the Printer. 1 2 8-64 hp designjet 4000 series printer service manual - HP Designjet 4000 | Service Manual - Page 299
Removal and Installation 6. Remove six T-10 screws (Type I) that secure the Interconnect PCA Cover. 7. Remove the Interconnect PCA Cover from the Printer. 8. Disconnect ALL cables from the Interconnect PCA. hp designjet 4000 series printer service manual 8-65 - HP Designjet 4000 | Service Manual - Page 300
Removal and Installation 9. Remove five T-10 screws (Type I) that secure the Interconnect PCA. 10. Remove the Interconnect PCA from the Printer. 8-66 hp designjet 4000 series printer service manual - HP Designjet 4000 | Service Manual - Page 301
cable. 1. Remove the JetDirect Card (if installed). 2. Remove three T-15 screws (Type A) that secure the Main PCA cover. 3. Remove the Main PCA Cover from the Printer. 1 2 hp designjet 4000 series printer service manual 8-67 - HP Designjet 4000 | Service Manual - Page 302
Removal and Installation 4. Remove one T-10 screw (Type I) that secures the Interface Card. 5. Disconnect the Interface Card from the Main PCA and remove from the Printer. 8-68 hp designjet 4000 series printer service manual - HP Designjet 4000 | Service Manual - Page 303
8-19. 3. Remove the JetDirect Card (if installed). 4. Remove three T-15 screws (Type A) that secure the Main PCA cover. 5. Remove the Main PCA Cover from the Printer. 1 2 hp designjet 4000 series printer service manual 8-69 - HP Designjet 4000 | Service Manual - Page 304
Removal and Installation 6. Disconnect the Trailing Cable from the Gamut PCI PCA. 7. Disconnect ALL cables connected to the Gamut PCI PCA 8. Remove one T-10 screw (Type I) that secures the Gamut PCI PCA. 8-70 hp designjet 4000 series printer service manual - HP Designjet 4000 | Service Manual - Page 305
Removal and Installation 9. Disconnect the Gamut PCI PCA from the Main PCA and remove from the Printer. hp designjet 4000 series printer service manual 8-71 - HP Designjet 4000 | Service Manual - Page 306
cable. 1. Remove the JetDirect Card (if installed). 2. Remove three T-15 screws (Type A) that secure the Main PCA cover. 3. Remove the Main PCA Cover from the Printer. 1 2 8-72 hp designjet 4000 series printer service manual - HP Designjet 4000 | Service Manual - Page 307
Removal and Installation 4. Push the Memory Module Connector clips up and down to release the Memory Module. 5. Remove the Memory Module from the Printer. hp designjet 4000 series printer service manual 8-73 - HP Designjet 4000 | Service Manual - Page 308
Fan or the Processor (located under the Fan) from the Main PCA Formatter - The Fan and the Processor are part of the Main PCA Formatter support part and should be replaced . 5. Remove eight T-10 screws (Type I) that secure the Main PCA Formatter. 8-74 hp designjet 4000 series printer service manual - HP Designjet 4000 | Service Manual - Page 309
the plastic locating pin that secures the Main PCA Formatter. 7. Remove the Main PCA Formatter from the Printer. When installing the Main PCA Formatter, make sure that you first locate it on the plastic locating pin and then install the screws. hp designjet 4000 series printer service manual 8-75 - HP Designjet 4000 | Service Manual - Page 310
cable. 1. Remove the JetDirect Card (if installed). 2. Remove three T-15 screws (Type A) that secure the Main PCA cover. 3. Remove the Main PCA Cover from the Printer. 1 2 8-76 hp designjet 4000 series printer service manual - HP Designjet 4000 | Service Manual - Page 311
and the Ink Supply Tubes and Trailing Cable at the same time. If both parts need to replaced, you MUST first replace one part and then power ON the Printer until it completely initializes. Then you can power OFF the Printer and replace the other part. hp designjet 4000 series printer service manual - HP Designjet 4000 | Service Manual - Page 312
8-18. 2. Remove the JetDirect Card (if installed). 3. Remove three T-15 screws (Type A) that secure the Main PCA cover. 4. Remove the Main PCA Cover from the Printer. 1 2 8-78 hp designjet 4000 series printer service manual - HP Designjet 4000 | Service Manual - Page 313
Removal and Installation 5. Remove three T-15 screws (Type A) that secure the PSU cover. 6. Remove the PSU Cover from the Printer. 1 2 7. Disconnect the Power Supply and Interconnect cables from the PrintMech PCA. hp designjet 4000 series printer service manual 8-79 - HP Designjet 4000 | Service Manual - Page 314
Removal and Installation 8. Remove six T-10 screws (Type I) that secure the Interconnect PCA Cover. 9. Remove the Interconnect PCA Cover from the Printer. 10. Disconnect one cable from the Interconnect PCA. 8-80 hp designjet 4000 series printer service manual - HP Designjet 4000 | Service Manual - Page 315
Removal and Installation 11. Disconnect two cables from the Main PCA. 12. Disconnect one cable from the Gamut PCA. 13. Disconnect one cable from Hard Disk Drive. hp designjet 4000 series printer service manual 8-81 - HP Designjet 4000 | Service Manual - Page 316
14. Bend the edge of the Cable Support Bracket so that it can be released. 15. Move the Cable Support Bracket to the left to release it from the Electronics Module. 16. Lower the Cable Support Bracket so that the cables can be accessed. 8-82 hp designjet 4000 series printer service manual - HP Designjet 4000 | Service Manual - Page 317
the Power Supply Cable from the Cable Support Bracket. 18. Remove four T-10 screws (Type I) that secure the Power Supply Unit. 19. Route the cables through the hole in the Electronics Module and remove the Power Supply Unit from the Printer. 1 2 hp designjet 4000 series printer service manual 8-83 - HP Designjet 4000 | Service Manual - Page 318
power cable. 1. Remove the Left Connector Cover ⇒ Page 8-19. 2. Remove three T-15 screws (Type A) that secure the PSU cover. 3. Remove the PSU Cover from the Printer. 1 2 4. Disconnect ALL cables from the PrintMech PCA. 8-84 hp designjet 4000 series printer service manual - HP Designjet 4000 | Service Manual - Page 319
Removal and Installation 5. Remove two T-15 screws (Type B) that secure the PrintMech Cover. 6. Slide the PrintMech Cover out of the Printer. 7. Remove eight T-10 screws (Type I) that secure the PrintMech PCA. hp designjet 4000 series printer service manual 8-85 - HP Designjet 4000 | Service Manual - Page 320
Removal and Installation 8. Remove the PrintMech PCA from the Printer. 8-86 hp designjet 4000 series printer service manual - HP Designjet 4000 | Service Manual - Page 321
cable. 1. Remove the JetDirect Card (if installed). 2. Remove three T-15 screws (Type A) that secure the Main PCA cover. 3. Remove the Main PCA Cover from the Printer. 1 2 hp designjet 4000 series printer service manual 8-87 - HP Designjet 4000 | Service Manual - Page 322
Removal and Installation Push here to release battery 4. Push the clip down and release the battery from the Main PCA. 8-88 hp designjet 4000 series printer service manual - HP Designjet 4000 | Service Manual - Page 323
of the Carriage PCA 1 Cover and unclip from the Carriage Assembly. 2 1 3. Release the clip and disconnect the Line Sensor cable from the Carriage PCA. 4. Remove one T-15 screw (Type G) that secures the Line Sensor to the carriage Assembly. hp designjet 4000 series printer service manual 8-89 - HP Designjet 4000 | Service Manual - Page 324
Removal and Installation 5. Remove the Line Sensor from the Carriage Assembly. After installing the NEW Line Sensor, make sure you perform the following Service Calibrations: „ Line Sensor Calibration ⇒ Chapter 5. 8-90 hp designjet 4000 series printer service manual - HP Designjet 4000 | Service Manual - Page 325
and remove the power cable. 1. Remove one T-20 screw (Type B) that secures the Media Deflector that needs to be replaced. 2. Release the clip securing the Media Deflector. 3. Remove the Media Deflector (slide upwards first) from the Printer. hp designjet 4000 series printer service manual 8-91 - HP Designjet 4000 | Service Manual - Page 326
Front Platen Removal Switch off the product and remove the power cable. 1. Open the Window. 2. Remove three T-15 screws and two crosshead screws that secure the Front Platen. 3. Release the clip on the left hand side of the Front Platen. 8-92 hp designjet 4000 series printer service manual - HP Designjet 4000 | Service Manual - Page 327
the Front Platen to the Left and then remove from the Printer. If a NEW Front Platen is to be installed, make sure that you first remove ALL 3 Media Deflectors (⇒ Page 8-91) from the OLD Front Platen and install them on the New Front Platen. hp designjet 4000 series printer service manual 8-93 - HP Designjet 4000 | Service Manual - Page 328
the Top Cover ⇒ Page 8-11. 4. Remove the Service Station ⇒ Page 8-23. 5. Remove the Middle Left Spittoons ⇒ Page 8-44. 6. Remove one T-15 screw (Type P) that secures the Center Platen Gear. 7. Remove the Center Platen Gear from the Printer. 8-94 hp designjet 4000 series printer service manual - HP Designjet 4000 | Service Manual - Page 329
Removal and Installation 8. Remove one T-15 screw that secures the small Gear. 9. Remove the small Gear from the Printer. 10. Remove the two small Platen Gears by releasing the clips. hp designjet 4000 series printer service manual 8-95 - HP Designjet 4000 | Service Manual - Page 330
Removal and Installation 11. Remove two T-20 screws (Type Q) that secure the Gear Bracket. 12. Remove the Gear Bracket from the Printer. 13. Remove 79 T-10 screws (Type C) that secure the Center Platen. 8-96 hp designjet 4000 series printer service manual - HP Designjet 4000 | Service Manual - Page 331
the support part) to the gears. After installing the NEW Center Platen, make sure you perform the following Service Calibration: „ Paper Advance Calibration illustrations to guide you: Foams will need to be trimmed when stuck to the Vacuum Beam hp designjet 4000 series printer service manual 8-97 - HP Designjet 4000 | Service Manual - Page 332
. Note that each Cartridge Tray is different even though they look very similar. When selecting the Cartridge Tray from the Support Part (it contains four Cartridge Trays), choose the Tray that exactly matches the one that you have just removed. 8-98 hp designjet 4000 series printer service manual - HP Designjet 4000 | Service Manual - Page 333
Removal and Installation Input Roller Removal Switch off the product and remove the power cable. 1. Raise the left and right levers to release the Input Roller. 2. Pull out the Input Roller from the Printer. hp designjet 4000 series printer service manual 8-99 - HP Designjet 4000 | Service Manual - Page 334
Mechanism you want to replace. 2. Open the Ink Cartridge or the Printhead Cleaner Door (depending on which cover you have removed). 3. Squeeze the release clips from inside the Cover. 4. Push the Push-Push Mechanism through the hole to remove. 8-100 hp designjet 4000 series printer service manual - HP Designjet 4000 | Service Manual - Page 335
cable from the Interconnect PCA. 4. Release the Media Sensor cable from the clip located on the Electronics Module. 5. Unclip the Media Sensor from the Center Guide. hp designjet 4000 series printer service manual 8-101 - HP Designjet 4000 | Service Manual - Page 336
Removal and Installation 6. Pull the cable through the hole and remove the Media Sensor from the Printer. 8-102 hp designjet 4000 series printer service manual - HP Designjet 4000 | Service Manual - Page 337
. 3. Remove the Left Connector Cover ⇒ Page 8-19. 4. Remove the Ink Supply Station ⇒ Page 8- 40. 5. Disconnect the Encoder Sensor cable from the PrintMech PCA. 6. Release the Encoder Sensor cable from the clip located on the Electronics Module. hp designjet 4000 series printer service manual 8-103 - HP Designjet 4000 | Service Manual - Page 338
Installation 7. Release the Encoder Sensor cable from the clip located on the Encoder Disc Cover. 8. Unclip the Encoder Disc Cover and remove from the Printer. 9. Remove one T-8 screw (Type D) that secures the Encoder Sensor to the Chassis. 8-104 hp designjet 4000 series printer service manual - HP Designjet 4000 | Service Manual - Page 339
Removal and Installation 10. Remove the Encoder Sensor from the Printer. 11. Carefully peel the Encoder Disc from the Drive Roller. hp designjet 4000 series printer service manual 8-105 - HP Designjet 4000 | Service Manual - Page 340
one T-15 screw (Type F) that secures the Media Lever to the Linkage. 5. Remove one T-15 screw (Type F) that secures the Linkage to the Spring. 8-106 hp designjet 4000 series printer service manual - HP Designjet 4000 | Service Manual - Page 341
Removal and Installation 6. Remove one T-20 screw (Type A) that secures the Spring to the Spacer. 7. Remove one T-20 screw (Type O) that secures the Media Lever to the Right Trim. 8. Remove the Media Lever Assembly from the Printer. hp designjet 4000 series printer service manual 8-107 - HP Designjet 4000 | Service Manual - Page 342
and Linkage ⇒ Page 8-106. 7. Disconnect the Media Lever Sensor cable from the Interconnect PCA. 8. Remove five T-15 screws (Type B) that secure the Right Trim. 8-108 hp designjet 4000 series printer service manual - HP Designjet 4000 | Service Manual - Page 343
remove the Right Trim from the Printer. 10. Carefully release the clip securing the Media Lever Sensor from the Right Trim and remove from the locating pins. 1 2 11. Release the Media Lever Sensor Cable from the four clips on the Vacuum Fan. hp designjet 4000 series printer service manual 8-109 - HP Designjet 4000 | Service Manual - Page 344
Removal and Installation 12. Remove the Media Lever Sensor from the Printer. 8-110 hp designjet 4000 series printer service manual - HP Designjet 4000 | Service Manual - Page 345
Remove the Right Cover ⇒ Page 8-6. 2. Remove the Rear Door ⇒ Page 8-16. 3. Remove the Service Station ⇒ Page 8-23. 4. Remove one T-20 screw that secures the Linkage to the Spring. 5. can be found in the replacement Pinchwheel Assembly kit). hp designjet 4000 series printer service manual 8-111 - HP Designjet 4000 | Service Manual - Page 346
Assembly (including the Cam and Cam Lever) from the Printer. Before installing the NEW Pinchwheel Assembly, insert the plastic studs in to each Pinchwheel subassembly. This will make it easier to install the complete Pinchwheel Assembly. 8-112 hp designjet 4000 series printer service manual - HP Designjet 4000 | Service Manual - Page 347
Removal and Installation Removing individual Pinchwheels 1. To remove an individual Pinchwheel, push apart the metal part that secures the pinchwheels and then pull out the individual Pinchwheel. hp designjet 4000 series printer service manual 8-113 - HP Designjet 4000 | Service Manual - Page 348
symmetrical so can be installed without any problems, BUT the white Pinchwheels are NOT symmetrical so it is VERY IMPORTANT to install them correctly using the following illustration: Check the orientation of the Pinchwheel before installing 8-114 hp designjet 4000 series printer service manual - HP Designjet 4000 | Service Manual - Page 349
Page 8-23. 6. Remove the Ink Supply Station ⇒ Page 840. 7. Remove the Media Sensor ⇒ Page 8-108. 8. Disconnect ALL the cables connected to the Interconnect PCA and the Gamut PCI PCA. 9. Disconnect ALL the cables connected to the PrintMech PCA. hp designjet 4000 series printer service manual 8-115 - HP Designjet 4000 | Service Manual - Page 350
and Installation 10. Remove four T-20 screws (Type B) that secure the Electronics Module. 11. Remove the Electronics Module from the Printer. 12. Remove one T-15 screw (Type E), that secures the Center Guide, from underneath the Printer. 8-116 hp designjet 4000 series printer service manual - HP Designjet 4000 | Service Manual - Page 351
Guide, from the left hand side of the Printer. 14. Remove one T-15 screw (Type E) and two T-20 screws (Type A), that secure the Center Guide, from the right hand side of the Printer. Type E Type A 15. Remove the Center Guide from the Printer. hp designjet 4000 series printer service manual - HP Designjet 4000 | Service Manual - Page 352
8-19. 5. Remove the Service Station ⇒ Page 8-23. 6. Remove the Ink Supply Station ⇒ Page 8- 40. 10. Remove the Media Sensor ⇒ Page 8-108. 11. Remove the Center Guide ⇒ Page 8-115. 12. Remove two T-10 screws that secure the Drive Roller Gear. 8-118 hp designjet 4000 series printer service manual - HP Designjet 4000 | Service Manual - Page 353
Removal and Installation 13. Remove the Drive Roller Gear from the Printer. 14. Remove one T-20 screw (Type B) that secures the cover on the right hand side of the Printer. 15. Remove the Cover. hp designjet 4000 series printer service manual 8-119 - HP Designjet 4000 | Service Manual - Page 354
Removal and Installation 16. Remove two T-20 screws (Type B) that secure the cover on the left hand side of the Printer. 17. Remove the Cover. 18. Remove three T-20 screws (Type B) that secure the Media-Axis Motor Bracket to the sideplate. 8-120 hp designjet 4000 series printer service manual - HP Designjet 4000 | Service Manual - Page 355
the parts, make 1 sure you apply the grease (included with the support part) to the gears. After installing the NEW Drive 2 Roller, make sure you perform the following Service Calibration: „ Paper Advance Calibration ⇒ Chapter 5. hp designjet 4000 series printer service manual 8-121 - HP Designjet 4000 | Service Manual - Page 356
Drive Roller Bearing and Sideplate Left Hand Side of the Printer Drive Roller Radial Retainer Sideplate 1 2 2 1. Datum between Drive Roller and Radial Retainer 2. Datum between Drive Roller and Sideplate Right Hand Side of the Printer 8-122 hp designjet 4000 series printer service manual - HP Designjet 4000 | Service Manual - Page 357
the Media-Axis Motor Bracket, make sure you follow these instructions: 1. Place the Media-Axis Motor Bracket in the correct position on the Printer. Make sure you keep it pushed down (as shown in in the previous step is fully tightened. hp designjet 4000 series printer service manual 8-123 - HP Designjet 4000 | Service Manual - Page 358
Removal and Installation 4. Install the remaining two screws (T-15) that secure the Media-Axis Motor Bracket. 8-124 hp designjet 4000 series printer service manual - HP Designjet 4000 | Service Manual - Page 359
8-6. 2. Remove the Service Station ⇒ Page 8-23. 3. Remove the Vacuum Fan ⇒ Page 8-27. 4. Remove the Input Roller ⇒ Page 8-99. 5. Remove the Media Spindle (if installed). 6. (Type J) that secure the Right Rollfeed Module from the outside. hp designjet 4000 series printer service manual 8-125 - HP Designjet 4000 | Service Manual - Page 360
Removal and Installation 8. Remove the Right Rollfeed Module from the Printer. Installation Follow these instructions for the correct installation of a NEW Right Rollfeed Module Assembly the T-15 screw that secures the Media Tension Mechanism. 8-126 hp designjet 4000 series printer service manual - HP Designjet 4000 | Service Manual - Page 361
3. While securely holding the Right Rollfeed Module, position the Right Rollfeed on to the Printer and install the T-15 screw that was removed in the previous step. 4. Install the remaining screws that were removed during the removal process. hp designjet 4000 series printer service manual 8-127 - HP Designjet 4000 | Service Manual - Page 362
instructions explain how to remove a broken Spindle Lever and install a new one. 1. Pull out the Media Spindle from the Printer. 2. Remove the Spring from the Spindle Lever. 3. Remove one T-20 screw (Type O) that secures the Spindle Lever. 8-128 hp designjet 4000 series printer service manual - HP Designjet 4000 | Service Manual - Page 363
Removal and Installation 4. Remove the Spindle Lever. Installation 1. Position the new Spindle Lever on the Printer. 2. Install one T-20 screw (Type O) to secure the Spindle Lever. hp designjet 4000 series printer service manual 8-129 - HP Designjet 4000 | Service Manual - Page 364
Removal and Installation 3. Place the spring on the top hook. 4. Stretch the spring and loop the spring on the bottom hook. 5. Check that the Spindle Lever is installed correctly as shown here. 8-130 hp designjet 4000 series printer service manual - HP Designjet 4000 | Service Manual - Page 365
Cleaning the Printer 9-2 General Cleaning 9-2 Cleaning the Drive Roller and Overdrive 9-3 Cleaning the Center Platen 9-3 Applying Oil to the Overdrive 9-5 Lubricating the Carriage Assembly 9-5 Scheduled Maintenance 9-6 Level of Printer Usage 9-6 hp designjet 4000 series printer service manual 9-1 - HP Designjet 4000 | Service Manual - Page 366
with compressed air if available. 2 Clean the outer surface of the Printer with a damp sponge or cloth. Use a mild soap and water solution if necessary. Do not use abrasive cleaners. 3 Wipe the Printer dry with a soft lint-free cloth. 9-2 hp designjet 4000 series printer service manual - HP Designjet 4000 | Service Manual - Page 367
the Printer. Cleaning the Center Platen If wide paper is used to print after narrower paper Printer. 2 Open the Window and with a dry brush remove ink deposits from the Cutter Groove and the Center Platen surface. Cutter Groove Center Platen Surface hp designjet 4000 series printer service manual - HP Designjet 4000 | Service Manual - Page 368
at all (not even with the cloth). 4 Clean the Cutter ramp with the damp cloth. 5 Clean the exposed part of the wheels with a dry cloth. Ideally, clean the whole circumference of these wheels (you can use Turn Drive Roller Utility on Page 4-63). 9-4 hp designjet 4000 series printer service manual - HP Designjet 4000 | Service Manual - Page 369
2 Open the Window and apply a few drops of oil (bottle of oil can be found in the Maintenance Kit) to the pads on either side of the Carriage Assembly. 3 Apply a few drops of oil directly to the Slider Rod on either side of the Carriage Assembly. hp designjet 4000 series printer service manual 9-5 - HP Designjet 4000 | Service Manual - Page 370
). „ Belt Assembly (⇒ Page 8-58). „ Most Left Spittoons (⇒ Page 8-43). „ Middle Left Spittoons (⇒ Page 8-44). „ Scraper (located on the Service Station). You must also clean the holes in the Service Station which are located under the Black Printhead Cleaners. 9-6 hp designjet 4000 series printer - HP Designjet 4000 | Service Manual - Page 371
About this Edition This is the 2nd edition of this Service Manual 1st edition, titled hp designjet 4000 series printers service manual (models Q1273A/Q1274A) December 2004 2nd edition, titled hp designjet 4000 series printers service manual (models Q1273A/Q1274A) April 2005 - HP Designjet 4000 | Service Manual - Page 372
What's in this Service Manual This manual contains information necessary to test, calibrate and service: - hp designjet 4000 (model Q1273A) - hp designjet 4000ps (model Q1274A) For information about using these printers, refer to the corresponding User and Quick Reference Guides. The procedures
-
 1
1 -
 2
2 -
 3
3 -
 4
4 -
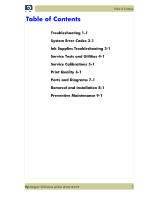 5
5 -
 6
6 -
 7
7 -
8
-
9
-
10
-
11
-
12
-
13
-
14
-
15
-
16
-
17
-
18
-
19
-
20
-
21
-
22
-
23
-
24
-
25
-
26
-
27
-
28
-
29
-
30
-
31
-
32
-
33
-
34
-
35
-
36
-
37
-
38
-
39
-
40
-
41
-
42
-
43
-
44
-
45
-
46
-
47
-
48
-
49
-
50
-
51
-
52
-
53
-
54
-
55
-
56
-
57
-
58
-
59
-
60
-
61
-
62
-
63
-
64
-
65
-
66
-
67
-
68
-
69
-
70
-
71
-
72
-
73
-
74
-
75
-
76
-
77
-
78
-
79
-
80
-
81
-
82
-
83
-
84
-
85
-
86
-
87
-
88
-
89
-
90
-
91
-
92
-
93
-
94
-
95
-
96
-
97
-
98
-
99
-
100
-
101
-
102
-
103
-
104
-
105
-
106
-
107
-
108
-
109
-
110
-
111
-
112
-
113
-
114
-
115
-
116
-
117
-
118
-
119
-
120
-
121
-
122
-
123
-
124
-
125
-
126
-
127
-
128
-
129
-
130
-
131
-
132
-
133
-
134
-
135
-
136
-
137
-
138
-
139
-
140
-
141
-
142
-
143
-
144
-
145
-
146
-
147
-
148
-
149
-
150
-
151
-
152
-
153
-
154
-
155
-
156
-
157
-
158
-
159
-
160
-
161
-
162
-
163
-
164
-
165
-
166
-
167
-
168
-
169
-
170
-
171
-
172
-
173
-
174
-
175
-
176
-
177
-
178
-
179
-
180
-
181
-
182
-
183
-
184
-
185
-
186
-
187
-
188
-
189
-
190
-
191
-
192
-
193
-
194
-
195
-
196
-
197
-
198
-
199
-
200
-
201
-
202
-
203
-
204
-
205
-
206
-
207
-
208
-
209
-
210
-
211
-
212
-
213
-
214
-
215
-
216
-
217
-
218
-
219
-
220
-
221
-
222
-
223
-
224
-
225
-
226
-
227
-
228
-
229
-
230
-
231
-
232
-
233
-
234
-
235
-
236
-
237
-
238
-
239
-
240
-
241
-
242
-
243
-
244
-
245
-
246
-
247
-
248
-
249
-
250
-
251
-
252
-
253
-
254
-
255
-
256
-
257
-
258
-
259
-
260
-
261
-
262
-
263
-
264
-
265
-
266
-
267
-
268
-
269
-
270
-
271
-
272
-
273
-
274
-
275
-
276
-
277
-
278
-
279
-
280
-
281
-
282
-
283
-
284
-
285
-
286
-
287
-
288
-
289
-
290
-
291
-
292
-
293
-
294
-
295
-
296
-
297
-
298
-
299
-
300
-
301
-
302
-
303
-
304
-
305
-
306
-
307
-
308
-
309
-
310
-
311
-
312
-
313
-
314
-
315
-
316
-
317
-
318
-
319
-
320
-
321
-
322
-
323
-
324
-
325
-
326
-
327
-
328
-
329
-
330
-
331
-
332
-
333
-
334
-
335
-
336
-
337
-
338
-
339
-
340
-
341
-
342
-
343
-
344
-
345
-
346
-
347
-
348
-
349
-
350
-
351
-
352
-
353
-
354
-
355
-
356
-
357
-
358
-
359
-
360
-
361
-
362
-
363
-
364
-
365
-
366
-
367
-
368
-
369
-
370
-
371
-
372
 |
 |
