HP LaserJet Pro CM1415 HP LaserJet Pro CM1410 - Software Technical Reference - Page 137
Setting up a printer with Mac OS X v10.5 and v10.6, Troubleshooting the product setup
 |
View all HP LaserJet Pro CM1415 manuals
Add to My Manuals
Save this manual to your list of manuals |
Page 137 highlights
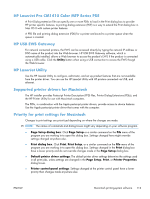
Setting up a printer with Mac OS X v10.5 and v10.6 Complete these steps after completing the printing-system software installation. 1. If you are installing the product using a USB connection, verify the USB cable is connected between the product and the computer. Turn on the product. If you are installing using a network connection, verify that the network cable is connected to the product and that the product is on. 2. In the Applications folder (in the Finder utility), open the System Preferences folder, and then open Printer & Fax. 3. If you are installing the product using a USB connection, verify that the product appears in the printer list. The Name column in the printer list should display the product name. If this is the case, the USB setup is complete. If the product does not appear, or if the correct information does not appear in the field, see Troubleshooting the product setup on page 117. If you are installing the product using a network connection, continue with the following steps. 4. Click the add + icon beneath the Printer List to open the Printer Browser screen. 5. Select your product model from the list of printers with Bonjour as the Kind. Click the Add button. Troubleshooting the product setup If the product does not appear in the printer list after an installation: Complete each one of these solutions in the order given, and restart the setup process after each one to see if the issue has been resolved. ● Verify that the USB or network cable is connected between the product and the computer and that the product is powered on. ● Try disconnecting and reconnecting the cable. If the computer has more than one USB port, try a different USB port. ● Turn the product off and then back on. ● Turn the computer off and then back on. ● If you are using a USB hub on the computer, disconnect any other USB devices from the hub. ● Try forcing the product into USB Full Speed mode by using the control panel. If the wrong PPD appears in the Kind column in the printer list after installation: 1. Unplug the USB cable. 2. Delete the print queue with the incorrect type (for example, Generic PostScript Printer). 3. Reinstall the printing-system software. 4. Turn the computer off and then on. 5. Reconnect the USB cable from the computer to the product. ENWW Macintosh install and uninstall instructions 117
-
 1
1 -
2
-
3
-
4
-
5
-
6
-
7
-
8
-
9
-
10
-
11
-
12
-
13
-
14
-
15
-
16
-
17
-
18
-
19
-
20
-
21
-
22
-
23
-
24
-
25
-
26
-
27
-
28
-
29
-
30
-
31
-
32
-
33
-
34
-
35
-
36
-
37
-
38
-
39
-
40
-
41
-
42
-
43
-
44
-
45
-
46
-
47
-
48
-
49
-
50
-
51
-
52
-
53
-
54
-
55
-
56
-
57
-
58
-
59
-
60
-
61
-
62
-
63
-
64
-
65
-
66
-
67
-
68
-
69
-
70
-
71
-
72
-
73
-
74
-
75
-
76
-
77
-
78
-
79
-
80
-
81
-
82
-
83
-
84
-
85
-
86
-
87
-
88
-
89
-
90
-
91
-
92
-
93
-
94
-
95
-
96
-
97
-
98
-
99
-
100
-
101
-
102
-
103
-
104
-
105
-
106
-
107
-
108
-
109
-
110
-
111
-
112
-
113
-
114
-
115
-
116
-
117
-
118
-
119
-
120
-
121
-
122
-
123
-
124
-
125
-
126
-
127
-
128
-
129
-
130
-
131
-
 132
132 -
 133
133 -
 134
134 -
 135
135 -
 136
136 -
 137
137 -
 138
138 -
 139
139 -
 140
140 -
 141
141 -
 142
142 -
143
-
144
-
145
-
146
-
147
-
148
-
149
-
150
-
151
-
152
-
153
-
154
-
155
-
156
-
157
-
158
-
159
-
160
-
161
-
162
-
163
-
164
-
165
-
166
-
167
-
168
-
169
-
170
-
171
-
172
-
173
-
174
-
175
-
176
-
177
-
178
-
179
-
180
-
181
-
182
-
183
-
184
-
185
-
186
-
187
-
188
-
189
-
190
-
191
-
192
-
193
-
194
-
195
-
196
-
197
-
198
-
199
-
200
-
201
-
202
-
203
-
204
-
205
-
206
-
207
-
208
-
209
-
210
-
211
-
212
-
213
-
214
-
215
-
216
-
217
-
218
-
219
-
220
-
221
-
222
-
223
-
224
-
225
-
226
-
227
-
228
-
229
-
230
-
231
-
232
-
233
-
234
-
235
-
236
-
237
-
238
-
239
-
240
-
241
-
242
-
243
-
244
-
245
-
246
-
247
-
248
-
249
-
250
-
251
-
252
-
253
-
254
-
255
-
256
-
257
-
258
-
259
-
260
-
261
-
262
-
263
-
264
-
265
-
266
-
267
-
268
-
269
-
270
-
271
-
272
-
273
-
274
-
275
-
276
-
277
-
278
-
279
-
280
-
281
-
282
 |
 |