Kyocera KM-1820 1820 Operation Guide (Advanced Edition)
Kyocera KM-1820 Manual
 |
View all Kyocera KM-1820 manuals
Add to My Manuals
Save this manual to your list of manuals |
Kyocera KM-1820 manual content summary:
- Kyocera KM-1820 | 1820 Operation Guide (Advanced Edition) - Page 1
KM-1820 Advanced Operation Guide - Kyocera KM-1820 | 1820 Operation Guide (Advanced Edition) - Page 2
the End of Scanning 2-12 Scanning with TWAIN 2-13 3 Printer Settings Parallel Setting 3-1 Network Settings 3-2 Setting the Emulation Mode 3-6 4 Operation Status Status Screen 4-1 Checking Jobs Status 4-2 Verifying Job Log 4-2 Pausing Jobs 4-2 ADVANCED OPERATION GUIDE iii - Kyocera KM-1820 | 1820 Operation Guide (Advanced Edition) - Page 3
8-14 Jobs Page 8-17 Advanced Page 8-18 9 Optional Equipment Available Options 9-1 Document Processor 9-2 Paper Feeder 9-4 Expansion Memory 9-4 FAX System 9-5 Appendix Paper Selection Appendix-1 Function Combination Tables Appendix-10 Glossary Index ADVANCED OPERATION GUIDE iv - Kyocera KM-1820 | 1820 Operation Guide (Advanced Edition) - Page 4
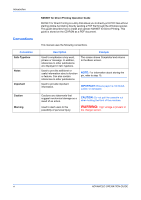
This guide) The Advanced Operation Guide contains explanations on copier, printer, and scanner functions as well as default settings that can be adjusted on this machine. This guide is stored on the CD-ROM as a PDF document. Kyocera Extended Driver (KX Driver) User Guide Describes how to install and - Kyocera KM-1820 | 1820 Operation Guide (Advanced Edition) - Page 5
without starting Adobe Acrobat by directly sending a PDF file through the Windows spooler. This guide describes how to install and operate KM-NET for Direct Printing. This guide is stored on the CD-ROM as a PDF document. This manual uses the following conventions. Description Example Used to - Kyocera KM-1820 | 1820 Operation Guide (Advanced Edition) - Page 6
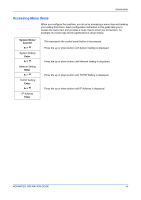
, you do so by accessing a menu item and making your setting from there. Each configuration instruction in this guide tells you to access the menu item and provides a route map to direct you to that up or down button until IP Address is displayed. IP Address Enter ADVANCED OPERATION GUIDE vii - Kyocera KM-1820 | 1820 Operation Guide (Advanced Edition) - Page 7
Introduction viii ADVANCED OPERATION GUIDE - Kyocera KM-1820 | 1820 Operation Guide (Advanced Edition) - Page 8
size to be used. Feeds paper from cassette 1. Feeds paper from the optional cassette 2 if it is installed. Feeds paper from the MP tray if the paper size and type has been registered. 1 Press Copy. Enter. The display shows Completed and returns to the basic screen. ADVANCED OPERATION GUIDE 1-1 - Kyocera KM-1820 | 1820 Operation Guide (Advanced Edition) - Page 9
shows Completed and returns to the basic screen. If you selected Manual, the Manual screen is displayed. Proceed to the next step. 4 Press S or T to adjust the required value for the exposure. Press Enter. The display shows Completed and returns to the basic screen. 1-2 ADVANCED OPERATION GUIDE - Kyocera KM-1820 | 1820 Operation Guide (Advanced Edition) - Page 10
selected paper size. For Standard Zoom, press S or T to select the zoom ratio. Press Enter. The display shows Completed and returns to the basic screen. ADVANCED OPERATION GUIDE 1-3 - Kyocera KM-1820 | 1820 Operation Guide (Advanced Edition) - Page 11
Left Using the Document Processor Top Edge to Rear Rear Top Edge to Left Left 5 Press right Select. The display returns to the basic screen. 1-4 ADVANCED OPERATION GUIDE - Kyocera KM-1820 | 1820 Operation Guide (Advanced Edition) - Page 12
Copying Functions Using Collate Mode Multiple originals can be scanned into memory in a single operation and the number of copy sets created. 1 Press Copy. The basic screen is displayed. the direction of the layout and press Enter. The Border Line screen is displayed. ADVANCED OPERATION GUIDE 1-5 - Kyocera KM-1820 | 1820 Operation Guide (Advanced Edition) - Page 13
to Rear Original Copied image Left to Right to Bottom Right to Top to Top to Left to Bottom to Bottom to Bottom Left Right 1-6 ADVANCED OPERATION GUIDE - Kyocera KM-1820 | 1820 Operation Guide (Advanced Edition) - Page 14
screen is displayed. The following illustrations indicate the effects of each borderline setting Solid Line Copied Image 2 in 1 4 in 1 Dotted Line Copied Image 2 in 1 4 in 1 ADVANCED OPERATION GUIDE 1-7 - Kyocera KM-1820 | 1820 Operation Guide (Advanced Edition) - Page 15
copied onto the platen. 2 Press Copy. The basic screen is displayed. 3 Select the combine mode. For more information, refer to Using Combine Mode on page 1-5. 1-8 ADVANCED OPERATION GUIDE - Kyocera KM-1820 | 1820 Operation Guide (Advanced Edition) - Page 16
Copying Functions 4 Press Start. The original is scanned. Once the scanning operation is completed, Set original and press Start key is displayed. 5 Place the next • 128 MB: Approximately 115 sheets • 192 MB: Approximately 380 sheets • 320 MB: Approximately 535 sheets ADVANCED OPERATION GUIDE 1-9 - Kyocera KM-1820 | 1820 Operation Guide (Advanced Edition) - Page 17
Select. Accepted will appear and copying commences. EcoPrint Mode EcoPrint enables the machine to consume less toner for a page to save your printing costs. This will cause images to be printed lighter than 5 Press right Select. The display returns to the basic screen. 1-10 ADVANCED OPERATION GUIDE - Kyocera KM-1820 | 1820 Operation Guide (Advanced Edition) - Page 18
Name Entry screen is displayed. 4 Enter the file name between one and 30 characters using the numeric keys (refer to Character Entry in the Operation Guide) and press Enter. The Additional Info screen is displayed. The factory default setting for the file name is doc. ADVANCED OPERATION GUIDE 1-11 - Kyocera KM-1820 | 1820 Operation Guide (Advanced Edition) - Page 19
completed, it is stored as a file name. The file name can be monitored in the Status menu. Refer to Checking Jobs Status on page 4-2. 1-12 ADVANCED OPERATION GUIDE - Kyocera KM-1820 | 1820 Operation Guide (Advanced Edition) - Page 20
right Select. The display returns to the basic screen. When there is no address to send, press left Select and return to the Function screen. ADVANCED OPERATION GUIDE 1-13 - Kyocera KM-1820 | 1820 Operation Guide (Advanced Edition) - Page 21
report to be sent. For details on using the numeric keys to enter characters, refer to Character Entry in the Operation Guide. Press Enter. The display shows Completed and returns to the Function screen. 2 Press right Select. The display returns to the basic screen. 1-14 ADVANCED OPERATION GUIDE - Kyocera KM-1820 | 1820 Operation Guide (Advanced Edition) - Page 22
, contact your Network Administrator. The Sender, a default subject and body message for the e-mail will be registered under the e-mail template setting in COMMAND CENTER. ADVANCED OPERATION GUIDE 2-1 - Kyocera KM-1820 | 1820 Operation Guide (Advanced Edition) - Page 23
and press Enter. 4 Press S or T to select SMB or FTP and press Enter. The Address Entry screen is displayed. 5 Enter the host name, path, login user name, and login password when requested. 6 Press Enter. The display shows Completed and returns to the basic screen. 2-2 ADVANCED OPERATION GUIDE - Kyocera KM-1820 | 1820 Operation Guide (Advanced Edition) - Page 24
the destination, press left Select. The display shows Deleted and returns to the Dest. Confirm screen. 6 Press Send. The display returns to the basic screen. ADVANCED OPERATION GUIDE 2-3 - Kyocera KM-1820 | 1820 Operation Guide (Advanced Edition) - Page 25
or T to select the destination required or, if the PC Folder is selected, enter the login user name and login password and press Enter. The display shows Completed and returns to the basic screen. select the address required and press Enter. The address is selected. 2-4 ADVANCED OPERATION GUIDE - Kyocera KM-1820 | 1820 Operation Guide (Advanced Edition) - Page 26
is to be converted into text using Optical Character Recognition software. 1 Press Send. The basic screen is displayed. 2 Press Original Quality. 3 Press S or T to select the mode required and press Enter. The display shows Completed and returns to the basic screen. ADVANCED OPERATION GUIDE 2-5 - Kyocera KM-1820 | 1820 Operation Guide (Advanced Edition) - Page 27
display shows Completed and returns to the basic screen. If Manual is selected, the Manual screen is displayed. Proceed to the next step. 4 Press S or T to adjust the value for the exposure and press Enter. The display shows Completed and returns to the basic screen. 2-6 ADVANCED OPERATION GUIDE - Kyocera KM-1820 | 1820 Operation Guide (Advanced Edition) - Page 28
Others and press Enter. 5 Press S or T to select the send size required and press Enter.The display shows Completed and returns to the Function screen. ADVANCED OPERATION GUIDE 2-7 - Kyocera KM-1820 | 1820 Operation Guide (Advanced Edition) - Page 29
press Enter. The display shows Completed and returns to the basic screen. Using the Platen Top Edge to Rear Rear Top Edge to Left Left 2-8 ADVANCED OPERATION GUIDE - Kyocera KM-1820 | 1820 Operation Guide (Advanced Edition) - Page 30
Start. The first original is scanned. 6 Once the scanning operation is completed, Set original and press Start key is displayed. Place the next original on the platen and press Start. The next original is scanned. 7 Repeat step 6 until all originals have been scanned. ADVANCED OPERATION GUIDE 2-9 - Kyocera KM-1820 | 1820 Operation Guide (Advanced Edition) - Page 31
under each setting. Color Scan Mode Selectable File Formats Full Color Grayscale Monochrome PDF, JPEG PDF, JPEG PDF, TIFF Compression Level 5 5 None When JPEG is selected, the Original File Name Entry and press Enter. The File Name Entry screen is displayed. 2-10 ADVANCED OPERATION GUIDE - Kyocera KM-1820 | 1820 Operation Guide (Advanced Edition) - Page 32
scanned image is attached can be edited according to preference. Change the subject and the message manually as necessary. On is displayed on the basic screen when any characters are entered in the Enter. The display shows Completed and returns to the basic screen. ADVANCED OPERATION GUIDE 2-11 - Kyocera KM-1820 | 1820 Operation Guide (Advanced Edition) - Page 33
be sent. 2 Press Enter. The display shows Completed and returns to the Function screen. 3 Press right Select. The display returns to the basic screen. 2-12 ADVANCED OPERATION GUIDE - Kyocera KM-1820 | 1820 Operation Guide (Advanced Edition) - Page 34
Plug and Play screen appears, click Cancel. 2 Install the TWAIN Driver from the CD-ROM on your PC. Follow the Wizard instructions to continue the installation procedure. 3 From the Start menu, select All Programs > Kyocera >TWAIN Driver setting. The Scanner List dialog box will be displayed. 4 Click - Kyocera KM-1820 | 1820 Operation Guide (Advanced Edition) - Page 35
TWAIN-compatible application to scan from your PC. 4 Choose the appropriate settings and click Scan. The scanned data will be sent to your PC. 2-14 ADVANCED OPERATION GUIDE - Kyocera KM-1820 | 1820 Operation Guide (Advanced Edition) - Page 36
operation panel. To make settings using COMMAND CENTER, refer to Using COMMAND CENTER on page 8-1. Parallel Setting The parallel interface supports a bi-directional/high-speed mode according to IEEE standards. Use a parallel printer mode if printing problems occur when ADVANCED OPERATION GUIDE 3-1 - Kyocera KM-1820 | 1820 Operation Guide (Advanced Edition) - Page 37
paper sizes for the cassette(s) and MP tray È Install and set-up the printer driver (Refer to the Kyocera Extended Driver (KX Driver) User Guide). È Print out from the application Network settings The display shows Completed and returns to the Network Setting screen. 3-2 ADVANCED OPERATION GUIDE - Kyocera KM-1820 | 1820 Operation Guide (Advanced Edition) - Page 38
Printer Settings TCP/IP Setting Turn this setting On when this machine is connected to a Windows network, etc., using TCP/IP. System Menu/ Counter vii. 2 To use DHCP, select On and press Enter. The display shows Completed and returns to the TCP/IP Setting screen. ADVANCED OPERATION GUIDE 3-3 - Kyocera KM-1820 | 1820 Operation Guide (Advanced Edition) - Page 39
Printer Settings IP Address Setting The IP address that should be error in entering a portion of the IP address, press W to return to the previous block of digits and re-enter the correct number. 4 Register the Subnet Mask. Refer to Subnet Mask Setting on page 3-5. 3-4 ADVANCED OPERATION GUIDE - Kyocera KM-1820 | 1820 Operation Guide (Advanced Edition) - Page 40
Printer Settings Subnet Mask Setting Specifies the Subnet Mask configured on the printing the TCP/IP Setting screen. If you make an error in entering a portion of the default gateway, press W to return to the previous block of digits and re-enter the correct number. ADVANCED OPERATION GUIDE 3-5 - Kyocera KM-1820 | 1820 Operation Guide (Advanced Edition) - Page 41
the alternative mode, and press Enter. The KPDL Err Rep screen is displayed. 5 Select whether or not a report is to be printed out upon a KPDL error, and press Enter. The display shows Completed and returns to the Printer Setting screen. 3-6 ADVANCED OPERATION GUIDE - Kyocera KM-1820 | 1820 Operation Guide (Advanced Edition) - Page 42
This chapter contains explanations on the aspects of this machine for which the current operation status can be verified. Some of the procedures shown in this chapter can also be successfully completed or has been canceled. Group destination. Contact destination ADVANCED OPERATION GUIDE 4-1 - Kyocera KM-1820 | 1820 Operation Guide (Advanced Edition) - Page 43
Operation Status Checking Jobs Status Status/Job Cancel S or T Status Menu Enter S or T Print Job Status Enter 1 Access Print Job Status. of jobs is paused, refer to Resuming Jobs on page 4-3. To cancel a job, refer to Canceling Jobs During Pausing on page 4-3. 4-2 ADVANCED OPERATION GUIDE - Kyocera KM-1820 | 1820 Operation Guide (Advanced Edition) - Page 44
Operation Status Canceling Jobs During Pausing Jobs can also be canceled from the Print Job Status or Send Job Status screens. For more information, to the Print Job Status or Send Job Status screen and the canceled job is deleted from the list of jobs being processed. ADVANCED OPERATION GUIDE 4-3 - Kyocera KM-1820 | 1820 Operation Guide (Advanced Edition) - Page 45
to replace the toner container. 1 Access Toner Status. If you are unsure how to use this route map refer to Accessing Menu Items on page vii. 2 Once you have completed verifying the amount of remaining toner, press Enter. The display returns to the Status Menu screen. 4-4 ADVANCED OPERATION GUIDE - Kyocera KM-1820 | 1820 Operation Guide (Advanced Edition) - Page 46
in the list may vary depending on the optional units installed in the machine. You can check the machine's current status print out lists of the internal fonts or the optional fonts including downloaded fonts. Procedure to Print Reports System Menu/ Counter S or T ADVANCED OPERATION GUIDE 4-5 - Kyocera KM-1820 | 1820 Operation Guide (Advanced Edition) - Page 47
it is possible to change between the functions of the counter as shown below: Item Function Printed Pages Copier, FAX (option), Printer, Total Scanned Pages Copier, Other, Total 4 When you have verified the counter, press Enter. The Counter screen is displayed. 4-6 ADVANCED OPERATION GUIDE - Kyocera KM-1820 | 1820 Operation Guide (Advanced Edition) - Page 48
message display from English, Français, Deutsch, Italiano, Nederlands, Español, Português, and optionally download messages in other languages. Contact your dealer for information. System Menu/ Counter S or T shows Completed and returns to the Common Setting screen. ADVANCED OPERATION GUIDE 5-1 - Kyocera KM-1820 | 1820 Operation Guide (Advanced Edition) - Page 49
map refer to Accessing Menu Items on page vii. 2 Press S or T to select the default operation mode required and press Enter. The display shows Completed and returns to the Common Setting screen. Unit The display shows Completed and returns to the Common Setting screen. 5-2 ADVANCED OPERATION GUIDE - Kyocera KM-1820 | 1820 Operation Guide (Advanced Edition) - Page 50
Menu Items on page vii. 2 Press S or T to select either On or Off. Press Enter. The display shows Completed and returns to the Adjust screen. ADVANCED OPERATION GUIDE 5-3 - Kyocera KM-1820 | 1820 Operation Guide (Advanced Edition) - Page 51
and returns to the Copy Setting screen. Item Description Error diffusion This is the standard method that should be Toner Gauge Rset and press Enter. Are you sure? is displayed. Press left Select. The display shows Completed and returns to the Toner Setting screen. 5-4 ADVANCED OPERATION GUIDE - Kyocera KM-1820 | 1820 Operation Guide (Advanced Edition) - Page 52
Sup Fine 300 x 300 dpi 400 x 400 Ult Fine 600 x 600 dpi * Text + Photo Photo Text Auto * Manual Auto * 100% Off * On Top Edge to Rear * Top Edge to Left doc File Name Entry/Additional Info. None The display shows Completed and returns to the Function Default screen. ADVANCED OPERATION GUIDE 5-5 - Kyocera KM-1820 | 1820 Operation Guide (Advanced Edition) - Page 53
Keys screen returns. To change an address that is already registered, press Enter. When the message Overwrite Are you sure? is displayed press left Select. 5-6 ADVANCED OPERATION GUIDE - Kyocera KM-1820 | 1820 Operation Guide (Advanced Edition) - Page 54
Functions Up to eight combinations of copy or send option modes and functions displayed on the operation panel can be registered as a single program. Registering a Program System Menu/ Counter . The display shows Registered and returns to the Program Setting screen. ADVANCED OPERATION GUIDE 5-7 - Kyocera KM-1820 | 1820 Operation Guide (Advanced Edition) - Page 55
display shows Called and the Program is loaded. When the destination of a PC folder is registered, the User Login Name and Login Password must be input. 3 Position the originals and press Start. Copy jobs or, on page vii. 2 To restart the machine, press left Select. 5-8 ADVANCED OPERATION GUIDE - Kyocera KM-1820 | 1820 Operation Guide (Advanced Edition) - Page 56
is ended. Load Paper in Cassette1 (Cassette2, MP Tray, or Document Processor). Memory overflow. Part of the job end is printed. Place original and press Start key. Print overrun. This page isn't complete. Remove original from Document Processor. Send error. Toner low. ADVANCED OPERATION GUIDE 5-9 - Kyocera KM-1820 | 1820 Operation Guide (Advanced Edition) - Page 57
or that user-intervention is required. This setting applies when one of the following messages appears on the display. Close Top (or Document Processor) Cover. Error occurred Call service person. Paper Jam at Casssete1 (Casssete2, MP Tray, or Document Processor). Paper Jam in printer. Replace Toner - Kyocera KM-1820 | 1820 Operation Guide (Advanced Edition) - Page 58
the Date/Timer Set screen. Date Format The display sequence of the date which is displayed at the operating panel can be changed to Month/Day/Year, Day/Month/Year or Year/Month/Day. System Menu/ display shows Completed and returns to the Date/Timer Set screen. ADVANCED OPERATION GUIDE 5-11 - Kyocera KM-1820 | 1820 Operation Guide (Advanced Edition) - Page 59
Auto Panel Reset function automatically returns the machine to the default settings when no operation has been performed on the machine or operation panel for a pre-set period of between 5 and 495 seconds. The to the Date/Timer Set screen. Auto Panel Reset Enter 5-12 ADVANCED OPERATION GUIDE - Kyocera KM-1820 | 1820 Operation Guide (Advanced Edition) - Page 60
before the machine enters sleep mode. The factory default time is 30 minutes. To engage auto sleep manually, press and hold Reset/Power for at least three seconds. Auto sleep will engage immediately. The machine wakes from auto sleep whenever you press Reset/Power. ADVANCED OPERATION GUIDE 5-13 - Kyocera KM-1820 | 1820 Operation Guide (Advanced Edition) - Page 61
Enabling Auto Error Clear 1 Access Auto Err. Clear. If you are unsure how to use this route map refer to Accessing Menu Items on page vii. 2 Press S or T to select either On or Off and press Enter. The display shows Completed and returns to the Date/Timer Set screen. 5-14 ADVANCED OPERATION GUIDE - Kyocera KM-1820 | 1820 Operation Guide (Advanced Edition) - Page 62
System Settings Error Clear Time System Menu/ Counter S or T Date/Timer Set Enter S or T Err. Clear Timer Enter 1 Access Err. Clear Timer. If keys to select the recovery time and press Enter. The display shows Completed and returns to the Date/Timer Set screen. ADVANCED OPERATION GUIDE 5-15 - Kyocera KM-1820 | 1820 Operation Guide (Advanced Edition) - Page 63
not registered in this machine (non-standard size), it is convenient to register that size in advance. You can register a custom original size within the following ranges: Measurement X Range Inch Registered and returns to the Orig. /Paper Set screen. 5-16 ADVANCED OPERATION GUIDE - Kyocera KM-1820 | 1820 Operation Guide (Advanced Edition) - Page 64
not registered in this machine (non-standard size), it is convenient to register that size in advance. It is possible to register a custom paper size within the following ranges: Measurement X Range shows Registered and returns to the Orig./Paper Set screen. ADVANCED OPERATION GUIDE 5-17 - Kyocera KM-1820 | 1820 Operation Guide (Advanced Edition) - Page 65
Size and Media Type From the operation panel, you can select the default paper source from which the machine feeds paper. If an optional paper feeder(s) is installed, it is also available for the Back and press Enter. The display returns to the Orig./Paper Set screen. 5-18 ADVANCED OPERATION GUIDE - Kyocera KM-1820 | 1820 Operation Guide (Advanced Edition) - Page 66
screen is displayed. 4 Press S or T to select the print density and press Enter. The display shows Completed and returns to the Media Type Adj screen. ADVANCED OPERATION GUIDE 5-19 - Kyocera KM-1820 | 1820 Operation Guide (Advanced Edition) - Page 67
System Settings Selecting the Paper Feed Source If an optional paper feeder is installed, it is also available for the default paper source. System Menu/ Counter S or T Common Setting Enter Enter. The display shows Completed and returns to the Copy Setting screen. 5-20 ADVANCED OPERATION GUIDE - Kyocera KM-1820 | 1820 Operation Guide (Advanced Edition) - Page 68
. 6 Enter the destination and press Enter. The Detail screen returns. When completed, press Enter. The display shows Registered and returns to the Edit Addressbook screen. ADVANCED OPERATION GUIDE 5-21 - Kyocera KM-1820 | 1820 Operation Guide (Advanced Edition) - Page 69
, press left Select. The Detail Group Member screen is displayed. 11 Press Enter. The display shows Registered and returns to the Edit Addressbook screen. 5-22 ADVANCED OPERATION GUIDE - Kyocera KM-1820 | 1820 Operation Guide (Advanced Edition) - Page 70
, it is also deleted inside group address. 4 Press Enter. Deleted is displayed and the address is deleted. The display returns to the Edit Addressbook screen. ADVANCED OPERATION GUIDE 5-23 - Kyocera KM-1820 | 1820 Operation Guide (Advanced Edition) - Page 71
settings and environments of use for this machine. Lists information on the network settings. 1 Access Service Setting. If you are unsure how to use this route map refer to Accessing Menu Items the report will begin. The display returns to the Service Setting screen. 5-24 ADVANCED OPERATION GUIDE - Kyocera KM-1820 | 1820 Operation Guide (Advanced Edition) - Page 72
to enter an administrator's User ID, press T and enter an administrator's Password and press Enter before the User/Job Account screen is displayed. 2 Press S or T to select On or Off and press Enter. The display shows Completed and returns to the User Login Set screen. ADVANCED OPERATION GUIDE 6-1 - Kyocera KM-1820 | 1820 Operation Guide (Advanced Edition) - Page 73
user ID and press Enter. The display shows Registered and returns to a login user screen. 6 Press S or T to select Detail and press Enter. 7 Enter the password of the login user, e-mail address, access level and account. 8 Press Enter. The User List screen returns. 6-2 ADVANCED OPERATION GUIDE - Kyocera KM-1820 | 1820 Operation Guide (Advanced Edition) - Page 74
screen is displayed. 5 Edit the information and press Enter. The Detail screen display returns. 6 On completion, press Enter. The display shows Registered and returns to a User List screen. ADVANCED OPERATION GUIDE 6-3 - Kyocera KM-1820 | 1820 Operation Guide (Advanced Edition) - Page 75
register contents are to be modified, press right Select. An edit screen is displayed. 4 Edit the property and press Enter. The User Property screen display returns. 5 On completion, press Enter. The display shows Registered and the Sys. Menu/Counter screen returns. 6-4 ADVANCED OPERATION GUIDE - Kyocera KM-1820 | 1820 Operation Guide (Advanced Edition) - Page 76
an administrator's User ID, press T and enter an administrator's Password and press Enter before the User/Job Account screen is displayed. 2 Press S or T to select Reject or Permit and press Enter. The display shows Completed and the User/Job Account screen returns. ADVANCED OPERATION GUIDE 6-5 - Kyocera KM-1820 | 1820 Operation Guide (Advanced Edition) - Page 77
User Login Management 6-6 ADVANCED OPERATION GUIDE - Kyocera KM-1820 | 1820 Operation Guide (Advanced Edition) - Page 78
refer to the Kyocera Extended Driver (KX Driver) User Guide for computer settings required for using job accounting for printer functions Enabling Job Accounting System Menu/ Counter S or T User/Job Account Press right Select. The display returns to the basic screen. ADVANCED OPERATION GUIDE 7-1 - Kyocera KM-1820 | 1820 Operation Guide (Advanced Edition) - Page 79
to Split. System Menu/ Counter S or T User/Job Account Enter S or T Job Account. Copier and press right Select. 4 Press S or T to select On and press Enter. 5 Enter the maximum pages and press Enter. 6 Press left Select twice. The display returns to the basic screen. 7-2 ADVANCED OPERATION GUIDE - Kyocera KM-1820 | 1820 Operation Guide (Advanced Edition) - Page 80
the limitation and press Enter. 3 Press S or T to select Print Limit.: Printer and press right Select. 4 Press S or T to select On and press to the basic screen. Scanning Limitation System Menu/ Counter S or T User/Job Account Enter S or T Job Account. Set Enter S or ADVANCED OPERATION GUIDE 7-3 - Kyocera KM-1820 | 1820 Operation Guide (Advanced Edition) - Page 81
The display returns to the basic screen. All Account Management Confirming the counter System Menu/ Counter S or T User/Job Account Enter S or T Job Account. Set Enter 1 Access Job Account. Set. If you are pages, FAX TX pages and FAX TX time and press Enter. 7-4 ADVANCED OPERATION GUIDE - Kyocera KM-1820 | 1820 Operation Guide (Advanced Edition) - Page 82
, FAX TX pages and FAX TX time and press Enter. Resetting the counter System Menu/ Counter S or T User/Job Account Enter S or T Job Account. Set Enter 1 Access Job Account. Set. If you are unsure . 6 Press right Select. The display returns to the basic screen. ADVANCED OPERATION GUIDE 7-5 - Kyocera KM-1820 | 1820 Operation Guide (Advanced Edition) - Page 83
Job Accounting Job Accounting Report System Menu/ Counter S or T User/Job Account Enter S or T Job Account. Set Enter 1 Access Job Account. Set. If you are Select. The job accounting report is printed. 4 Press right Select. The display returns to the basic screen. 7-6 ADVANCED OPERATION GUIDE - Kyocera KM-1820 | 1820 Operation Guide (Advanced Edition) - Page 84
can select whether to add the copying counter to the printing counter or not. System Menu/ Counter S or T User/Job Account Enter S or T Job Account. Set Enter 1 Access Job Account. Set. If you are unsure 5 Press right Select. The display returns to the basic screen. ADVANCED OPERATION GUIDE 7-7 - Kyocera KM-1820 | 1820 Operation Guide (Advanced Edition) - Page 85
code, press Stop/Clear and re-enter the code. 2 Perform normal copier or send operations. 3 On completion, press Log Out. Printer Operation With job accounting enabled, operation on the computer is required for printing. For details, contact your system administrator. 7-8 ADVANCED OPERATION GUIDE - Kyocera KM-1820 | 1820 Operation Guide (Advanced Edition) - Page 86
be accessed from a PC if the TCP/ IP protocol is installed on the PC and the IP address has been configured for the machine. Required operating systems (OS) for using COMMAND CENTER: • Microsoft Windows 98SE/ME the elements in the drop down list may appear in English. ADVANCED OPERATION GUIDE 8-1 - Kyocera KM-1820 | 1820 Operation Guide (Advanced Edition) - Page 87
been set, enter a user name and password. The administrator password may be defined on the Basic page. If prompted to enter User name and Password, any value may be entered for User Name (including leaving it blank). For Password, enter COMMAND CENTER Admin password. 8-2 ADVANCED OPERATION GUIDE - Kyocera KM-1820 | 1820 Operation Guide (Advanced Edition) - Page 88
Advanced Page Job Page Fax Page Scanner Page Printer Page Basic Page Start Page Page Start page Basic page Printer page Scanner page Description This page allows you to verify this machine's operating machine, such as Default Scan Resolution and Original Placement. ADVANCED OPERATION GUIDE 8-3 - Kyocera KM-1820 | 1820 Operation Guide (Advanced Edition) - Page 89
to 0%, the smaller the amount of remaining toner. This allows you to verify the following information: IP Address, Host Name, MAC Address, System Firmware, Engine Firmware, Serial Number, and Asset Number. This shows paper size and media type for cassettes and MP tray. 8-4 ADVANCED OPERATION GUIDE - Kyocera KM-1820 | 1820 Operation Guide (Advanced Edition) - Page 90
that were made on the operation panel or using COMMAND CENTER. Item Network > General Network > IP Filters Network > POP3/ SMTP Network > Logical Printer Network > Netware Device/Printer Scanner Fax Jobs > Print Job pages and the number of prints made on the machine. ADVANCED OPERATION GUIDE 8-5 - Kyocera KM-1820 | 1820 Operation Guide (Advanced Edition) - Page 91
User Logins. For more information on other items, refer to Jobs Page on page 8-17. This shows details of the machine and COMMAND CENTER. Start > Links Visit the following web site for more information and downloads. Item Download Drivers Kyocera Mita the printer and ADVANCED OPERATION GUIDE - Kyocera KM-1820 | 1820 Operation Guide (Advanced Edition) - Page 92
the User Login page. 2 Click the desired number or name to edit the user and modify their information. 3 Click Submit. Deleting the User Login 1 Open the User Login page. 2 Check the desired user. If you check ID, all users will be checked. 3 Click Delete. 4 Click Delete. ADVANCED OPERATION GUIDE - Kyocera KM-1820 | 1820 Operation Guide (Advanced Edition) - Page 93
for the printing system network component. This name is also used as the NetBEUI Printer Name and the SNMP sysName object. Assigns the Internet Protocol address on the printing system server. Displays the results of the synchronization operation with the time server. 8-8 ADVANCED OPERATION GUIDE - Kyocera KM-1820 | 1820 Operation Guide (Advanced Edition) - Page 94
Français, Deutsch, Italiano, Nederlands, Español, Português, and the downloaded languages You can optionally download messages in other languages. Contact your dealer for information. Adjusts the low a fax number even if the FAX System is not installed. 4 Click Submit. ADVANCED OPERATION GUIDE 8-9 - Kyocera KM-1820 | 1820 Operation Guide (Advanced Edition) - Page 95
Group 1 Open the Address Book Groups page. 2 Click Add Group and enter the information of the user to be used for the User Login. 3 Enter the number and name of the group. 4 Click Submit. Editing the Group 1 page will be checked. 3 Click Delete Group. 4 Click Delete. 8-10 ADVANCED OPERATION GUIDE - Kyocera KM-1820 | 1820 Operation Guide (Advanced Edition) - Page 96
printer settings will be overridden by the printer driver settings. Settings that affect the machine, such as locking the operation panel, are found under Basic page. Printer EcoPrint On or Off to reduce the amount of toner used. The default setting is Off. Changes the ADVANCED OPERATION GUIDE 8-11 - Kyocera KM-1820 | 1820 Operation Guide (Advanced Edition) - Page 97
the port number to be used by FTP. Scanner > SMB The table below provides a summary of the items displayed on the Scanner SMB page. Item SMB Protocol SMB Port Number Description Switches the SMB Protocol on or off. You can enter the port number to be used by SMB. 8-12 ADVANCED OPERATION GUIDE - Kyocera KM-1820 | 1820 Operation Guide (Advanced Edition) - Page 98
number, MAC address and equipment ID by entering any of the following conversion strings: - %printer = Model - %serial = Serial Number - %etheraddr = MAC Address - %equipid = Equipment ID You can enter the information that you want to appear in the body of the e-mail. ADVANCED OPERATION GUIDE 8-13 - Kyocera KM-1820 | 1820 Operation Guide (Advanced Edition) - Page 99
. Specifies your FAX system ID. Sets the type of phone line to correspond to the type of telephone service that you are using. Be sure that the type of phone line you select is correct because, if . Selects the TTI position to be printed on the transmitted documents. 8-14 ADVANCED OPERATION GUIDE - Kyocera KM-1820 | 1820 Operation Guide (Advanced Edition) - Page 100
depending on the destination. The choices are Auto (Normal, FAX/TEL, TAD or DRD) or Manual. Selects the DRD pattern. This menu is available only for certain destination. Selects On or Off whether Specifies the number of rings for Auto FAX reception (FAX/TEL). ADVANCED OPERATION GUIDE 8-15 - Kyocera KM-1820 | 1820 Operation Guide (Advanced Edition) - Page 101
Settings Description Enables or disables the fax forwarding. Selects the file format, TIFF or PDF, of the forwarding documents. Selects the forwarding time between Time Specification and All Day. key in hexadecimal. The length of the encryption key is 16 digits. 8-16 ADVANCED OPERATION GUIDE - Kyocera KM-1820 | 1820 Operation Guide (Advanced Edition) - Page 102
Status Status > Store Job Status Schedule Log > Print Job Log Log > Send Job Log Log > Store Job Log Description Shows the job status for each operation. Shows the scheduled job such as fax delayed transmission. Shows the job jog for each operation. ADVANCED OPERATION GUIDE 8-17 - Kyocera KM-1820 | 1820 Operation Guide (Advanced Edition) - Page 103
kyoceramita.com. It should not include the host printer name. WINS Server (Primary, The IP address of the primary and secondary Windows Internet Name Service Secondary) (WINS) servers. Scope ID This . FTP Status Check Enables or disables the FTP Status Check. 8-18 ADVANCED OPERATION GUIDE - Kyocera KM-1820 | 1820 Operation Guide (Advanced Edition) - Page 104
string if it is necessary to transmit the control code before printing. Specifies the character string sent to the printer after directly outputting to the output port (lp port). Specify a character string, if it is necessary, to send a control code after printing. ADVANCED OPERATION GUIDE 8-19 - Kyocera KM-1820 | 1820 Operation Guide (Advanced Edition) - Page 105
Using COMMAND CENTER Advanced > Protocols > Netware This printing system supports both NDS and bindery printing in either print server mode or remote printer mode. NetWare setup requires installation of the following client software and logon with Administrator Privileges. If you are unsure, please - Kyocera KM-1820 | 1820 Operation Guide (Advanced Edition) - Page 106
> TCP/IP > General). If you want to change the NetBEUI printer name, change the TCP/IP Host Name. Workgroup represents the workgroup which will appear in Entire Network in Windows Network Neighborhood. You can enter comments here. (This can also be left blank.) ADVANCED OPERATION GUIDE 8-21 - Kyocera KM-1820 | 1820 Operation Guide (Advanced Edition) - Page 107
before SMTP as the protocol. The SMTP authentication supports Microsoft Exchange 2000. Authenticate as Authentication can mail address of the person responsible for the printing system, such as the printer administrator, so that a reply or non-delivery report will go to a ADVANCED OPERATION GUIDE - Kyocera KM-1820 | 1820 Operation Guide (Advanced Edition) - Page 108
printer = Model - %serial = Serial Number - %etheraddr = MAC Address - %host = Host Name - %ip = IP Address Choose the events you want to be reported. These events are: - Add Paper - Low Toner - Add Toner - Cover Open - Paper Jam - All Other Errors e-mail addresses. ADVANCED OPERATION GUIDE 8-23 - Kyocera KM-1820 | 1820 Operation Guide (Advanced Edition) - Page 109
APOP Test Delete e-mail after retrieval E-mail size limit Cover Page Description Enables or disables this user number. Enter the e-mail address. Enter the server name. Enter the server port number or size is disabled. Enables or disables the sending of a cover page. 8-24 ADVANCED OPERATION GUIDE - Kyocera KM-1820 | 1820 Operation Guide (Advanced Edition) - Page 110
trap to be generated including Add Paper, Low Toner, Add Toner, Cover Open, Paper Jam, and All Other Errors. Advanced > Management > LDAP The FAX System can refer Specifies the user name to login to the LDAP server. Specifies the password to login to the LDAP server. ADVANCED OPERATION GUIDE 8-25 - Kyocera KM-1820 | 1820 Operation Guide (Advanced Edition) - Page 111
the LDAP address book. Specifies a base object which indicates the starting point in the tree structure of the database for the LDAP directory searching. 8-26 ADVANCED OPERATION GUIDE - Kyocera KM-1820 | 1820 Operation Guide (Advanced Edition) - Page 112
and should comprise the following Subject Conversion Strings: - %printer = Model - %serial = Serial Number - %etheraddr = MAC Address - %equipid = Equipment ID Set the time when the report will be sent. You can test this by pressing the "Run once now:" Send button. ADVANCED OPERATION GUIDE 8-27 - Kyocera KM-1820 | 1820 Operation Guide (Advanced Edition) - Page 113
operation using COMMAND CENTER? Use a browser application that page 8-1 supports COMMAND CENTER. Has the administrator set a password? Enter the password. page 8-6 Is the printer or scanner currently in operation? Wait until the operation has - been completed. 8-28 ADVANCED OPERATION GUIDE - Kyocera KM-1820 | 1820 Operation Guide (Advanced Edition) - Page 114
click the Restart button after making the settings? - Is there an error message shown in the display? Corrective Action Reference Click the Submit or service center. Follow the appropriate procedure on the troubleshooting page of Operation Guide. Operation Guide ADVANCED OPERATION GUIDE 8- - Kyocera KM-1820 | 1820 Operation Guide (Advanced Edition) - Page 115
Using COMMAND CENTER 8-30 ADVANCED OPERATION GUIDE - Kyocera KM-1820 | 1820 Operation Guide (Advanced Edition) - Page 116
9 Optional Equipment Available Options The following options are available for use with your machine. Paper Feeder Document Processor Expansion Memory FAX System ADVANCED OPERATION GUIDE 9-1 - Kyocera KM-1820 | 1820 Operation Guide (Advanced Edition) - Page 117
wet. • Folded originals - smooth out the folds before setting them in the document processor. Failure to do so may result in the originals being jammed. 9-2 ADVANCED OPERATION GUIDE - Kyocera KM-1820 | 1820 Operation Guide (Advanced Edition) - Page 118
Optional Equipment Machine Parts 1 Left Cover - Open this cover if an original jam occurs. 12 34 5 2 Original Insert Guides - Align these guides to fit the guide. Slide the leading edge of the originals securely into the document processor as far as they will go. ADVANCED OPERATION GUIDE 9-3 - Kyocera KM-1820 | 1820 Operation Guide (Advanced Edition) - Page 119
memory up to 320 MB, remove the 32 MB DIMM that is installed at the factory and install a 256 MB DIMM. NOTE: We recommend that expansion memory is installed by your dealer. We shall not be liable for any damages caused by improper installation of expansion memory. 9-4 ADVANCED OPERATION GUIDE - Kyocera KM-1820 | 1820 Operation Guide (Advanced Edition) - Page 120
socket. 5 When you have completed installing DIMM, replace the side cover and fasten it with the right cover anchor pin. FAX System Installing the FAX System on the machine enables the facsimile function. For details, refer to the Operation Guide for the FAX System. ADVANCED OPERATION GUIDE 9-5 - Kyocera KM-1820 | 1820 Operation Guide (Advanced Edition) - Page 121
Optional Equipment 9-6 ADVANCED OPERATION GUIDE - Kyocera KM-1820 | 1820 Operation Guide (Advanced Edition) - Page 122
by ensuring efficient, trouble-free printing and reducing Paper intended for xerographic copiers can also be printer cannot produce high-quality results when the wrong paper is used. Low-priced paper is not economical in the long run if it causes printing problems ADVANCED OPERATION GUIDE Appendix-1 - Kyocera KM-1820 | 1820 Operation Guide (Advanced Edition) - Page 123
more Selecting the Right Paper Laser printing is a process involving laser light, electrostatic discharge, toner, and heat. In addition, as the paper passes through the machine it undergoes considerable sliding content should consist of cotton or other fibers. Appendix-2 ADVANCED OPERATION GUIDE - Kyocera KM-1820 | 1820 Operation Guide (Advanced Edition) - Page 124
. Paper with a rough or sandy surface can cause voids in the printed output. Paper that is too smooth, however, can cause multiple feeding and fogging problems. (Fogging is a gray background effect.) ADVANCED OPERATION GUIDE Appendix-3 - Kyocera KM-1820 | 1820 Operation Guide (Advanced Edition) - Page 125
electrostatic properties, and toner fusing characteristics. problems in the machine. All paper used in the machine should be long grain. Other Paper Properties Porosity: Refers to the density of the paper structure; that is, to how openly or compactly the fibers are bonded. ADVANCED OPERATION GUIDE - Kyocera KM-1820 | 1820 Operation Guide (Advanced Edition) - Page 126
. Loading instructions are usually toner problems with copiers ( trouble during operator. NOTE: Before purchasing any type of special paper, test a sample on the machine and check that printing quality is satisfactory. Specifications for each type of special paper follow. ADVANCED OPERATION GUIDE - Kyocera KM-1820 | 1820 Operation Guide (Advanced Edition) - Page 127
part of the machine. Adhesive paper sticking to the drum or rollers will damage the machine. Label paper must be manually , adhesive-backed label paper is particularly likely to give trouble in printing. Top sheet (white bond paper) Adhesive problems. Appendix-6 ADVANCED OPERATION GUIDE - Kyocera KM-1820 | 1820 Operation Guide (Advanced Edition) - Page 128
using paper with a basis weight of 60 to 79 g/ m² (16 to 21 lb/ream). Envelopes must be manually fed. An envelope is a more complex object than a single sheet of paper. For this reason, it may with the machine, test a sample to verify the envelope's suitability. ADVANCED OPERATION GUIDE Appendix-7 - Kyocera KM-1820 | 1820 Operation Guide (Advanced Edition) - Page 129
Avoid long printing runs consisting of envelopes only. Extensive envelope printing can cause premature printer wear. To avoid jamming due to curled envelopes, do not leave more than approximately on the machine and check that the printing quality is satisfactory. Appendix-8 ADVANCED OPERATION GUIDE - Kyocera KM-1820 | 1820 Operation Guide (Advanced Edition) - Page 130
type for the paper source by using COMMAND CENTER will cause the printer to automatically select the paper source and print in the mode the user. Up to eight types of user settings may be defined. For details, Refer to Registering Custom Media Type on page 5-19. ADVANCED OPERATION GUIDE Appendix - Kyocera KM-1820 | 1820 Operation Guide (Advanced Edition) - Page 131
Image quality (Text) 4 Image quality (Photo) 5 Image quality (Text + Photo) 6 Exposure (Manual adjustment) 7 Exposure (Auto Adjustment) 8 Original placement 9 Original size (standard size) 10 Original size scanning will be entered once copying begins. Appendix-10 ADVANCED OPERATION GUIDE - Kyocera KM-1820 | 1820 Operation Guide (Advanced Edition) - Page 132
manual exposure selection. Y4:At least 64 MB of expansion memory is required. Y5:If an addition more than 64 MB of memory is not installed, the scanning resolution will automatically be set to 300 dpi x 300 dpi. Y6:The sending size will be changed to the auto sending size. ADVANCED OPERATION GUIDE - Kyocera KM-1820 | 1820 Operation Guide (Advanced Edition) - Page 133
Appendix-12 ADVANCED OPERATION GUIDE - Kyocera KM-1820 | 1820 Operation Guide (Advanced Edition) - Page 134
is the home page that is installed in this machine. It can be printer and scanner resolution. EcoPrint This is a printing mode that controls toner consumption. Pages printed in the EcoPrint mode are lighter than pages printed in the normal mode. The default setting is Off. ADVANCED OPERATION GUIDE - Kyocera KM-1820 | 1820 Operation Guide (Advanced Edition) - Page 135
bit expresses 65536 levels of gray. IEEE1284 This is a standard established by the Institute of Electrical and Electronic Engineers in 1994 for use when connecting a printer to a computer. ADVANCED OPERATION GUIDE - Kyocera KM-1820 | 1820 Operation Guide (Advanced Edition) - Page 136
printing on envelopes, postcards, transparency sheets, and labels. NetBEUI (NetBIOS Extended User Interface) This is a network protocol which enables the utilization of more advanced functions on small-scale networks than do other protocols such as TCP/IP, etc. ADVANCED OPERATION GUIDE Glossary-3 - Kyocera KM-1820 | 1820 Operation Guide (Advanced Edition) - Page 137
such as Windows NT and Windows 95/98 via network. NetBIOS is used as a subordinate protocol. It is the application software which is used from LAN Manager of MS-DOS age. If the software, Samba was used, it is possible to offer the service which used SMB at UNIX. Glossary-4 ADVANCED OPERATION GUIDE - Kyocera KM-1820 | 1820 Operation Guide (Advanced Edition) - Page 138
network. TWAIN (Tool Without An Interesting Name) A software driver interface between a scanner and other image capturing devices that lets you scan printer supports Hi-Speed USB 2.0. The maximum transfer rate is 480 Mbps and the maximum cable length is 5 meters (16 feet). ADVANCED OPERATION GUIDE - Kyocera KM-1820 | 1820 Operation Guide (Advanced Edition) - Page 139
Glossary Glossary-6 ADVANCED OPERATION GUIDE - Kyocera KM-1820 | 1820 Operation Guide (Advanced Edition) - Page 140
11 ADVANCED OPERATION GUIDE Default gateway 3-5, 8-8, 8-18 Default operation 5-2 Default original size 5-18 Device 8-7 Device Defaults 8-9 DHCP 3-3, 8-8, 8-18 DIMM 9-5 Dithering 5-4 Document processor 1-8, 9-2 Drection and layout 1-6 E EcoPrint 1-10 E-mail address 2-2 Emulation 3-6 Error diffusion - Kyocera KM-1820 | 1820 Operation Guide (Advanced Edition) - Page 141
Appendix-1 ADVANCED OPERATION GUIDE Parallel interface 3-1 Pausing jobs 4-2 PC folder 2-2 PC folder address 2-2 Photo processing 5-4 POP3 8-23 Print override mode 1-11 Printer page 8-11 Printer status 4-4 Program 5-7 R Report 4-5 Reporting 2-12 Reset 8-9 Resetting toner status 5-4 Resolution - Kyocera KM-1820 | 1820 Operation Guide (Advanced Edition) - Page 142
U User login 6-1, 8-7 V Volume 5-9 Z Zoom 1-3, 2-8 Index ADVANCED OPERATION GUIDE Index-3 - Kyocera KM-1820 | 1820 Operation Guide (Advanced Edition) - Page 143
Index Index-4 OPERATION GUIDE - Kyocera KM-1820 | 1820 Operation Guide (Advanced Edition) - Page 144
For best print results and machine performance, we recommend that you use only our original supplies for your products. A1 - Kyocera KM-1820 | 1820 Operation Guide (Advanced Edition) - Page 145
©2004 is a trademark of Kyocera Corporation - Kyocera KM-1820 | 1820 Operation Guide (Advanced Edition) - Page 146
©2005 is a trademark of Kyocera Corporation - Kyocera KM-1820 | 1820 Operation Guide (Advanced Edition) - Page 147
Revision 1.0 2005.2
-
 1
1 -
 2
2 -
 3
3 -
 4
4 -
 5
5 -
 6
6 -
 7
7 -
8
-
9
-
10
-
11
-
12
-
13
-
14
-
15
-
16
-
17
-
18
-
19
-
20
-
21
-
22
-
23
-
24
-
25
-
26
-
27
-
28
-
29
-
30
-
31
-
32
-
33
-
34
-
35
-
36
-
37
-
38
-
39
-
40
-
41
-
42
-
43
-
44
-
45
-
46
-
47
-
48
-
49
-
50
-
51
-
52
-
53
-
54
-
55
-
56
-
57
-
58
-
59
-
60
-
61
-
62
-
63
-
64
-
65
-
66
-
67
-
68
-
69
-
70
-
71
-
72
-
73
-
74
-
75
-
76
-
77
-
78
-
79
-
80
-
81
-
82
-
83
-
84
-
85
-
86
-
87
-
88
-
89
-
90
-
91
-
92
-
93
-
94
-
95
-
96
-
97
-
98
-
99
-
100
-
101
-
102
-
103
-
104
-
105
-
106
-
107
-
108
-
109
-
110
-
111
-
112
-
113
-
114
-
115
-
116
-
117
-
118
-
119
-
120
-
121
-
122
-
123
-
124
-
125
-
126
-
127
-
128
-
129
-
130
-
131
-
132
-
133
-
134
-
135
-
136
-
137
-
138
-
139
-
140
-
141
-
142
-
143
-
144
-
145
-
146
-
147
 |
 |

Advanced Operation Guide
KM-1820