Lexmark 16Z0000 User's Guide - Page 116
Ping the printer, Run the Wireless Setup Utility (Windows users only)
 |
UPC - 734646046657
View all Lexmark 16Z0000 manuals
Add to My Manuals
Save this manual to your list of manuals |
Page 116 highlights
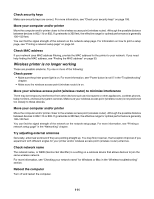
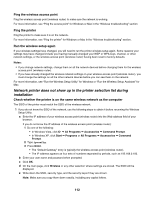
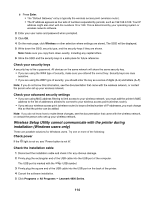
b Select the appropriate connection from the ones shown. Note: If the computer is connected to the access point (router) by an Ethernet cable, the connection may not include the word "wireless" in its name. c Right-click the connection, and then click Repair. Ping the printer 1 Do one of the following: • In Windows Vista, click Œ All Programs Œ Accessories Œ Command Prompt. • In Windows XP, click Start Œ Programs or All Programs Œ Accessories Œ Command Prompt. 2 Type ping followed by the IP address of the printer. For example, ping 192.168.0.25 3 Press Enter. 4 If the printer responds, you will see several lines appear that start with "Reply from". Turn off and restart the printer, and then try resending your print job. 5 If the printer does not respond, you will see "Request timed out." a Check that the computer has a wireless IP address. 1 Do one of the following: • In Windows Vista, click Œ All Programs Œ Accessories Œ Command Prompt. • In Windows XP, click Start Œ Programs or All Programs Œ Accessories Œ Command Prompt. 2 Type ipconfig. 3 Press Enter. 4 Check the Windows IP Configuration screen that appears for the wireless IP address of the computer. Note: Your computer may have an IP address for a wired network, a wireless network, or both. 5 If your computer does not have an IP address, see the documentation that came with your wireless access point (wireless router) to learn how to connect your computer to the wireless network. b The printer may need to be reconfigured for new wireless network settings. For more information, see "Run the Wireless Setup Utility". Run the Wireless Setup Utility (Windows users only) 1 Click Programs or All Programs Œ Lexmark 4800 Series. 2 Click Wireless Setup Utility. Note: You may be prompted to connect the printer to the computer again using the installation cable as part of the setup process. 3 Follow the instructions on the computer screen. Changing wireless settings after installation To change your password, network name, or other wireless setting, rerun the wireless setup. For more information, see "Run the Wireless Setup Utility" for Windows or the "Run the Wireless Setup Assistant" for Mac. 116
-
 1
1 -
2
-
3
-
4
-
5
-
6
-
7
-
8
-
9
-
10
-
11
-
12
-
13
-
14
-
15
-
16
-
17
-
18
-
19
-
20
-
21
-
22
-
23
-
24
-
25
-
26
-
27
-
28
-
29
-
30
-
31
-
32
-
33
-
34
-
35
-
36
-
37
-
38
-
39
-
40
-
41
-
42
-
43
-
44
-
45
-
46
-
47
-
48
-
49
-
50
-
51
-
52
-
53
-
54
-
55
-
56
-
57
-
58
-
59
-
60
-
61
-
62
-
63
-
64
-
65
-
66
-
67
-
68
-
69
-
70
-
71
-
72
-
73
-
74
-
75
-
76
-
77
-
78
-
79
-
80
-
81
-
82
-
83
-
84
-
85
-
86
-
87
-
88
-
89
-
90
-
91
-
92
-
93
-
94
-
95
-
96
-
97
-
98
-
99
-
100
-
101
-
102
-
103
-
104
-
105
-
106
-
107
-
108
-
109
-
110
-
 111
111 -
 112
112 -
 113
113 -
 114
114 -
 115
115 -
 116
116 -
 117
117 -
 118
118 -
 119
119 -
 120
120 -
 121
121 -
122
-
123
-
124
-
125
-
126
-
127
-
128
-
129
-
130
-
131
-
132
-
133
-
134
-
135
-
136
-
137
-
138
-
139
-
140
-
141
-
142
-
143
-
144
-
145
-
146
-
147
-
148
-
149
-
150
-
151
-
152
-
153
-
154
-
155
-
156
-
157
-
158
-
159
-
160
-
161
-
162
-
163
-
164
-
165
-
166
-
167
-
168
-
169
-
170
-
171
-
172
-
173
-
174
-
175
-
176
 |
 |