Lexmark 16Z0000 User's Guide - Page 62
Understanding the PictBridge Default Print Settings menu
 |
UPC - 734646046657
View all Lexmark 16Z0000 manuals
Add to My Manuals
Save this manual to your list of manuals |
Page 62 highlights
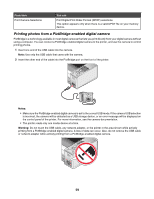
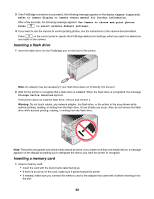
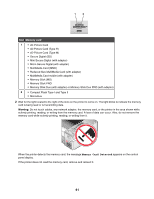
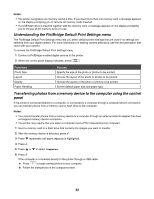
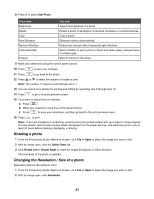
Notes: • The printer recognizes one memory card at a time. If you insert more than one memory card, a message appears on the display prompting you to remove all memory cards inserted. • If a USB flash drive is inserted together with the memory card, a message appears on the display prompting you to choose which memory device to use. Understanding the PictBridge Default Print Settings menu The PictBridge Default Print Settings menu lets you select default printer settings that are used if no settings are selected from your digital camera. For more information on making camera selections, see the documentation that came with your camera. To access the PictBridge Default Print Settings menu: 1 Connect a PictBridge-enabled digital camera to the printer. 2 When the control panel display indicates, press . From here Photo Size Layout Quality Paper Handling You can Specify the size of the photo or photos to be printed. Choose the layout of the photo or photos to be printed. Choose the quality of the photo or photos to be printed. Set the default paper size and paper type. Transferring photos from a memory device to the computer using the control panel If the printer is connected directly to a computer, or connected to a computer through a wireless network connection, you can transfer photos from a memory card or flash drive to the computer. Notes: • You cannot transfer photos from a memory device to a computer through an external network adapter that does not support memory device connection. • The printer may require that you select a computer (and a PIN if required by that computer). 1 Insert a memory card or a flash drive that contains the images you want to transfer. 2 After the memory device is detected, press . 3 Press repeatedly until Save Photos is highlighted. 4 Press . 5 Press or to select Computer. 6 Press . If the computer is connected directly to the printer through a USB cable: a Press to begin saving photos to your computer. b Follow the instructions on the computer screen. 62
-
 1
1 -
2
-
3
-
4
-
5
-
6
-
7
-
8
-
9
-
10
-
11
-
12
-
13
-
14
-
15
-
16
-
17
-
18
-
19
-
20
-
21
-
22
-
23
-
24
-
25
-
26
-
27
-
28
-
29
-
30
-
31
-
32
-
33
-
34
-
35
-
36
-
37
-
38
-
39
-
40
-
41
-
42
-
43
-
44
-
45
-
46
-
47
-
48
-
49
-
50
-
51
-
52
-
53
-
54
-
55
-
56
-
 57
57 -
 58
58 -
 59
59 -
 60
60 -
 61
61 -
 62
62 -
 63
63 -
 64
64 -
 65
65 -
 66
66 -
 67
67 -
68
-
69
-
70
-
71
-
72
-
73
-
74
-
75
-
76
-
77
-
78
-
79
-
80
-
81
-
82
-
83
-
84
-
85
-
86
-
87
-
88
-
89
-
90
-
91
-
92
-
93
-
94
-
95
-
96
-
97
-
98
-
99
-
100
-
101
-
102
-
103
-
104
-
105
-
106
-
107
-
108
-
109
-
110
-
111
-
112
-
113
-
114
-
115
-
116
-
117
-
118
-
119
-
120
-
121
-
122
-
123
-
124
-
125
-
126
-
127
-
128
-
129
-
130
-
131
-
132
-
133
-
134
-
135
-
136
-
137
-
138
-
139
-
140
-
141
-
142
-
143
-
144
-
145
-
146
-
147
-
148
-
149
-
150
-
151
-
152
-
153
-
154
-
155
-
156
-
157
-
158
-
159
-
160
-
161
-
162
-
163
-
164
-
165
-
166
-
167
-
168
-
169
-
170
-
171
-
172
-
173
-
174
-
175
-
176
 |
 |
