Lexmark 16Z0000 User's Guide - Page 97
Aligning print cartridges, Cleaning the print cartridge nozzles
 |
UPC - 734646046657
View all Lexmark 16Z0000 manuals
Add to My Manuals
Save this manual to your list of manuals |
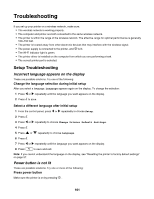
Page 97 highlights
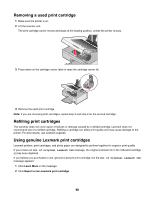
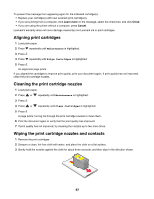
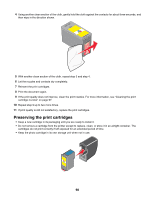
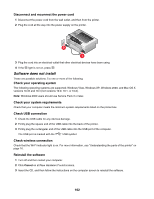
To prevent the message from appearing again for the indicated cartridge(s): • Replace your cartridge(s) with new Lexmark print cartridge(s). • If you are printing from a computer, click Learn more on the message, select the check box, and click Close. • If you are using the printer without a computer, press Cancel. Lexmark's warranty does not cover damage caused by non-Lexmark ink or print cartridges. Aligning print cartridges 1 Load plain paper. 2 Press repeatedly until Maintenance is highlighted. 3 Press . 4 Press repeatedly until Align Cartridges is highlighted. 5 Press . An alignment page prints. If you aligned the cartridges to improve print quality, print your document again. If print quality has not improved, clean the print cartridge nozzles. Cleaning the print cartridge nozzles 1 Load plain paper. 2 Press or repeatedly until Maintenance is highlighted. 3 Press . 4 Press or repeatedly until Clean Cartridges is highlighted. 5 Press . A page prints, forcing ink through the print cartridge nozzles to clean them. 6 Print the document again to verify that the print quality has improved. 7 If print quality has not improved, try cleaning the nozzles up to two more times. Wiping the print cartridge nozzles and contacts 1 Remove the print cartridges. 2 Dampen a clean, lint-free cloth with water, and place the cloth on a flat surface. 3 Gently hold the nozzles against the cloth for about three seconds, and then wipe in the direction shown. 97
-
 1
1 -
2
-
3
-
4
-
5
-
6
-
7
-
8
-
9
-
10
-
11
-
12
-
13
-
14
-
15
-
16
-
17
-
18
-
19
-
20
-
21
-
22
-
23
-
24
-
25
-
26
-
27
-
28
-
29
-
30
-
31
-
32
-
33
-
34
-
35
-
36
-
37
-
38
-
39
-
40
-
41
-
42
-
43
-
44
-
45
-
46
-
47
-
48
-
49
-
50
-
51
-
52
-
53
-
54
-
55
-
56
-
57
-
58
-
59
-
60
-
61
-
62
-
63
-
64
-
65
-
66
-
67
-
68
-
69
-
70
-
71
-
72
-
73
-
74
-
75
-
76
-
77
-
78
-
79
-
80
-
81
-
82
-
83
-
84
-
85
-
86
-
87
-
88
-
89
-
90
-
91
-
 92
92 -
 93
93 -
 94
94 -
 95
95 -
 96
96 -
 97
97 -
 98
98 -
 99
99 -
 100
100 -
 101
101 -
 102
102 -
103
-
104
-
105
-
106
-
107
-
108
-
109
-
110
-
111
-
112
-
113
-
114
-
115
-
116
-
117
-
118
-
119
-
120
-
121
-
122
-
123
-
124
-
125
-
126
-
127
-
128
-
129
-
130
-
131
-
132
-
133
-
134
-
135
-
136
-
137
-
138
-
139
-
140
-
141
-
142
-
143
-
144
-
145
-
146
-
147
-
148
-
149
-
150
-
151
-
152
-
153
-
154
-
155
-
156
-
157
-
158
-
159
-
160
-
161
-
162
-
163
-
164
-
165
-
166
-
167
-
168
-
169
-
170
-
171
-
172
-
173
-
174
-
175
-
176
 |
 |