Lexmark 16Z0000 User's Guide - Page 28
Saving settings, Understanding and using default settings
 |
UPC - 734646046657
View all Lexmark 16Z0000 manuals
Add to My Manuals
Save this manual to your list of manuals |
Page 28 highlights
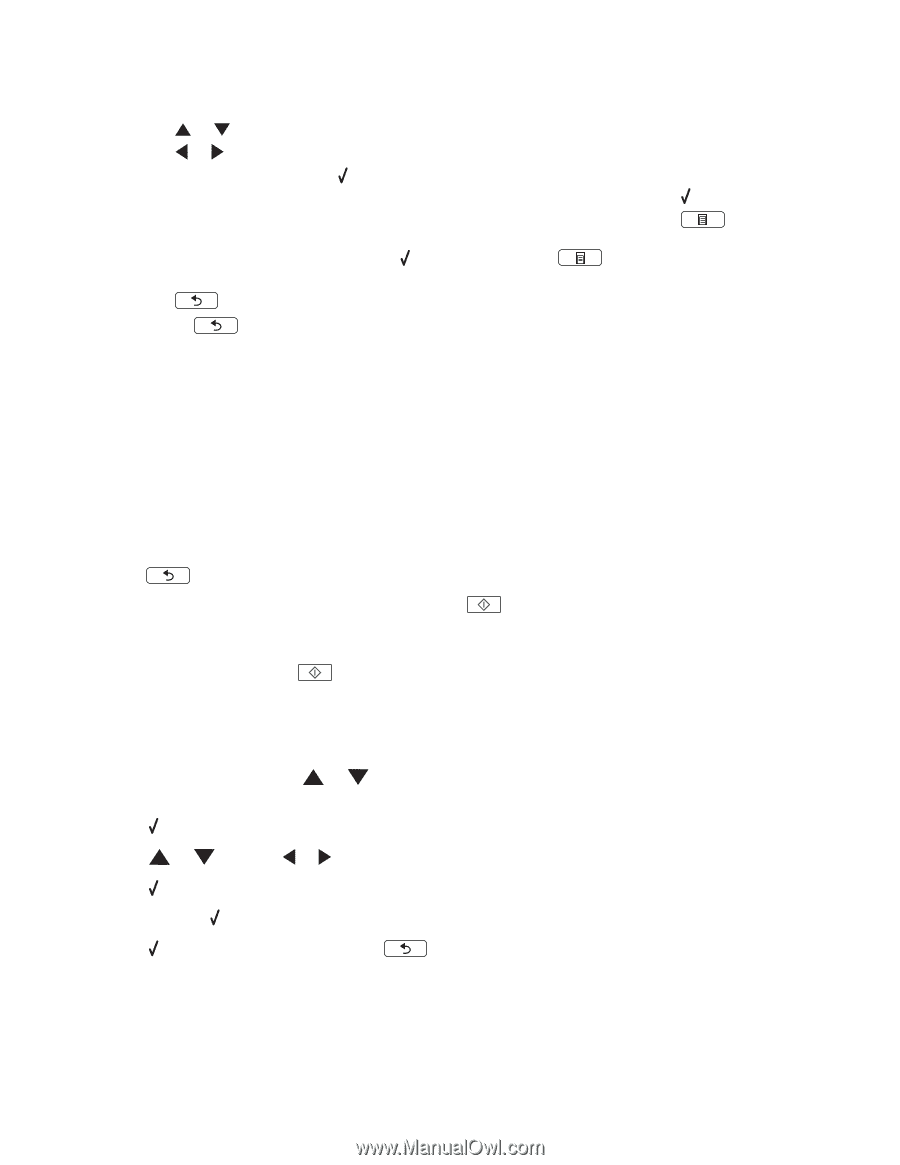
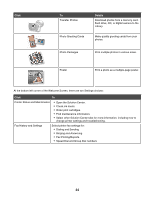
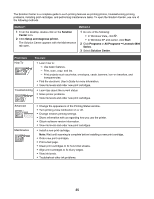
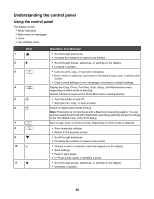
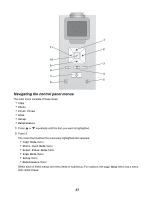
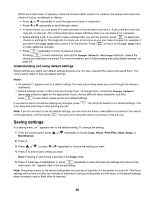
Within each menu item or submenu, there are choices called values. For instance, the Color menu item has values of Color and Black & White. • Press or repeatedly to scroll through menu items or submenus. • Press or repeatedly to scroll through values. • In some menus, you can press to see a preview of the job before you start it. A job could be a print job, copy job, or scan job. The control panel menu screen indicates when you can press for a preview. • Before starting a job, if you want to make a change after you see the preview, press to adjust any choices or settings for this single job. It returns you to the menu so you can make changes. For example, if you were in the Copy Mode menu, press for the preview. Press to make additional changes. to return to the Copy Mode menu • Press repeatedly to return to previous menus. Pressing in some submenus, such as the Change Default Settings submenu, causes the values you selected to be saved. For more information, see "Understanding and using default settings" on page 28. Understanding and using default settings Saved settings are called user default settings because you, the user, selected the values and saved them. The control panel refers to them as default settings. Notes: • An asterisk (*) appears next to a default setting. You may notice these when you scroll through the values in submenus. • Default settings remain in effect until you change them. To change them, access the Change Default Settings submenu again for the appropriate menu, choose different value selections, and then press to save these values as the new default settings. If you want to start a job without making any changes, press is an easy and quick way to start printing any job. . The job prints based on the default settings. This Note: If you do not want to use the default settings, you can enter the menu, make different choices for the values in the submenus, and then press . Your job prints using the values you chose for this job only. Saving settings In a setting menu, an * appears next to the default setting. To change the setting: 1 From the control panel, press or repeatedly to choose Copy, Photo, Print Files, Scan, Setup, or Maintenance. 2 Press . 3 Press or , or press or repeatedly to choose the setting you want. 4 Press to select each setting you want. Note: Pressing also shows a preview in the Copy mode. 5 Press while Yes is highlighted, or press repeatedly to save all temporary settings and return to the main menu. An * appears next to the saved setting. Note: The printer reverts to the default setting after two minutes of inactivity or if the printer is turned off. The Photo settings will not time out after two minutes of inactivity or turning off the power but will return to the default settings when a memory card or flash drive is removed. 28
-
 1
1 -
2
-
3
-
4
-
5
-
6
-
7
-
8
-
9
-
10
-
11
-
12
-
13
-
14
-
15
-
16
-
17
-
18
-
19
-
20
-
21
-
22
-
 23
23 -
 24
24 -
 25
25 -
 26
26 -
 27
27 -
 28
28 -
 29
29 -
 30
30 -
 31
31 -
 32
32 -
 33
33 -
34
-
35
-
36
-
37
-
38
-
39
-
40
-
41
-
42
-
43
-
44
-
45
-
46
-
47
-
48
-
49
-
50
-
51
-
52
-
53
-
54
-
55
-
56
-
57
-
58
-
59
-
60
-
61
-
62
-
63
-
64
-
65
-
66
-
67
-
68
-
69
-
70
-
71
-
72
-
73
-
74
-
75
-
76
-
77
-
78
-
79
-
80
-
81
-
82
-
83
-
84
-
85
-
86
-
87
-
88
-
89
-
90
-
91
-
92
-
93
-
94
-
95
-
96
-
97
-
98
-
99
-
100
-
101
-
102
-
103
-
104
-
105
-
106
-
107
-
108
-
109
-
110
-
111
-
112
-
113
-
114
-
115
-
116
-
117
-
118
-
119
-
120
-
121
-
122
-
123
-
124
-
125
-
126
-
127
-
128
-
129
-
130
-
131
-
132
-
133
-
134
-
135
-
136
-
137
-
138
-
139
-
140
-
141
-
142
-
143
-
144
-
145
-
146
-
147
-
148
-
149
-
150
-
151
-
152
-
153
-
154
-
155
-
156
-
157
-
158
-
159
-
160
-
161
-
162
-
163
-
164
-
165
-
166
-
167
-
168
-
169
-
170
-
171
-
172
-
173
-
174
-
175
-
176
 |
 |