Lexmark 16Z0000 User's Guide - Page 133
Cannot print from digital camera using PictBridge
 |
UPC - 734646046657
View all Lexmark 16Z0000 manuals
Add to My Manuals
Save this manual to your list of manuals |
Page 133 highlights
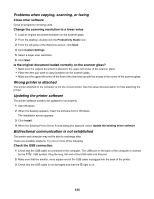
Cannot print from digital camera using PictBridge These are possible solutions. Try one or more of the following: Enable PictBridge printing from camera Enable PictBridge printing on the camera by selecting the correct USB mode. If the camera USB selection is incorrect, the camera will be detected as a USB storage device, or an error message will be displayed on the control panel of the printer. For more information, see the digital camera documentation. Make sure the camera is a PictBridge-enabled digital camera 1 Disconnect the camera. 2 Connect a PictBridge-enabled digital camera to the PictBridge port. See the digital camera documentation to determine whether it is PictBridge-enabled. Check USB cable Use only the USB cable that came with the camera. Remove memory cards Remove any memory cards from the printer. Check messages If an error message appears on the display, see "Error messages on the computer screen" on page 153. Printer cannot communicate with computers over peer-to-peer network These are possible solutions. Try one or more of the following: Check the status of the host computer and printer Make sure: • The host computer is on and is directly connected to the printer. • The host computer can print to the printer. • The printer is shown as Shared in the Printers and Faxes folder (Windows XP and Windows 2000) or Printers folder (Windows Vista) on the host computer. Check the printer status Windows Vista users: 1 Click: • (default Start menu) • (Classic Start menu) Œ Settings Œ Printers. Œ Control Panel Œ Printers. 2 Right-click the Lexmark 4800 Series icon. 3 Click Sharing. 4 Click Change Sharing Options, and confirm the Windows prompt. 5 Select Share this printer, and then give the printer a distinctive name. 6 Click OK. 133
-
 1
1 -
2
-
3
-
4
-
5
-
6
-
7
-
8
-
9
-
10
-
11
-
12
-
13
-
14
-
15
-
16
-
17
-
18
-
19
-
20
-
21
-
22
-
23
-
24
-
25
-
26
-
27
-
28
-
29
-
30
-
31
-
32
-
33
-
34
-
35
-
36
-
37
-
38
-
39
-
40
-
41
-
42
-
43
-
44
-
45
-
46
-
47
-
48
-
49
-
50
-
51
-
52
-
53
-
54
-
55
-
56
-
57
-
58
-
59
-
60
-
61
-
62
-
63
-
64
-
65
-
66
-
67
-
68
-
69
-
70
-
71
-
72
-
73
-
74
-
75
-
76
-
77
-
78
-
79
-
80
-
81
-
82
-
83
-
84
-
85
-
86
-
87
-
88
-
89
-
90
-
91
-
92
-
93
-
94
-
95
-
96
-
97
-
98
-
99
-
100
-
101
-
102
-
103
-
104
-
105
-
106
-
107
-
108
-
109
-
110
-
111
-
112
-
113
-
114
-
115
-
116
-
117
-
118
-
119
-
120
-
121
-
122
-
123
-
124
-
125
-
126
-
127
-
 128
128 -
 129
129 -
 130
130 -
 131
131 -
 132
132 -
 133
133 -
 134
134 -
 135
135 -
 136
136 -
 137
137 -
 138
138 -
139
-
140
-
141
-
142
-
143
-
144
-
145
-
146
-
147
-
148
-
149
-
150
-
151
-
152
-
153
-
154
-
155
-
156
-
157
-
158
-
159
-
160
-
161
-
162
-
163
-
164
-
165
-
166
-
167
-
168
-
169
-
170
-
171
-
172
-
173
-
174
-
175
-
176
 |
 |