Samsung GT-P3113TSYXAR User Manual - Page 42
Joining Contacts
 |
View all Samsung GT-P3113TSYXAR manuals
Add to My Manuals
Save this manual to your list of manuals |
Page 42 highlights
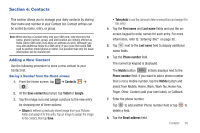
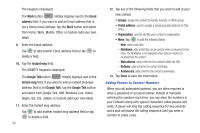
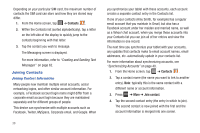
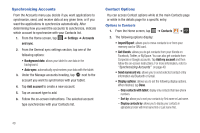
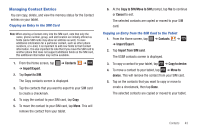
Depending on your particular SIM card, the maximum number of contacts the SIM card can store and how they are stored may differ. 1. From the Home screen, tap ➔ Contacts . 2. Within the Contacts list (sorted alphabetically), tap a letter on the left side of the display to quickly jump to the contacts beginning with that letter. 3. Tap the contact you wish to message. The Messaging screen is displayed. For more information, refer to "Creating and Sending Text Messages" on page 62. Joining Contacts Joining Contact Information Many people now maintain multiple email accounts, social networking logins, and other similar account information. For example, a Facebook account login name might differ from a corporate email account login because they are maintained separately and for different groups of people. This device can synchronize with multiple accounts such as Facebook, Twitter, MySpace, Corporate email, and Google. When 38 you synchronize your tablet with these accounts, each account creates a separate contact entry in the Contacts list. If one of your contacts (Amy Smith, for example) has a regular email account that you maintain in Gmail, but also has a Facebook account under her maiden and married name, as well as a Yahoo! chat account, when you merge these accounts into your Contacts list you can join all of her entries and view the information in one record. The next time you synchronize your tablet with your accounts, any updates that contacts make to email account names, email addresses, etc. automatically update in your contacts list. For more information about synchronizing accounts, see "Synchronizing Accounts" on page 40. 1. From the Home screen, tap ➔ Contacts . 2. Tap a contact name (the name you want to link to another entry). Note: typically this is the same contact with a different name or account information. 3. Press ➔ More ➔ Join contact. 4. Tap the second contact entry (the entry in which to join). The second contact is now joined with the first and the account information is merged into one screen.
-
 1
1 -
2
-
3
-
4
-
5
-
6
-
7
-
8
-
9
-
10
-
11
-
12
-
13
-
14
-
15
-
16
-
17
-
18
-
19
-
20
-
21
-
22
-
23
-
24
-
25
-
26
-
27
-
28
-
29
-
30
-
31
-
32
-
33
-
34
-
35
-
36
-
 37
37 -
 38
38 -
 39
39 -
 40
40 -
 41
41 -
 42
42 -
 43
43 -
 44
44 -
 45
45 -
 46
46 -
 47
47 -
48
-
49
-
50
-
51
-
52
-
53
-
54
-
55
-
56
-
57
-
58
-
59
-
60
-
61
-
62
-
63
-
64
-
65
-
66
-
67
-
68
-
69
-
70
-
71
-
72
-
73
-
74
-
75
-
76
-
77
-
78
-
79
-
80
-
81
-
82
-
83
-
84
-
85
-
86
-
87
-
88
-
89
-
90
-
91
-
92
-
93
-
94
-
95
-
96
-
97
-
98
-
99
-
100
-
101
-
102
-
103
-
104
-
105
-
106
-
107
-
108
-
109
-
110
-
111
-
112
-
113
-
114
-
115
-
116
-
117
-
118
-
119
-
120
-
121
-
122
-
123
-
124
-
125
-
126
-
127
-
128
-
129
-
130
-
131
-
132
-
133
-
134
-
135
-
136
-
137
-
138
-
139
-
140
-
141
-
142
-
143
-
144
-
145
-
146
-
147
-
148
-
149
 |
 |
