Samsung GT-P3113TSYXAR User Manual - Page 60
Using the Camcorder
 |
View all Samsung GT-P3113TSYXAR manuals
Add to My Manuals
Save this manual to your list of manuals |
Page 60 highlights
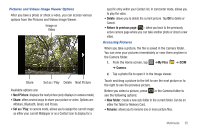
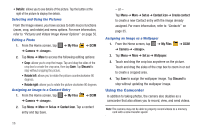
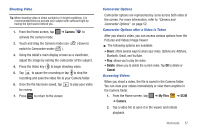
• Details: allows you to see details of the picture. Tap the button at the right of the picture to display the details. Selecting and Using the Pictures From the Image viewer, you have access to both macro functions (zoom, crop, and rotate) and menu options. For more information, refer to "Pictures and Videos Image Viewer Options" on page 55. Editing a Photo 1. From the Home screen, tap ➔ Camera ➔ . ➔ My Files ➔ DCIM 2. Tap Menu ➔ More to access the following editing options: • Crop: allows you to crop the image. Tap and drag the sides of the crop box to create the crop area, then tap Save. Tap Discard to stop without cropping the picture. • Rotate left: allows you to rotate the picture counterclockwise 90 degrees. • Rotate right: allows you to rotate the picture clockwise 90 degrees. Assigning an Image to a Contact Entry 1. From the Home screen, tap ➔ My Files ➔ DCIM ➔ Camera ➔ . 2. Tap Menu ➔ More ➔ Set as ➔ Contact icon. Tap a contact entry and tap Save. - or - Tap Menu ➔ More ➔ Set as ➔ Contact icon ➔ Create contact to create a new Contact entry with the image already assigned. For more information, refer to "Contacts" on page 35. Assigning an Image as a Wallpaper 1. From the Home screen, tap ➔ Camera ➔ . ➔ My Files ➔ DCIM 2. Tap Menu ➔ More ➔ Set as ➔ Wallpaper. 3. Touch and drag the crop box anywhere on the picture. Touch and drag the sides of the crop box to zoom in or out to create a cropped area. 4. Tap Save to assign the wallpaper image. Tap Discard to stop without updating the wallpaper image. Using the Camcorder In addition to taking photos, the camera also doubles as a camcorder that also allows you to record, view, and send videos. Note: The camera may not be able to properly record videos to a memory card with a slow transfer speed. 56
-
 1
1 -
2
-
3
-
4
-
5
-
6
-
7
-
8
-
9
-
10
-
11
-
12
-
13
-
14
-
15
-
16
-
17
-
18
-
19
-
20
-
21
-
22
-
23
-
24
-
25
-
26
-
27
-
28
-
29
-
30
-
31
-
32
-
33
-
34
-
35
-
36
-
37
-
38
-
39
-
40
-
41
-
42
-
43
-
44
-
45
-
46
-
47
-
48
-
49
-
50
-
51
-
52
-
53
-
54
-
 55
55 -
 56
56 -
 57
57 -
 58
58 -
 59
59 -
 60
60 -
 61
61 -
 62
62 -
 63
63 -
 64
64 -
 65
65 -
66
-
67
-
68
-
69
-
70
-
71
-
72
-
73
-
74
-
75
-
76
-
77
-
78
-
79
-
80
-
81
-
82
-
83
-
84
-
85
-
86
-
87
-
88
-
89
-
90
-
91
-
92
-
93
-
94
-
95
-
96
-
97
-
98
-
99
-
100
-
101
-
102
-
103
-
104
-
105
-
106
-
107
-
108
-
109
-
110
-
111
-
112
-
113
-
114
-
115
-
116
-
117
-
118
-
119
-
120
-
121
-
122
-
123
-
124
-
125
-
126
-
127
-
128
-
129
-
130
-
131
-
132
-
133
-
134
-
135
-
136
-
137
-
138
-
139
-
140
-
141
-
142
-
143
-
144
-
145
-
146
-
147
-
148
-
149
 |
 |