Singer C440 LEGACY Instruction Manual and Troubleshooting Guide - Page 16
IPP
 |
View all Singer C440 LEGACY manuals
Add to My Manuals
Save this manual to your list of manuals |
Page 16 highlights
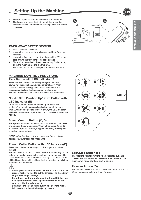
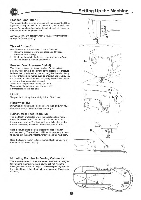
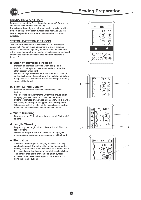
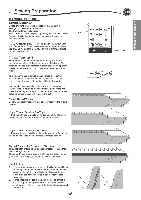
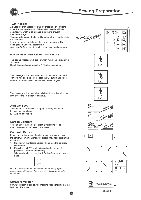
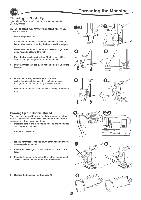
Sewing Preparation Twin Needle Activate the twin needle program by pressing - or + buttons to set the twin needle width. When a twin needle width is selected, the width of all stitches is limited to prevent needle breakage. To deactivate, press - button until number of twin needle width will disappear. In sewing mode, the twin needle icon will be shown. The setting is kept until you deactivate it. See page 38 for more information about twin needle sewing. POP-UP MESSAGES ABOUT TWIN NEEDLE This pop-up message will appear when twin needle program is activated. Check the needle and press the "i" button to continue. This message will appear when a stitch that cannot be used with twin needle, is selected. Press the "i" button and select another pattern or deactivate the twin needle program. ll ITnA 3.5 4.5 5+ (i) lJ ✓I This message will appear when stitch width is adjusted to the limit. Press the "v" button to continue. Audible Beep You can turn off the audible beep by pressing this button. i. Audible beep is on. ii. Audible beep is off. Screen Contrast You can adjust the screen contrast. By pressing "+" or "-" button, contrast will increase or decrease. Calibrate Screen If the icons on the screen, in relationship to where you touch the screen, seem misaligned, the screen may need calibrating, as follows: 1. Scroll down the Setting Screen, then press the calibrate screen button. 2. Press the each "O" mark indicated on the screen 5 positions. (4 corners and center) When calibration is completed, Setting Screen will appear again. • • • NOTE: If calibration has not completed correctly, a popup message will appear. Press the V" button and retry the calibration. Software Version Software version of this sewing machine will be indicated at the bottom of this screen. e • PP- II 0 ...LUg4.. 4:16".. " "117 1. 7 7 . I I jai l 43> LI • • • ik 2 3 4 • • • • n cc] • 6, o 5 30* 0 • • • El 0002 20160107 V (example)
-
 1
1 -
2
-
3
-
4
-
5
-
6
-
7
-
8
-
9
-
10
-
 11
11 -
 12
12 -
 13
13 -
 14
14 -
 15
15 -
 16
16 -
 17
17 -
 18
18 -
 19
19 -
 20
20 -
 21
21 -
22
-
23
-
24
-
25
-
26
-
27
-
28
-
29
-
30
-
31
-
32
-
33
-
34
-
35
-
36
-
37
-
38
-
39
-
40
-
41
-
42
-
43
-
44
-
45
-
46
-
47
-
48
-
49
-
50
-
51
-
52
-
53
-
54
-
55
-
56
-
57
-
58
-
59
-
60
-
61
-
62
-
63
-
64
-
65
-
66
-
67
-
68
-
69
-
70
-
71
-
72
-
73
-
74
-
75
-
76
-
77
-
78
-
79
-
80
-
81
-
82
-
83
-
84
-
85
-
86
-
87
-
88
-
89
-
90
-
91
-
92
-
93
-
94
-
95
-
96
-
97
-
98
-
99
-
100
-
101
-
102
-
103
-
104
-
105
-
106
-
107
-
108
-
109
-
110
-
111
-
112
-
113
-
114
-
115
-
116
-
117
-
118
-
119
-
120
-
121
-
122
-
123
-
124
-
125
-
126
-
127
-
128
-
129
-
130
-
131
-
132
-
133
-
134
-
135
-
136
-
137
-
138
-
139
-
140
 |
 |
