Singer C440 LEGACY Instruction Manual and Troubleshooting Guide - Page 39
snesiol, cD.6s'sl
 |
View all Singer C440 LEGACY manuals
Add to My Manuals
Save this manual to your list of manuals |
Page 39 highlights
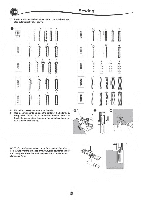
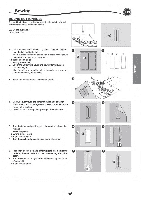
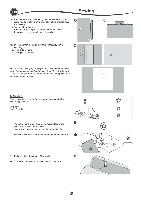
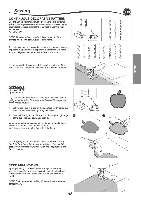
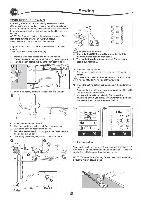
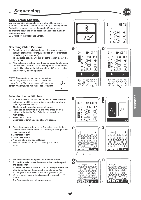
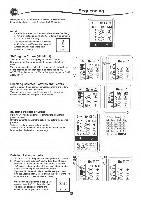
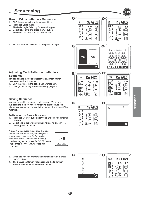
Sequencing EN SEQUENCE SEWING You can combine stitch patterns and letter stitches into a sequence. There are 2 memories for storing stitch sequences. Each stitch sequence can contain up to 40 characters. To enter the sequence mode, press the Sequence button at the home screen. LCD will show the Sequence Screen. Selecting Stitch Patterns 1. Select the desired stitch patterns in the same manner as that used for normal sewing. (See page 14 for information on selecting stitch patterns) The selected patterns will display at the top left side of the LCD screen. 2. After selecting a pattern, use the same procedure to select the next stitch pattern. The selected pattern will be added, and it will display on the left side of the LCD screen below the previously selected pattern. NOTE: Some patterns may not be combined • into the sequence. If you select a pattern that cannot be combined, a message will appear on screen to alert you of this. Press the V" button. ♦ ) A Selecting Letter Stitches 1. To enter a letter stitch into the sequence, press the letter button on the LCD screen, which is indicated by a lower case 'a', as shown below. The letter style selecting screen will appear. 2. Press the left button for the Block font, press the right button for the Cyrillic font. Selected button will be highlighted. 3. Press the "v" button. Uppercase letter of selected style will appear. r Cs • a • 0 .81 • • 0 d) scDn.e6s"sio'sll a oescil SI04, 0 77 C1B BO 7.0 14.0 IS IS Aa AB SEQUENCING 4. Press the desired letter directly. Press the character tabs (located at the bottom of the LCD screen) to change lower case, numbers, etc. a. Uppercase letters b. Lowercase letters c. Numeric letters and special letters 5. Selected letters will appear on the top line of the LCD screen. 6. The Arrow buttons on top line will move the cursor. 7. To insert the letter, move the cursor to the inserting point and select letter. To delete the letter, move the cursor to the right side of the letter to be deleted, then press the Delete button (d). To change the letter style, press the Style button (e). 8. When sequencing of letters is completed, press the "V" button. The Sequence Screen will appear again. • 41 • a0000000 CO@C0080 @COXXE @CDOOCDO 800 ( ) a b c I Sinrger 986@@MO OCCUD@CO CXDOCCXDOg C @XeaXX)(2®, A */ e I Singeri 0 (ao@D0aCe00Oc00oM00c00Mo0ao@00g 000 ( ) A mu a 0acg@I 0cemSoin0ucpgemre0'memeemeo(maeeo0) A a
-
 1
1 -
2
-
3
-
4
-
5
-
6
-
7
-
8
-
9
-
10
-
11
-
12
-
13
-
14
-
15
-
16
-
17
-
18
-
19
-
20
-
21
-
22
-
23
-
24
-
25
-
26
-
27
-
28
-
29
-
30
-
31
-
32
-
33
-
 34
34 -
 35
35 -
 36
36 -
 37
37 -
 38
38 -
 39
39 -
 40
40 -
 41
41 -
 42
42 -
 43
43 -
 44
44 -
45
-
46
-
47
-
48
-
49
-
50
-
51
-
52
-
53
-
54
-
55
-
56
-
57
-
58
-
59
-
60
-
61
-
62
-
63
-
64
-
65
-
66
-
67
-
68
-
69
-
70
-
71
-
72
-
73
-
74
-
75
-
76
-
77
-
78
-
79
-
80
-
81
-
82
-
83
-
84
-
85
-
86
-
87
-
88
-
89
-
90
-
91
-
92
-
93
-
94
-
95
-
96
-
97
-
98
-
99
-
100
-
101
-
102
-
103
-
104
-
105
-
106
-
107
-
108
-
109
-
110
-
111
-
112
-
113
-
114
-
115
-
116
-
117
-
118
-
119
-
120
-
121
-
122
-
123
-
124
-
125
-
126
-
127
-
128
-
129
-
130
-
131
-
132
-
133
-
134
-
135
-
136
-
137
-
138
-
139
-
140
 |
 |
