Toshiba Portege R100 User Manual - Page 83
Gently press the center of the disc onto the spindle until it, facing up.
 |
View all Toshiba Portege R100 manuals
Add to My Manuals
Save this manual to your list of manuals |
Page 83 highlights
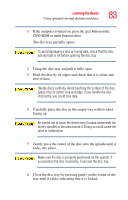
Learning the Basics Using optional external diskettes and discs 83 1 If the computer is turned on, press the eject button on the DVD-ROM or multi-function drive. The disc tray partially opens. To avoid damaging a disc or losing data, check that the disc activity light is off before opening the disc tray. 2 Grasp the disc tray and pull it fully open. 3 Hold the disc by its edges and check that it is clean and free of dust. Handle discs carefully. Avoid touching the surface of the disc. Grasp it by its center hole and edge. If you handle the disc incorrectly, you could lose data. 4 Carefully place the disc in the empty tray with its label facing up. Be careful not to touch the drive's lens (located underneath the drive's spindle) or the area around it. Doing so could cause the drive to malfunction. 5 Gently press the center of the disc onto the spindle until it locks into place. Make sure the disc is properly positioned on the spindle. If you position the disc incorrectly, it can jam the disc tray. 6 Close the disc tray by pressing gently on the center of the tray until it clicks indicating that it is locked.
-
 1
1 -
2
-
3
-
4
-
5
-
6
-
7
-
8
-
9
-
10
-
11
-
12
-
13
-
14
-
15
-
16
-
17
-
18
-
19
-
20
-
21
-
22
-
23
-
24
-
25
-
26
-
27
-
28
-
29
-
30
-
31
-
32
-
33
-
34
-
35
-
36
-
37
-
38
-
39
-
40
-
41
-
42
-
43
-
44
-
45
-
46
-
47
-
48
-
49
-
50
-
51
-
52
-
53
-
54
-
55
-
56
-
57
-
58
-
59
-
60
-
61
-
62
-
63
-
64
-
65
-
66
-
67
-
68
-
69
-
70
-
71
-
72
-
73
-
74
-
75
-
76
-
77
-
 78
78 -
 79
79 -
 80
80 -
 81
81 -
 82
82 -
 83
83 -
 84
84 -
 85
85 -
 86
86 -
 87
87 -
 88
88 -
89
-
90
-
91
-
92
-
93
-
94
-
95
-
96
-
97
-
98
-
99
-
100
-
101
-
102
-
103
-
104
-
105
-
106
-
107
-
108
-
109
-
110
-
111
-
112
-
113
-
114
-
115
-
116
-
117
-
118
-
119
-
120
-
121
-
122
-
123
-
124
-
125
-
126
-
127
-
128
-
129
-
130
-
131
-
132
-
133
-
134
-
135
-
136
-
137
-
138
-
139
-
140
-
141
-
142
-
143
-
144
-
145
-
146
-
147
-
148
-
149
-
150
-
151
-
152
-
153
-
154
-
155
-
156
-
157
-
158
-
159
-
160
-
161
-
162
-
163
-
164
-
165
-
166
-
167
-
168
-
169
-
170
-
171
-
172
-
173
-
174
-
175
-
176
-
177
-
178
-
179
-
180
-
181
-
182
-
183
-
184
-
185
-
186
-
187
-
188
-
189
-
190
-
191
-
192
-
193
-
194
-
195
-
196
-
197
-
198
-
199
-
200
-
201
-
202
-
203
-
204
-
205
-
206
-
207
-
208
-
209
-
210
-
211
-
212
-
213
-
214
-
215
-
216
-
217
-
218
-
219
-
220
-
221
-
222
-
223
-
224
-
225
-
226
-
227
-
228
-
229
-
230
-
231
-
232
-
233
-
234
-
235
-
236
-
237
-
238
-
239
-
240
-
241
-
242
-
243
 |
 |