Brother International MFC-7050C Service Manual - Page 38
Black:1.new
 |
View all Brother International MFC-7050C manuals
Add to My Manuals
Save this manual to your list of manuals |
Page 38 highlights
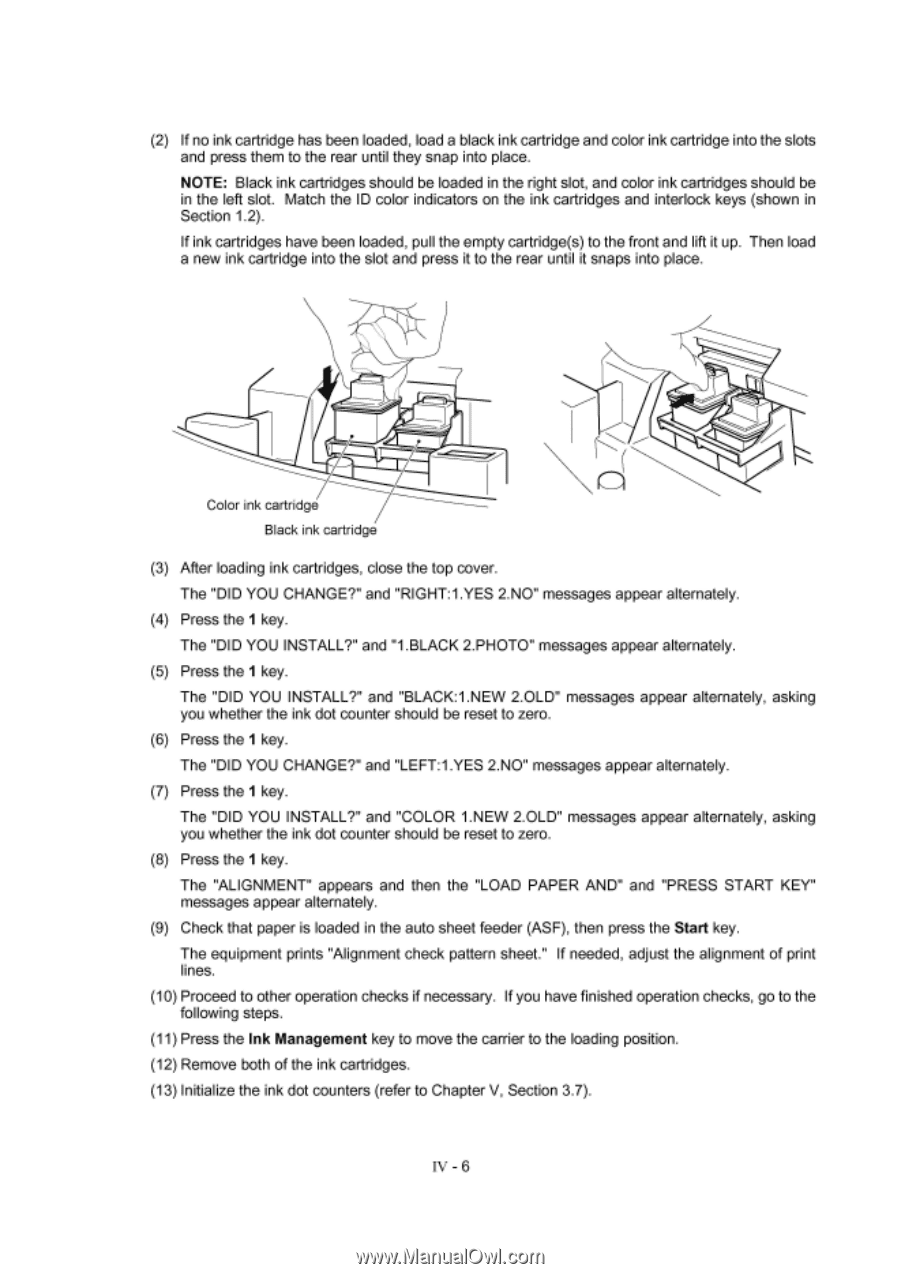
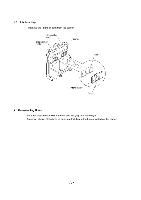
(2) If no ink cartridge has been loaded, load a black ink cartridge and color ink cartridge into the slots and press them to the rear until they snap into place. NOTE: Black ink cartridges should be loaded in the right slot, and color ink cartridges should be in the left slot. Match the ID color indicators on the ink cartridges and interlock keys (shown in Section 1.2). If ink cartridges have been loaded, pull the empty cartridge(s) to the front and lift it up. Then load a new ink cartridge into the slot and press it to the rear until it snaps into place. V of Color ink cartridge Black ink cartridge (3) After loading ink cartridges, close the top cover. The "DID YOU CHANGE?" and "RIGHT:1.YES 2.NO" messages appear alternately. (4) Press the 1 key. The "DID YOU INSTALL?" and "1.BLACK 2.PHOTO" messages appear alternately. (5) Press the 1 key. The "DID YOU INSTALL?" and "BLACK:1.NEW 2.OLD" messages appear alternately, asking you whether the ink dot counter should be reset to zero. (6) Press the 1 key. The "DID YOU CHANGE?" and "LEFT:1.YES 2.NO" messages appear alternately. (7) Press the 1 key. The "DID YOU INSTALL?" and "COLOR 1.NEW 2.OLD" messages appear alternately, asking you whether the ink dot counter should be reset to zero. (8) Press the 1 key. The "ALIGNMENT" appears and then the "LOAD PAPER AND" and "PRESS START KEY" messages appear alternately. (9) Check that paper is loaded in the auto sheet feeder (ASF), then press the Start key. The equipment prints "Alignment check pattern sheet." If needed, adjust the alignment of print lines. (10) Proceed to other operation checks if necessary. If you have finished operation checks, go to the following steps. (11) Press the Ink Management key to move the carrier to the loading position. (12) Remove both of the ink cartridges. (13) Initialize the ink dot counters (refer to Chapter V, Section 3.7). IV - 6
-
 1
1 -
2
-
3
-
4
-
5
-
6
-
7
-
8
-
9
-
10
-
11
-
12
-
13
-
14
-
15
-
16
-
17
-
18
-
19
-
20
-
21
-
22
-
23
-
24
-
25
-
26
-
27
-
28
-
29
-
30
-
31
-
32
-
 33
33 -
 34
34 -
 35
35 -
 36
36 -
 37
37 -
 38
38 -
 39
39 -
 40
40 -
 41
41 -
 42
42 -
 43
43 -
44
-
45
-
46
-
47
-
48
-
49
-
50
-
51
-
52
-
53
-
54
-
55
-
56
-
57
-
58
-
59
-
60
-
61
-
62
-
63
-
64
-
65
-
66
-
67
-
68
-
69
-
70
-
71
-
72
-
73
-
74
-
75
-
76
-
77
-
78
-
79
-
80
-
81
-
82
-
83
-
84
-
85
-
86
-
87
-
88
-
89
-
90
-
91
-
92
-
93
-
94
-
95
-
96
-
97
-
98
-
99
-
100
-
101
-
102
-
103
-
104
-
105
-
106
-
107
-
108
-
109
-
110
-
111
-
112
-
113
-
114
-
115
-
116
-
117
-
118
-
119
-
120
-
121
-
122
-
123
-
124
-
125
-
126
-
127
-
128
-
129
-
130
-
131
-
132
-
133
-
134
-
135
-
136
-
137
-
138
-
139
-
140
-
141
-
142
-
143
 |
 |