Epson 710C User Manual - Page 113
The image quality is poor on a laptop computer., The image vibrates, flickers, or has vertical lines.
 |
UPC - 010343821538
View all Epson 710C manuals
Add to My Manuals
Save this manual to your list of manuals |
Page 113 highlights
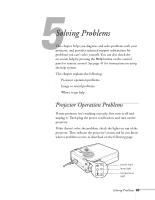
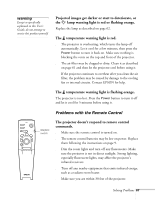
70 Solving Problems The image or parts of it are blurred or out of focus. s Adjust the Brightness, Contrast, Sharpness, and/or Gamma settings on the Video menu. If you're viewing a computer image, also try adjusting the Tracking and Sync settings. See page 48 for instructions on using the menu. When you change video settings, you should be able to see the effect on the screen immediately. Feel free to experiment. You can always select Reset to return to the factory default settings. s There may be dirt or smears on the lens. Clean the lens by gently wiping it with an alcohol-based cleaner on a soft cloth. See page 60 for more information. The image vibrates, flickers, or has vertical lines. Adjust the Tracking and Sync settings on the Video menu (or through the projector's Help system). It is best to project a gray screen (or the screen you see when you exit Windows) when you adjust these settings. Hold down the button to change the setting until your image looks correct. See page 48 for instructions on using the Video menu. The image quality is poor on a laptop computer. The video signal may be split between the computer and the projector. Try turning off the laptop LCD display. See your laptop manual or on-screen help for instructions. The colors of the image are not right. s If you're displaying a computer image, use the Color setting in the Video menu to adjust the balance of red, green, and blue. s If you're displaying video, adjust the Color and Tint (NTSC only) settings on the Video menu. s Check your computer display settings to correct color balance.
-
 1
1 -
2
-
3
-
4
-
5
-
6
-
7
-
8
-
9
-
10
-
11
-
12
-
13
-
14
-
15
-
16
-
17
-
18
-
19
-
20
-
21
-
22
-
23
-
24
-
25
-
26
-
27
-
28
-
29
-
30
-
31
-
32
-
33
-
34
-
35
-
36
-
37
-
38
-
39
-
40
-
41
-
42
-
43
-
44
-
45
-
46
-
47
-
48
-
49
-
50
-
51
-
52
-
53
-
54
-
55
-
56
-
57
-
58
-
59
-
60
-
61
-
62
-
63
-
64
-
65
-
66
-
67
-
68
-
69
-
70
-
71
-
72
-
73
-
74
-
75
-
76
-
77
-
78
-
79
-
80
-
81
-
82
-
83
-
84
-
85
-
86
-
87
-
88
-
89
-
90
-
91
-
92
-
93
-
94
-
95
-
96
-
97
-
98
-
99
-
100
-
101
-
102
-
103
-
104
-
105
-
106
-
107
-
 108
108 -
 109
109 -
 110
110 -
 111
111 -
 112
112 -
 113
113 -
 114
114 -
 115
115 -
 116
116 -
 117
117 -
 118
118 -
119
-
120
-
121
-
122
-
123
-
124
 |
 |