Epson 710C User Manual - Page 19
Using the Projector Menus, change the setting.
 |
UPC - 010343821538
View all Epson 710C manuals
Add to My Manuals
Save this manual to your list of manuals |
Page 19 highlights
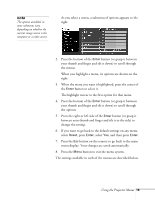
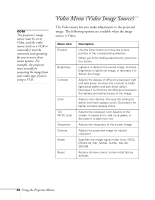
note The options available in some submenus vary, depending on whether the current image source is the computer or a video source. As you select a menu, a submenu of options appears to the right. 2. Press the bottom of the Enter button (or grasp it between your thumb and finger and tilt it down) to scroll through the menus. When you highlight a menu, its options are shown on the right. 3. When the menu you want is highlighted, press the center of the Enter button to select it. The highlight moves to the first option for that menu. 4. Press the bottom of the Enter button (or grasp it between your thumb and finger and tilt it down) to scroll through the options. 5. Press the right or left side of the Enter button (or grasp it between your thumb and finger and tilt it to the side) to change the setting. 6. If you want to go back to the default settings on any menu, select Reset, press Enter, select Yes, and then press Enter. 7. Press the Esc button on the remote to go back to the main menu display. Your changes are saved automatically. 8. Press the Menu button to exit the menu system. The settings available in each of the menus are described below. Using the Projector Menus 19
-
 1
1 -
2
-
3
-
4
-
5
-
6
-
7
-
8
-
9
-
10
-
11
-
12
-
13
-
 14
14 -
 15
15 -
 16
16 -
 17
17 -
 18
18 -
 19
19 -
 20
20 -
 21
21 -
 22
22 -
 23
23 -
 24
24 -
25
-
26
-
27
-
28
-
29
-
30
-
31
-
32
-
33
-
34
-
35
-
36
-
37
-
38
-
39
-
40
-
41
-
42
-
43
-
44
-
45
-
46
-
47
-
48
-
49
-
50
-
51
-
52
-
53
-
54
-
55
-
56
-
57
-
58
-
59
-
60
-
61
-
62
-
63
-
64
-
65
-
66
-
67
-
68
-
69
-
70
-
71
-
72
-
73
-
74
-
75
-
76
-
77
-
78
-
79
-
80
-
81
-
82
-
83
-
84
-
85
-
86
-
87
-
88
-
89
-
90
-
91
-
92
-
93
-
94
-
95
-
96
-
97
-
98
-
99
-
100
-
101
-
102
-
103
-
104
-
105
-
106
-
107
-
108
-
109
-
110
-
111
-
112
-
113
-
114
-
115
-
116
-
117
-
118
-
119
-
120
-
121
-
122
-
123
-
124
 |
 |
