Epson 710C User Manual - Page 80
Using the Cursor/Stamp Arrow, Drawing Boxes, corner of the screen. This is the box-drawing tool.
 |
UPC - 010343821538
View all Epson 710C manuals
Add to My Manuals
Save this manual to your list of manuals |
Page 80 highlights
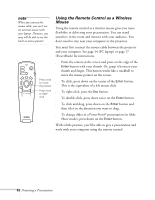
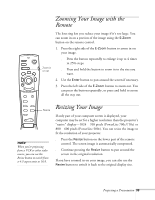
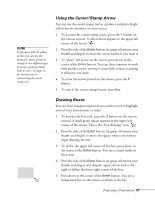
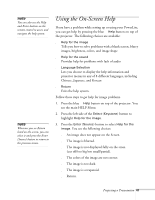
note If you don't like the yellow arrow, you can use the projector's menu system to change it to a different type of arrow, pointing hand, ball, or cross. See page 52 for instructions on customizing the cursor stamp tool. Using the Cursor/Stamp Arrow You can use the cursor stamp tool as a pointer and place bright yellow arrows anywhere on your screen. 1. To activate the cursor stamp arrow, press the 1 button on the remote control. A yellow arrow appears in the upper left corner of the screen. 2. Press the side of the Enter button (or grasp it between your thumb and finger) to move the arrow wherever you want it. 3. To "paste" the arrow on the screen, press down in the center of the Enter button. You can then continue to work with another arrow, moving it around the screen or pasting it wherever you want. 4. To erase the arrows pasted on the screen, press the 5 button. 5. To cancel the cursor stamp feature, press Esc. Drawing Boxes You can draw transparent green boxes on the screen to highlight areas of your presentation or video. 1. To activate the box tool, press the 2 button on the remote control. A small green square appears in the upper left corner of the screen. This is the "box-drawing" tool. 2. Press the side of the Enter button (or grasp it between your thumb and finger) to move the square where you want to begin drawing the box. 3. To define the upper left corner of the box, press down in the center of the Enter button. You see a corner mark on the screen. 4. Press the side of the Enter button (or grasp it between your thumb and finger) and drag the square down and to the right to define the lower right corner of the box. 5. Press down in the center of the Enter button. You see a transparent box on the screen, as shown at the left. Projecting a Presentation 37
-
 1
1 -
2
-
3
-
4
-
5
-
6
-
7
-
8
-
9
-
10
-
11
-
12
-
13
-
14
-
15
-
16
-
17
-
18
-
19
-
20
-
21
-
22
-
23
-
24
-
25
-
26
-
27
-
28
-
29
-
30
-
31
-
32
-
33
-
34
-
35
-
36
-
37
-
38
-
39
-
40
-
41
-
42
-
43
-
44
-
45
-
46
-
47
-
48
-
49
-
50
-
51
-
52
-
53
-
54
-
55
-
56
-
57
-
58
-
59
-
60
-
61
-
62
-
63
-
64
-
65
-
66
-
67
-
68
-
69
-
70
-
71
-
72
-
73
-
74
-
 75
75 -
 76
76 -
 77
77 -
 78
78 -
 79
79 -
 80
80 -
 81
81 -
 82
82 -
 83
83 -
 84
84 -
 85
85 -
86
-
87
-
88
-
89
-
90
-
91
-
92
-
93
-
94
-
95
-
96
-
97
-
98
-
99
-
100
-
101
-
102
-
103
-
104
-
105
-
106
-
107
-
108
-
109
-
110
-
111
-
112
-
113
-
114
-
115
-
116
-
117
-
118
-
119
-
120
-
121
-
122
-
123
-
124
 |
 |
