Epson FX-2180 User Manual - Page 43
For Windows 95 or NT 4.0, My Computer, Setup - printer drivers
 |
View all Epson FX-2180 manuals
Add to My Manuals
Save this manual to your list of manuals |
Page 43 highlights
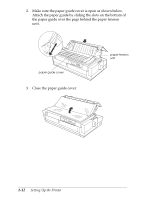
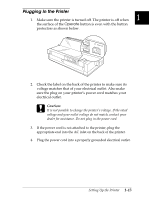
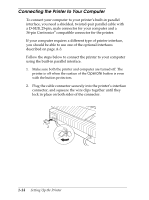
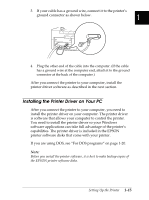
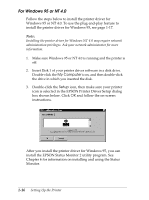
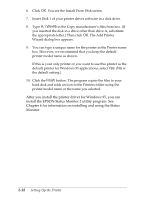
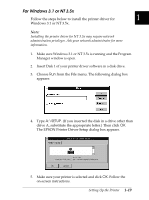
For Windows 95 or NT 4.0 Follow the steps below to install the printer driver for Windows 95 or NT 4.0. To use the plug-and-play feature to install the printer driver for Windows 95, see page 1-17. Note: Installing the printer driver for Windows NT 4.0 may require network administration privileges. Ask your network administrator for more information. 1. Make sure Windows 95 or NT 4.0 is running and the printer is off. 2. Insert Disk 1 of your printer driver software in a disk drive. Double-click the My Computer icon, and then double-click the drive in which you inserted the disk. 3. Double-click the Setup icon, then make sure your printer icon is selected in the EPSON Printer Driver Setup dialog box shown below. Click OK and follow the on-screen instructions. After you install the printer driver for Windows 95, you can install the EPSON Status Monitor 2 utility program. See Chapter 6 for information on installing and using the Status Monitor. 1-16 Setting Up the Printer
-
 1
1 -
2
-
3
-
4
-
5
-
6
-
7
-
8
-
9
-
10
-
11
-
12
-
13
-
14
-
15
-
16
-
17
-
18
-
19
-
20
-
21
-
22
-
23
-
24
-
25
-
26
-
27
-
28
-
29
-
30
-
31
-
32
-
33
-
34
-
35
-
36
-
37
-
 38
38 -
 39
39 -
 40
40 -
 41
41 -
 42
42 -
 43
43 -
 44
44 -
 45
45 -
 46
46 -
 47
47 -
 48
48 -
49
-
50
-
51
-
52
-
53
-
54
-
55
-
56
-
57
-
58
-
59
-
60
-
61
-
62
-
63
-
64
-
65
-
66
-
67
-
68
-
69
-
70
-
71
-
72
-
73
-
74
-
75
-
76
-
77
-
78
-
79
-
80
-
81
-
82
-
83
-
84
-
85
-
86
-
87
-
88
-
89
-
90
-
91
-
92
-
93
-
94
-
95
-
96
-
97
-
98
-
99
-
100
-
101
-
102
-
103
-
104
-
105
-
106
-
107
-
108
-
109
-
110
-
111
-
112
-
113
-
114
-
115
-
116
-
117
-
118
-
119
-
120
-
121
-
122
-
123
-
124
-
125
-
126
-
127
-
128
-
129
-
130
-
131
-
132
-
133
-
134
-
135
-
136
-
137
-
138
-
139
-
140
-
141
-
142
-
143
-
144
-
145
-
146
-
147
-
148
-
149
-
150
-
151
-
152
-
153
-
154
-
155
-
156
-
157
-
158
-
159
-
160
-
161
-
162
-
163
-
164
-
165
-
166
-
167
-
168
-
169
-
170
-
171
-
172
-
173
-
174
-
175
-
176
-
177
-
178
-
179
-
180
-
181
-
182
-
183
-
184
-
185
-
186
-
187
-
188
-
189
-
190
-
191
-
192
-
193
-
194
-
195
-
196
-
197
-
198
-
199
-
200
-
201
-
202
-
203
-
204
-
205
-
206
-
207
-
208
-
209
-
210
-
211
-
212
-
213
-
214
-
215
-
216
-
217
-
218
-
219
-
220
-
221
-
222
-
223
-
224
-
225
-
226
-
227
 |
 |