Epson Stylus Pro 3880 Designer Edition User's Guide - Page 111
Changing the Black Ink Cartridge, Changing the Date and Time, papers
 |
View all Epson Stylus Pro 3880 Designer Edition manuals
Add to My Manuals
Save this manual to your list of manuals |
Page 111 highlights
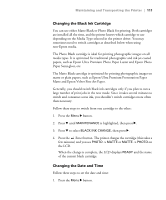
Maintaining and Transporting the Printer | 111 Changing the Black Ink Cartridge You can use either Matte Black or Photo Black for printing. Both cartridges are installed all the time, and the printer knows which cartridge to use depending on the Media Type selected in the printer driver. You may sometimes need to switch cartridges as described below when using non-Epson media. The Photo Black cartridge is ideal for printing photographic images on all media types. It is optimized for traditional photographic and ink jet-coated papers, such as Epson Ultra Premium Photo Paper Luster and Epson Photo Paper Semi-gloss, etc. The Matte Black cartridge is optimized for printing photographic images on matte or plain papers, such as Epson Ultra Premium Presentation Paper Matte and Epson Velvet Fine Art Paper. Generally, you should switch black ink cartridges only if you plan to run a large number of print jobs in the new mode. Since it takes several minutes to switch and consumes some ink, you shouldn't switch cartridges more often than necessary. Follow these steps to switch from one cartridge to the other: 1. Press the Menu r button. 2. Press d until MAINTENANCE is highlighted, then press r. 3. Press d to select BLACK INK CHANGE, then press r. 4. Press the Enter button. The printer charges the cartridge (this takes a few minutes) and you see PHOTO -> MATTE or MATTE -> PHOTO on the LCD. When the change is complete, the LCD displays READY and the name of the current black cartridge. Changing the Date and Time Follow these steps to set the date and time: 1. Press the Menu r button. 5-111
-
 1
1 -
2
-
3
-
4
-
5
-
6
-
7
-
8
-
9
-
10
-
11
-
12
-
13
-
14
-
15
-
16
-
17
-
18
-
19
-
20
-
21
-
22
-
23
-
24
-
25
-
26
-
27
-
28
-
29
-
30
-
31
-
32
-
33
-
34
-
35
-
36
-
37
-
38
-
39
-
40
-
41
-
42
-
43
-
44
-
45
-
46
-
47
-
48
-
49
-
50
-
51
-
52
-
53
-
54
-
55
-
56
-
57
-
58
-
59
-
60
-
61
-
62
-
63
-
64
-
65
-
66
-
67
-
68
-
69
-
70
-
71
-
72
-
73
-
74
-
75
-
76
-
77
-
78
-
79
-
80
-
81
-
82
-
83
-
84
-
85
-
86
-
87
-
88
-
89
-
90
-
91
-
92
-
93
-
94
-
95
-
96
-
97
-
98
-
99
-
100
-
101
-
102
-
103
-
104
-
105
-
 106
106 -
 107
107 -
 108
108 -
 109
109 -
 110
110 -
 111
111 -
 112
112 -
 113
113 -
 114
114 -
 115
115 -
 116
116 -
117
-
118
-
119
-
120
-
121
-
122
-
123
-
124
-
125
-
126
-
127
-
128
-
129
-
130
-
131
-
132
-
133
-
134
-
135
-
136
-
137
-
138
-
139
-
140
-
141
-
142
-
143
-
144
-
145
-
146
-
147
-
148
-
149
-
150
-
151
-
152
-
153
-
154
 |
 |
