Epson Stylus Pro 3880 Designer Edition User's Guide - Page 133
Problem, Solution, Media Type, SuperPhoto - 2880, High Speed, Paper Thickness, Paper Feed Adjustment
 |
View all Epson Stylus Pro 3880 Designer Edition manuals
Add to My Manuals
Save this manual to your list of manuals |
Page 133 highlights
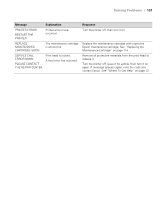
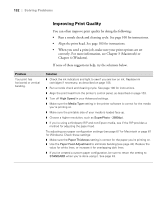
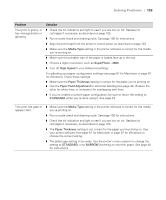
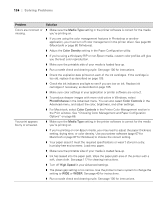
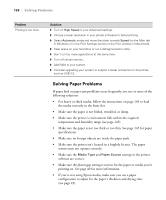
Solving Problems | 133 Problem Your print is grainy, or has misregistration or ghosting. Solution ◗ Check the ink indicators and light to see if you are low on ink. Replace ink cartridges if necessary, as described on page 105. ◗ Run a nozzle check and cleaning cycle. See page 100 for instructions. ◗ Align the print head from the printer's control panel, as described on page 103. ◗ Make sure the Media Type setting in the printer software is correct for the media you're printing on. ◗ Make sure the printable side of the paper is loaded face-up in the tray. ◗ Choose a higher resolution, such as SuperPhoto - 2880. ◗ Turn off High Speed in your Advanced settings. Try adjusting your paper configuration settings (see page 67 for Macintosh or page 87 for Windows). Check these settings: ◗ Make sure the Paper Thickness setting is correct for the paper you're printing on. ◗ Use the Paper Feed Adjustment to eliminate banding (see page 42). Reduce the value for white lines, or increase it for overlapping dark lines. ◗ If you've created a custom paper configuration, be sure to return the setting to STANDARD when you're done using it. See page 43. Your print has gaps or appears faint. ◗ Make sure the Media Type setting in the printer software is correct for the media you're printing on. ◗ Run a nozzle check and cleaning cycle. See page 100 for instructions. ◗ Check the ink indicators and light to see if you are low on ink. Replace ink cartridges if necessary, as described on page 105. ◗ The Paper Thickness setting is not correct for the paper you're printing on. Use your printer software (see page 67 for Macintosh or page 87 for Windows) to choose the correct setting. ◗ The platen gap setting is too wide. Use the printer's menu system to change the setting to STANDARD, or to NARROW if printing on very thin paper. See page 40 for instructions. 6-133
-
 1
1 -
2
-
3
-
4
-
5
-
6
-
7
-
8
-
9
-
10
-
11
-
12
-
13
-
14
-
15
-
16
-
17
-
18
-
19
-
20
-
21
-
22
-
23
-
24
-
25
-
26
-
27
-
28
-
29
-
30
-
31
-
32
-
33
-
34
-
35
-
36
-
37
-
38
-
39
-
40
-
41
-
42
-
43
-
44
-
45
-
46
-
47
-
48
-
49
-
50
-
51
-
52
-
53
-
54
-
55
-
56
-
57
-
58
-
59
-
60
-
61
-
62
-
63
-
64
-
65
-
66
-
67
-
68
-
69
-
70
-
71
-
72
-
73
-
74
-
75
-
76
-
77
-
78
-
79
-
80
-
81
-
82
-
83
-
84
-
85
-
86
-
87
-
88
-
89
-
90
-
91
-
92
-
93
-
94
-
95
-
96
-
97
-
98
-
99
-
100
-
101
-
102
-
103
-
104
-
105
-
106
-
107
-
108
-
109
-
110
-
111
-
112
-
113
-
114
-
115
-
116
-
117
-
118
-
119
-
120
-
121
-
122
-
123
-
124
-
125
-
126
-
127
-
 128
128 -
 129
129 -
 130
130 -
 131
131 -
 132
132 -
 133
133 -
 134
134 -
 135
135 -
 136
136 -
 137
137 -
 138
138 -
139
-
140
-
141
-
142
-
143
-
144
-
145
-
146
-
147
-
148
-
149
-
150
-
151
-
152
-
153
-
154
 |
 |
