Epson Stylus Pro 3880 Designer Edition User's Guide - Page 17
Printing a Network Status Sheet
 |
View all Epson Stylus Pro 3880 Designer Edition manuals
Add to My Manuals
Save this manual to your list of manuals |
Page 17 highlights
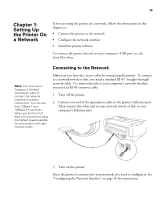
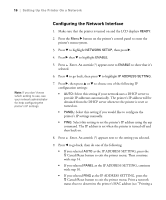
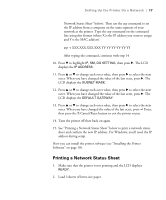
Setting Up the Printer On a Network | 17 Network Status Sheet" below). Then use the arp command to set the IP address from a computer on the same segment of your network as the printer. Type the arp command on the command line using this format (where X is the IP address you want to assign and Y is the MAC address): arp -s XXX.XXX.XXX.XXX YY-YY-YY-YY-YY-YY After typing the command, continue with step 14 10. Press d to highlight IP, SM, DG SETTING, then press r. The LCD displays the IP ADDRESS. 11. Press u or d to change each octet value, then press r to select the next octet. When you have changed the value of the last octet, press r. The LCD displays the SUBNET MASK. 12. Press u or d to change each octet value, then press r to select the next octet. When you have changed the value of the last octet, press r. The LCD displays the DEFAULT GATEWAY. 13. Press u or d to change each octet value, then press r to select the next octet. When you have changed the value of the last octet, press Enter, then press the + Cancel/Reset button to exit the printer menu. 14. Turn the printer off then back on again. 15. See "Printing a Network Status Sheet" below to print a network status sheet and confirm the new IP address. For Windows, you'll need the IP address during setup. Now you can install the printer software (see "Installing the Printer Software" on page 18). Printing a Network Status Sheet 1. Make sure that the printer is not printing and the LCD displays READY. 2. Load 3 sheets of letter-size paper. 1-17
-
 1
1 -
2
-
3
-
4
-
5
-
6
-
7
-
8
-
9
-
10
-
11
-
 12
12 -
 13
13 -
 14
14 -
 15
15 -
 16
16 -
 17
17 -
 18
18 -
 19
19 -
 20
20 -
 21
21 -
 22
22 -
23
-
24
-
25
-
26
-
27
-
28
-
29
-
30
-
31
-
32
-
33
-
34
-
35
-
36
-
37
-
38
-
39
-
40
-
41
-
42
-
43
-
44
-
45
-
46
-
47
-
48
-
49
-
50
-
51
-
52
-
53
-
54
-
55
-
56
-
57
-
58
-
59
-
60
-
61
-
62
-
63
-
64
-
65
-
66
-
67
-
68
-
69
-
70
-
71
-
72
-
73
-
74
-
75
-
76
-
77
-
78
-
79
-
80
-
81
-
82
-
83
-
84
-
85
-
86
-
87
-
88
-
89
-
90
-
91
-
92
-
93
-
94
-
95
-
96
-
97
-
98
-
99
-
100
-
101
-
102
-
103
-
104
-
105
-
106
-
107
-
108
-
109
-
110
-
111
-
112
-
113
-
114
-
115
-
116
-
117
-
118
-
119
-
120
-
121
-
122
-
123
-
124
-
125
-
126
-
127
-
128
-
129
-
130
-
131
-
132
-
133
-
134
-
135
-
136
-
137
-
138
-
139
-
140
-
141
-
142
-
143
-
144
-
145
-
146
-
147
-
148
-
149
-
150
-
151
-
152
-
153
-
154
 |
 |
