Epson Stylus Pro 3880 Designer Edition User's Guide - Page 41
Using Special Paper Configurations, Creating a Paper Configuration
 |
View all Epson Stylus Pro 3880 Designer Edition manuals
Add to My Manuals
Save this manual to your list of manuals |
Page 41 highlights
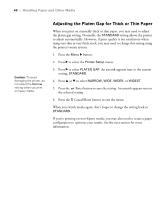
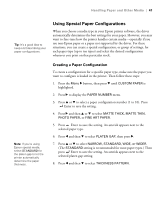
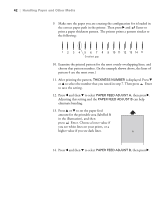
Handling Paper and Other Media | 41 Tip: It's a good idea to keep a list describing your paper configurations. Using Special Paper Configurations When you choose a media type in your Epson printer software, the driver automatically determines the best settings for your paper. However, you may want to fine-tune how the printer handles certain media-especially if you use non-Epson paper or a paper not supported by the driver. For these situations, you can create a special configuration, or group of settings, for each paper type (up to ten types) and select the desired configuration whenever you print on that particular stock. Note: If you're using Epson special media, select STANDARD for the platen gap to let the printer automatically determine the paper thickness. Creating a Paper Configuration To create a configuration for a specific paper type, make sure the paper you want to configure is loaded in the printer. Then follow these steps: 1. Press the Menu r button, then press d until CUSTOM PAPER is highlighted. 2. Press r to display the PAPER NUMBER menu. 3. Press u or d to select a paper configuration number (1 to 10). Press Enter to save the setting. 4. Press r and then u or d to select MATTE THICK, MATTE THIN, PHOTO PAPER, or FINE ART PAPER. 5. Press Enter to save the setting. An asterisk appears next to the selected paper type. 6. Press l and then d to select PLATEN GAP, then press r. 7. Press u or d to select NARROW, STANDARD, WIDE, or WIDER. (The STANDARD setting is recommended for most paper types.) Then press Enter to save the setting. An asterisk appears next to the selected platen gap setting. 8. Press l and then d to select THICKNESS PATTERN. 2-41
-
 1
1 -
2
-
3
-
4
-
5
-
6
-
7
-
8
-
9
-
10
-
11
-
12
-
13
-
14
-
15
-
16
-
17
-
18
-
19
-
20
-
21
-
22
-
23
-
24
-
25
-
26
-
27
-
28
-
29
-
30
-
31
-
32
-
33
-
34
-
35
-
 36
36 -
 37
37 -
 38
38 -
 39
39 -
 40
40 -
 41
41 -
 42
42 -
 43
43 -
 44
44 -
 45
45 -
 46
46 -
47
-
48
-
49
-
50
-
51
-
52
-
53
-
54
-
55
-
56
-
57
-
58
-
59
-
60
-
61
-
62
-
63
-
64
-
65
-
66
-
67
-
68
-
69
-
70
-
71
-
72
-
73
-
74
-
75
-
76
-
77
-
78
-
79
-
80
-
81
-
82
-
83
-
84
-
85
-
86
-
87
-
88
-
89
-
90
-
91
-
92
-
93
-
94
-
95
-
96
-
97
-
98
-
99
-
100
-
101
-
102
-
103
-
104
-
105
-
106
-
107
-
108
-
109
-
110
-
111
-
112
-
113
-
114
-
115
-
116
-
117
-
118
-
119
-
120
-
121
-
122
-
123
-
124
-
125
-
126
-
127
-
128
-
129
-
130
-
131
-
132
-
133
-
134
-
135
-
136
-
137
-
138
-
139
-
140
-
141
-
142
-
143
-
144
-
145
-
146
-
147
-
148
-
149
-
150
-
151
-
152
-
153
-
154
 |
 |
