Epson Stylus Pro 3880 Designer Edition User's Guide - Page 132
Improving Print Quality, Windows.
 |
View all Epson Stylus Pro 3880 Designer Edition manuals
Add to My Manuals
Save this manual to your list of manuals |
Page 132 highlights
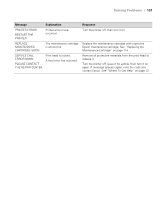
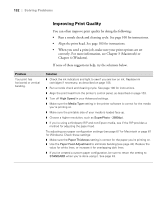
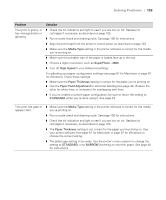
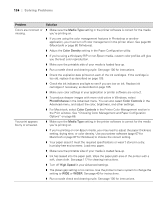
132 | Solving Problems Improving Print Quality You can often improve print quality by doing the following: • Run a nozzle check and cleaning cycle. See page 100 for instructions. • Align the print head. See page 103 for instructions. • When you send a print job, make sure your print options are set correctly. For more information, see Chapter 3 (Macintosh) or Chapter 4 (Windows). If none of these suggestions help, try the solutions below. Problem Your print has horizontal or vertical banding. Solution ◗ Check the ink indicators and light to see if you are low on ink. Replace ink cartridges if necessary, as described on page 105. ◗ Run a nozzle check and cleaning cycle. See page 100 for instructions. ◗ Align the print head from the printer's control panel, as described on page 103. ◗ Turn off High Speed in your Advanced settings. ◗ Make sure the Media Type setting in the printer software is correct for the media you're printing on. ◗ Make sure the printable side of your media is loaded face-up. ◗ Choose a higher resolution, such as SuperPhoto - 2880dpi. ◗ If you're using a third-party RIP and non-Epson media, see if the RIP provides a method for adjusting the paper feed. Try adjusting your paper configuration settings (see page 67 for Macintosh or page 87 for Windows). Check these settings: ◗ Make sure the Paper Thickness setting is correct for the paper you're printing on. ◗ Use the Paper Feed Adjustment to eliminate banding (see page 42). Reduce the value for white lines, or increase it for overlapping dark lines. ◗ If you've created a custom paper configuration, be sure to return the setting to STANDARD when you're done using it. See page 43. 6-132
-
 1
1 -
2
-
3
-
4
-
5
-
6
-
7
-
8
-
9
-
10
-
11
-
12
-
13
-
14
-
15
-
16
-
17
-
18
-
19
-
20
-
21
-
22
-
23
-
24
-
25
-
26
-
27
-
28
-
29
-
30
-
31
-
32
-
33
-
34
-
35
-
36
-
37
-
38
-
39
-
40
-
41
-
42
-
43
-
44
-
45
-
46
-
47
-
48
-
49
-
50
-
51
-
52
-
53
-
54
-
55
-
56
-
57
-
58
-
59
-
60
-
61
-
62
-
63
-
64
-
65
-
66
-
67
-
68
-
69
-
70
-
71
-
72
-
73
-
74
-
75
-
76
-
77
-
78
-
79
-
80
-
81
-
82
-
83
-
84
-
85
-
86
-
87
-
88
-
89
-
90
-
91
-
92
-
93
-
94
-
95
-
96
-
97
-
98
-
99
-
100
-
101
-
102
-
103
-
104
-
105
-
106
-
107
-
108
-
109
-
110
-
111
-
112
-
113
-
114
-
115
-
116
-
117
-
118
-
119
-
120
-
121
-
122
-
123
-
124
-
125
-
126
-
 127
127 -
 128
128 -
 129
129 -
 130
130 -
 131
131 -
 132
132 -
 133
133 -
 134
134 -
 135
135 -
 136
136 -
 137
137 -
138
-
139
-
140
-
141
-
142
-
143
-
144
-
145
-
146
-
147
-
148
-
149
-
150
-
151
-
152
-
153
-
154
 |
 |
