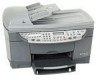
HP 7110 HP Officejet 7100 series all-in-one - (English) Reference Guide
HP 7110 - Officejet All-in-One Color Inkjet Manual
 |
View all HP 7110 manuals
Add to My Manuals
Save this manual to your list of manuals |
HP 7110 manual content summary:
- HP 7110 | HP Officejet 7100 series all-in-one - (English) Reference Guide - Page 1
hp officejet 7100 series all-in-one reference guide - HP 7110 | HP Officejet 7100 series all-in-one - (English) Reference Guide - Page 2
are reserved. No part of the document may be photocopied, reproduced, or translated to another language without the prior written consent of Hewlett-Packard Company. Portions Copyright © 1989-2001 Palomar Software Inc. The HP OfficeJet 7100 Series includes printer driver technology licensed from - HP 7110 | HP Officejet 7100 series all-in-one - (English) Reference Guide - Page 3
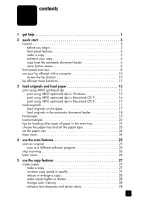
hp officejet with a computer 10 review the hp director 10 hp officejet menu functions 13 3 load originals and load paper 15 print using 4800 optimized dpi 15 print using 4800 optimized dpi in Windows 15 print an original 25 scan to a different software program 26 stop scanning 26 learn more - HP 7110 | HP Officejet 7100 series all-in-one - (English) Reference Guide - Page 4
a fax from your hp officejet 45 use speed dial entries to send a fax 46 send a color fax 46 broadcast a fax to multiple recipients 47 schedule a fax 47 cancel a scheduled fax 47 receive a fax 48 receive a fax automatically 48 receive a fax manually 48 print reports 48 generate automated - HP 7110 | HP Officejet 7100 series all-in-one - (English) Reference Guide - Page 5
fax feature menu options 55 8 maintain your hp officejet 57 clean the glass 57 clean the lid backing 57 clean the exterior 57 install the automatic document feeder 58 work with printheads and ink cartridges 58 print a self-test report 58 check the ink level 58 perform color calibration 59 - HP 7110 | HP Officejet 7100 series all-in-one - (English) Reference Guide - Page 6
contents index 81 iv hp officejet 7100 series - HP 7110 | HP Officejet 7100 series all-in-one - (English) Reference Guide - Page 7
Guide. This printed Reference Guide contains information on using X X your HP Officejet and provides additional troubleshooting assistance for the installation process. The printed Support and Specifications booklet provides XX information for your HP Officejet, including how to order supplies - HP 7110 | HP Officejet 7100 series all-in-one - (English) Reference Guide - Page 8
, click Start, point to Programs or All Programs (XP), point to Hewlett-Packard, point to HP Officejet 7100 Series, and then choose View the Readme File. For Macintosh: go to the HD:Applications:HP Officejet Software folder. For Windows: Clicking Help in a dialog box displays X information about - HP 7110 | HP Officejet 7100 series all-in-one - (English) Reference Guide - Page 9
: • Follow the instructions in the Setup Poster to set up your HP Officejet. You should install the HP Officejet software before connecting the HP Officejet to the computer. • If you are using Macintosh OS X, once the HP Officejet software is installed, add your printer to the Print Center. For more - HP 7110 | HP Officejet 7100 series all-in-one - (English) Reference Guide - Page 10
through speed-dial entries. Access one-touch speed-dial buttons. Change software program to scan to, or a computer, if on a network Access photo card, copy, fax, scan, and network settings options. Make two-sided copies. Choose the paper type and paper tray. Start a copy. Turn the HP Officejet - HP 7110 | HP Officejet 7100 series all-in-one - (English) Reference Guide - Page 11
instructions below to make a copy of your color photo or picture. 1 Open the lid of your HP Officejet and place your picture face down in the bottom-right corner of the scanner HP Officejet automatically prints one color copy of the panel. The HP Officejet makes two Number of Copies one more time - HP 7110 | HP Officejet 7100 series all-in-one - (English) Reference Guide - Page 12
is printed, which fills the whole page. Next, you will review the automatic document feeder. copy from the automatic document feeder Your HP Officejet has an automatic document feeder (ADF), which you can use to load multiple originals for faster copying, faxing, or scanning. In the next part of - HP 7110 | HP Officejet 7100 series all-in-one - (English) Reference Guide - Page 13
available only on certain models of your HP Officejet. 3 Press Menu. 4 Press 7, then press 1. This selects Status and Maintenance, then selects the Check Ink Level. The ink supply levels for both the black ink cartridge (#14) and the tri-color ink cartridge (#14) appear in the front-panel display - HP 7110 | HP Officejet 7100 series all-in-one - (English) Reference Guide - Page 14
to access speed-dial numbers that have been set up from the front panel or with the HP Director software. One-Touch Speed-Dial Buttons: use to access the first 10 speed-dial entries. Phone Hook: the Black: starts a black and white fax. Start Fax - Color: starts a color fax. hp officejet 7100 series - HP 7110 | HP Officejet 7100 series all-in-one - (English) Reference Guide - Page 15
must configure the Scan To list using the HP Officejet software on the PC prior to using this feature. On: turns the HP Officejet on and off. Two-Sided Copy: use to make hands-free two-sided copies. Available only if you have the two-sided printing accessory and the automatic document feeder (ADF - HP 7110 | HP Officejet 7100 series all-in-one - (English) Reference Guide - Page 16
Programs or All Programs (XP), point to Hewlett-Packard, choose HP Officejet 7100 Series, then choose HP Director. For Macintosh Users: Double-click the HP Director icon on the desktop. See the HP Officejet 7100 Series: Onscreen User's Guide for comprehensive onscreen information about the Director - HP 7110 | HP Officejet 7100 series all-in-one - (English) Reference Guide - Page 17
the form of an onscreen User's Guide, Troubleshooting, Product Tour, Director Help, and information about your HP Officejet. Fax: displays the Send Fax Center, where you can view and edit images, use creative printing, make and print a photo album, print, e-mail, or fax an image, upload an image to - HP 7110 | HP Officejet 7100 series all-in-one - (English) Reference Guide - Page 18
the HP Officejet 7100 Series. Customize: displays options for customizing the appearance and functionality of the Director and scanning. Help: accesses Help for assistance with the HP Officejet software. About: accesses copyright information about the HP Officejet software. 12 hp officejet 7100 - HP 7110 | HP Officejet 7100 series all-in-one - (English) Reference Guide - Page 19
quick start hp officejet menu functions Access Menu functions by pressing the corresponding numbers for each menu option. For example: to set the language and and Maintenance menu, then selects the Set Country and Language option. Not all features are available on all models. reference guide 13 - HP 7110 | HP Officejet 7100 series all-in-one - (English) Reference Guide - Page 20
6:Backup Fax Reception 7:Error Correction Mode 8:Silent Detect 1:Check Ink Level 2:Clean PrintHeads JetDirect CFG IPX/SPX CFG TCP/IP 3:Align PrintHeads CFG LINK 4:Perform Color Calibration 5:Restore Factory Defaults 6:Set Power Save Mode Time 7:Set Language and Country/ Region 8:Ring and - HP 7110 | HP Officejet 7100 series all-in-one - (English) Reference Guide - Page 21
dpi to get the best print quality when you are printing your photos on photo paper. With this setting the HP Officejet prints significantly slower. To achieve 4800 Optimized dpi, you must select one of the following types of photo paper: - hp premium photo paper - hp premium plus photo paper, matte - HP 7110 | HP Officejet 7100 series all-in-one - (English) Reference Guide - Page 22
select Print. The Print dialog box opens. 4 Select Paper Type/Quality from the list. 5 Select the Quality tab. 6 In the Paper Selection area, select Photo Paper from the Group list. 7 In the Paper Selection area, select the appropriate photo paper from the Type list. Your HP Officejet automatically - HP 7110 | HP Officejet 7100 series all-in-one - (English) Reference Guide - Page 23
the Paper type list before you can access this option. 7 Click Print. load originals Your HP Officejet provides two ways to load originals for copying, scanning, and faxing. backing are not clean. For more information, see clean the glass and clean the lid backing on page 57. reference guide 17 - HP 7110 | HP Officejet 7100 series all-in-one - (English) Reference Guide - Page 24
load them one sheet at a time: • Other specialty papers, such as glossy paper • Overhead transparencies, such as HP Premium print side up. 2 Adjust the paper-width guide to fit the size of your original. A message appears on the display indicating that the originals are loaded. 18 hp officejet - HP 7110 | HP Officejet 7100 series all-in-one - (English) Reference Guide - Page 25
tray and set the paper type on page 23. If you have the HP 250-sheet plain paper tray, you can load paper into both the main loading paper, and adjusting paper-width and paper-length guides. Caution! You must also have the two-sided printing accessory installed to use the 250-sheet plain paper - HP 7110 | HP Officejet 7100 series all-in-one - (English) Reference Guide - Page 26
guide that came with the 250-sheet plain paper tray for information on loading paper in this accessory. load envelopes Your HP Officejet provides two methods for working with envelopes. Do not use shiny or embossed envelopes, or envelopes that have clasps or windows. • If you are printing one - HP 7110 | HP Officejet 7100 series all-in-one - (English) Reference Guide - Page 27
they stop. Adjust the paper-width guide against the envelopes (be careful not to bend the envelopes). Make sure the envelopes fit within the tray (do not overload it). Consult the help files in your word processing software for details on how to format text for printing on envelopes. reference - HP 7110 | HP Officejet 7100 series all-in-one - (English) Reference Guide - Page 28
the main tray, slide the paper-width guide up against the long edge of the photo paper, and slide the paper-length guide in until it stops. If the photo paper you are using has perforated tabs, load the photo paper so that the tabs are closest to you. 22 hp officejet 7100 series - HP 7110 | HP Officejet 7100 series all-in-one - (English) Reference Guide - Page 29
with printing) tips main tray. • If you use non-HP banner paper, use 20-lb. paper and to ensure the best print quality. If you have installed HP 250-sheet plain paper the two-sided printing accessory installed to use the 250- unit completes the copy. HP recommends paper type settings according - HP 7110 | HP Officejet 7100 series all-in-one - (English) Reference Guide - Page 30
Size. 3 Press until the desired size appears, then press Enter to select it. learn more See the load section in the onscreen User's Guide to learn more about the following: • Recommended paper-type settings for printing • Recommended paper-type settings for copying 24 hp officejet 7100 series - HP 7110 | HP Officejet 7100 series all-in-one - (English) Reference Guide - Page 31
in your publishing software, allowing you to print business cards and brochures for yourself. • Scan in photos and e-mail them to coworkers and friends, create a photographic inventory of your office or home, or create an electronic scrapbook. To use the scan features, your HP Officejet and computer - HP 7110 | HP Officejet 7100 series all-in-one - (English) Reference Guide - Page 32
then press to scroll through the Scan To list until the desired scan-to software program appears. 3 If you have more than one computer networked to the HP Officejet, you see a list of computers that have the HP Officejet software installed on them. Press to scroll through the Scan To list until the - HP 7110 | HP Officejet 7100 series all-in-one - (English) Reference Guide - Page 33
your HP Officejet or by using the HP Officejet software on HP Officejet completes the copy, unless you save the settings as the default settings. For more information, see change settings for all copy jobs in the onscreen User's Guide of replacing your ink cartridges, because it uses less ink. 1 Load - HP 7110 | HP Officejet 7100 series all-in-one - (English) Reference Guide - Page 34
Fit to Page, Which Size?, Poster, 2 on 1, Margin Shift, or Mirror. 1 Press Reduce/Enlarge to choose one of the following: - Custom 100%- lets you enter the percentage to reduce or enlarge your copy. - Full Page 91 enhance light colors that may otherwise appear white. 28 hp officejet 7100 series - HP 7110 | HP Officejet 7100 series all-in-one - (English) Reference Guide - Page 35
settings in the Copy Area. 3 Press Menu. 4 Press 1, then press 4. This selects Copy Setup, and then selects Set Copy Defaults. Your settings are saved. reference guide 29 - HP 7110 | HP Officejet 7100 series all-in-one - (English) Reference Guide - Page 36
chapter 5 perform special copy jobs In addition to supporting standard copying, your HP Officejet can also do the following: • copy at 4800 optimized dpi • copy a photo • fit a copy to the page • print several copies on one page • print two originals on one page • shift image to increase the margin - HP 7110 | HP Officejet 7100 series all-in-one - (English) Reference Guide - Page 37
type settings for copying in the onscreen User's Guide. Tip: To enlarge a photo automatically to a . Tip: Make sure that the glass is clean and the original has been placed in the bottom Copy, Color. print several copies on one page You can place multiple copies of an original on one page by selecting - HP 7110 | HP Officejet 7100 series all-in-one - (English) Reference Guide - Page 38
again. print two originals on one page You can print two different letter- or A4-sized originals on one page one page 1 Place the first original on the glass. If you are using the ADF, load both originals there. 2 Press Special Features until 2 on 1 59% appears, then press Enter. 32 hp officejet - HP 7110 | HP Officejet 7100 series all-in-one - (English) Reference Guide - Page 39
. Note: You can make two-sided copies automatically only if your HP Officejet has an HP two-sided printing accessory. The two-sided printing accessory is standard equipment with some models or can be purchased separately. document feeder (ADF). 2 Press the Two-Sided Copy button. reference guide 33 - HP 7110 | HP Officejet 7100 series all-in-one - (English) Reference Guide - Page 40
You must copy more than one original to use the collate print a poster from a file on your computer. For more information, see print a poster in the onscreen User's Guide. 1 Load the original on the glass. Tip: You cannot use the automatic document feeder (ADF) when making a poster. 34 hp officejet - HP 7110 | HP Officejet 7100 series all-in-one - (English) Reference Guide - Page 41
Press Start Copy, Black or Start Copy, Color. Tip: After you select the poster width, the HP Officejet adjusts the length automatically to maintain the proportions of the original. If the original cannot be enlarged to function. 5 Press Start Copy, Black or Start Copy, Color. reference guide 35 - HP 7110 | HP Officejet 7100 series all-in-one - (English) Reference Guide - Page 42
copying, press Cancel on the front panel. learn more See the copy section in the onscreen User's Guide to learn more about the following: • Perform special copying • Change color intensity • Enhance text sharpness you want. Press Enter to select the displayed setting. 36 hp officejet 7100 series - HP 7110 | HP Officejet 7100 series all-in-one - (English) Reference Guide - Page 43
Officejet to print or save your photos. Your HP Officejet has three different slots for photo cards. Your HP Officejet can read SmartMedia, CompactFlash, Secure Digital and Memory Stick photo cards. SmartMedia Memory Stick CompactFlash Secure Digital Note: You can use only one photo card in your HP - HP 7110 | HP Officejet 7100 series all-in-one - (English) Reference Guide - Page 44
. use the hp photo view center The HP Photo View Center is a Windows software program for viewing and editing image files. You can print images, send images by e-mail or fax, upload images to a website, or use images in printing projects with the HP Photo View Center. 38 hp officejet 7100 series - HP 7110 | HP Officejet 7100 series all-in-one - (English) Reference Guide - Page 45
use the hp workplace The HP Workplace is a Macintosh software program for camera supports it, you can also print photos using the Digital Print Order Format (DPOF). print a print a proof sheet when first inserting the card 1 Insert the photo card into the appropriate slot on your HP Officejet - HP 7110 | HP Officejet 7100 series all-in-one - (English) Reference Guide - Page 46
for the photos you want to print. 5 Press or Enter to enter the next photo number. A comma is inserted automatically as the cursor advances to the right. Tip: You can specify a range using a dash, which you enter by pressing the Symbols button (*) on the keypad. 40 hp officejet 7100 series - HP 7110 | HP Officejet 7100 series all-in-one - (English) Reference Guide - Page 47
photo numbers for the photos you want to print. 7 Press to select a photo size supports Digital Print Order Format (DPOF). The DPOF file is stored by the digital camera on a photo card and specifies the following information: • Which photos to print • The quantity of each photo to be printed 1 Do one - HP 7110 | HP Officejet 7100 series all-in-one - (English) Reference Guide - Page 48
slot on your HP Officejet. 3 Fill out step 1 of the proof sheet, which lets you select the photos you want to print by filling in the one option in each section of the proof sheet. 5 Place the top of the proof sheet face down on the scanner glass as shown in the following figure. 42 hp officejet - HP 7110 | HP Officejet 7100 series all-in-one - (English) Reference Guide - Page 49
Sheet. The proof sheet is scanned and the HP Officejet prints the photos you specified on the proof sheet from the paper in the upper tray. learn more See the onscreen User's Guide to learn more about the following: • Use the HP Photo View Center or HP Workplace • Find and select images on your - HP 7110 | HP Officejet 7100 series all-in-one - (English) Reference Guide - Page 50
chapter 6 photo card functions menu options 0:Photo Card Functions 1:Save Photos to PC 2:Print Proof Sheet 3:Scan Proof Sheet 4: Print Photos 44 hp officejet 7100 series - HP 7110 | HP Officejet 7100 series all-in-one - (English) Reference Guide - Page 51
-page fax using the computer. See the onscreen User's Guide for more information about sending faxes and creating cover pages using your computer. Note: By default, your HP Officejet prints a report only if there is a problem with sending or receiving a fax. A confirmation message indicating that - HP 7110 | HP Officejet 7100 series all-in-one - (English) Reference Guide - Page 52
information, see send a fax from your computer in the onscreen User's Guide. 1 Load your original. For more information, see load originals on page 17. 2 Enter the fax number using the keypad, speed dial button, or one-touch speed-dial buttons. 3 Press Start Fax, Color. 46 hp officejet 7100 series - HP 7110 | HP Officejet 7100 series all-in-one - (English) Reference Guide - Page 53
HP Officejet, broadcasting lets you send a blackand-white fax to one group, which can contain up to 20 individual speed-dial entries. To use broadcasting, the fax must fit into your HP Officejet , see schedule a fax in the onscreen User's Guide. When the specified time is reached, your fax is - HP 7110 | HP Officejet 7100 series all-in-one - (English) Reference Guide - Page 54
fax features in the onscreen User's Guide. Your HP Officejet is automatically set to receive and print received faxes (unless you have turned instructions below. ` Press the Auto Answer button until the green light is lit. receive a fax manually Before manually receiving a fax to your HP Officejet, - HP 7110 | HP Officejet 7100 series all-in-one - (English) Reference Guide - Page 55
, see print a self-test report in the onscreen User's Guide. - 6:Automatic Reports Setup, which is the automatic reports setting described in generate automated reports on page 49. 3 Select the report you want, then press Enter. redial a number automatically You can set your HP Officejet to redial - HP 7110 | HP Officejet 7100 series all-in-one - (English) Reference Guide - Page 56
8. This selects the Status and Maintenance, then selects the Ring and Beep Volume option. 3 Press to select one of the options: Soft, Loud, or Off. 4 Press Enter. set up speed dialing Through your HP Officejet or your computer, you can assign entries to fax numbers you use often. This lets you dial - HP 7110 | HP Officejet 7100 series all-in-one - (English) Reference Guide - Page 57
Speed Dial Setup menu, then selects the Group Speed Dial option. 3 Choose one of the following: - If this is your first group, the first unassigned printed along with the fax header. The date and time format is based upon the language and country setting. Normally the computer software guide 51 - HP 7110 | HP Officejet 7100 series all-in-one - (English) Reference Guide - Page 58
Fax Setup Wizard. If you need to change it, you can use the Fax Setup Wizard from the HP Director, or you can follow these steps to enter your name and fax number from the front panel. and then in uppercase. The first letter of a word is set to uppercase automatically. 52 hp officejet 7100 series - HP 7110 | HP Officejet 7100 series all-in-one - (English) Reference Guide - Page 59
you purchased. When your HP Officejet runs out of memory to store faxes, it will not receive any more fax calls until the stored faxes are printed. Reprint Faxes in Memory enables you to reprint a fax stored in memory. For example, if your ink cartridge runs out of ink or paper becomes jammed when - HP 7110 | HP Officejet 7100 series all-in-one - (English) Reference Guide - Page 60
the receiver. When the HP Officejet is set to receive faxes manually, you must be available to respond to the incoming call or your HP Officejet cannot receive faxes. See receive a fax on page 48 for more information. learn more See the fax section in the onscreen User's Guide to learn more about - HP 7110 | HP Officejet 7100 series all-in-one - (English) Reference Guide - Page 61
55 reference guide fax feature menu options The following options are available for fax functions. 2:Fax Functions 3:Print Report 4:Speed Dial Maintenance 1:Check Ink Level 2:Clean PrintHeads 3:Align PrintHeads 4:Perform Color Calibration 5:Restore Factory Defaults 6:Set Power Save Mode Time - HP 7110 | HP Officejet 7100 series all-in-one - (English) Reference Guide - Page 62
chapter 7 56 hp officejet 7100 series - HP 7110 | HP Officejet 7100 series all-in-one - (English) Reference Guide - Page 63
hp officejet 8 This section provides instructions for keeping your HP Officejet in top working condition. Perform these maintenance procedures as necessary. clean and Copy. 1 Turn off the unit, unplug the power cord, and raise the lid. 2 Clean the glass with a soft cloth or sponge slightly moistened - HP 7110 | HP Officejet 7100 series all-in-one - (English) Reference Guide - Page 64
your HP Officejet, you well need to preform some simple maintenance procedures, and when prompted by a front-panel message, replace the ink cartridges or printheads. print a self-test report If you are experiencing problems with printing, before cleaning or replacing the ink cartridges or printheads - HP 7110 | HP Officejet 7100 series all-in-one - (English) Reference Guide - Page 65
maintain your hp officejet perform color calibration The Color Calibration option prints out a report that lets you manually improve your color printing or copying. You should perform this procedure only if you see problems with color tints, such as noticeably incorrect flesh tones. 1 Press Menu. 2 - HP 7110 | HP Officejet 7100 series all-in-one - (English) Reference Guide - Page 66
Pull the printhead handle upward 5 If there is plastic tape on the failed printhead, remove the plastic tape. 6 Push the failed printhead firmly down into the appropriate slot using the printhead handle. Do not touch the printhead tower, and do not remove the printhead handle. 60 hp officejet 7100 - HP 7110 | HP Officejet 7100 series all-in-one - (English) Reference Guide - Page 67
maintain your hp officejet 7 Move the print carriage latch down, and make sure the loops catch the hooks. Snap the latch into place, then close the print carriage access door. 8 If the error message still appears, remove and reinsert the printhead again and close the print carriage access drawer. 9 - HP 7110 | HP Officejet 7100 series all-in-one - (English) Reference Guide - Page 68
avoid damaging the printer, remove a printhead only when a replacement is available. If a printhead is removed without being replaced: - Close the print carriage and the print-carriage access door. - Replace the printhead within 24 hours. - Never remove an ink cartridge and a printhead at the same - HP 7110 | HP Officejet 7100 series all-in-one - (English) Reference Guide - Page 69
expiration dates Caution! If you ignore the messages and do not replace the ink cartridges, eventually the HP Officejet will stop working completely to avoid damaging the printheads. See the Support and Specifications booklet for information on ordering replacement ink cartridges. reference guide - HP 7110 | HP Officejet 7100 series all-in-one - (English) Reference Guide - Page 70
damaging the printer, remove an ink cartridge only when a replacement is available. If an ink cartridge is removed without being replaced: - Close the print carriage and the print-carriage access door. - Replace the ink cartridge within 24 hours. - Never remove an ink cartridge and a printhead at - HP 7110 | HP Officejet 7100 series all-in-one - (English) Reference Guide - Page 71
the color bars on the print carriage. The ink-cartridge label should be face-up after the cartridge is inserted. Color bars place the ink cartridges into their respective slots on the left and right 5 Close the print-carriage access door. align the printheads The HP Officejet prompts you to align - HP 7110 | HP Officejet 7100 series all-in-one - (English) Reference Guide - Page 72
or print quality still seem poor after you clean the printheads, replace the printhead that is affected. clean the ink cartridge contacts Clean the ink cartridge contacts only if you get repeated front panel messages prompting you to check a cartridge after you already have. 66 hp officejet 7100 - HP 7110 | HP Officejet 7100 series all-in-one - (English) Reference Guide - Page 73
you removed an ink cartridge from its holder, the HP Officejet needs to align the printheads. 9 After the message appears in the front-panel display, press Enter to align the printheads. A page is printed to confirm alignment. clean the printhead contacts Clean the printhead copper contacts only - HP 7110 | HP Officejet 7100 series all-in-one - (English) Reference Guide - Page 74
the print-carriage access door. The print carriage moves to the center. 2 After the print carriage has moved to the center, unplug the power cord from the back of the unit. Warning! It is very important that you disconnect the printer from its electrical power source before touching the printhead - HP 7110 | HP Officejet 7100 series all-in-one - (English) Reference Guide - Page 75
the Troubleshooting help, which you access from the HP Director. replacement alternatives To get the best performance from your HP Officejet, we recommend using only genuine Hewlett-Packard supplies. See the Support and Specifications booklet for information on ordering replacement ink cartridges - HP 7110 | HP Officejet 7100 series all-in-one - (English) Reference Guide - Page 76
of Hewlett-Packard. Damage that results from the use of non-HP ink is not the responsibility of HewlettPackard. The Ink Level Gauge is automatically reset when a different ink cartridge is installed in the printer. Overriding the Ink Level Gauge does not affect ink cartridge expiration dates - HP 7110 | HP Officejet 7100 series all-in-one - (English) Reference Guide - Page 77
country are set when you install the HP Officejet. If you need to reset either to choose the correct language. You may also consider printing a Self-Test report to identify the country and are prompted to confirm that the language you selected is the one you want. 6 Press 1 for Yes and 2 for No - HP 7110 | HP Officejet 7100 series all-in-one - (English) Reference Guide - Page 78
you selected is the one you want. 11 Press 1 for Yes or 2 for No. You can confirm the country and language by printing a Self-Test Report. 12 Press Menu, press 3, and then press 5 to print the Self-Test report. set the power save mode time The bulb in your HP Officejet remains on for a specified - HP 7110 | HP Officejet 7100 series all-in-one - (English) Reference Guide - Page 79
select the displayed setting. maintain your hp officejet 7:Status and Maintenance 1:Check Ink Level 2:Clean PrintHeads 3:Align PrintHeads 4:Perform Color Calibration 5:Restore Factory Defaults 6:Set Power Save Mode Time 7:Set Language and Country/ Region 8:Ring and Beep Volume reference guide 73 - HP 7110 | HP Officejet 7100 series all-in-one - (English) Reference Guide - Page 80
chapter 8 74 hp officejet 7100 series - HP 7110 | HP Officejet 7100 series all-in-one - (English) Reference Guide - Page 81
, you should not have any problems with the installation of your HP Officejet. If you do not follow the instructions, you may see any of the following problems: If Microsoft's New Hardware Found message does not appear If you installed the HP Officejet software first as requested on the Setup - HP 7110 | HP Officejet 7100 series all-in-one - (English) Reference Guide - Page 82
75. selecting an hp officejet on a network (Macintosh) If your HP Officejet model supports networking, you can use automatic discovery or manual setup to locate your printer using the HP All-in-One Setup Assistant (Hard Disk:Applications:HP All-in-One Software:HP All-in-One Setup Assist). Automatic - HP 7110 | HP Officejet 7100 series all-in-one - (English) Reference Guide - Page 83
up manually: - Click the Create button. - Enter the network IP address for the desired printer. - Click OK. 4 Complete the HP-All-in-One Setup Assistant. connect your hp officejet to your computer Your HP Officejet supports HOT Swapping, meaning you can connect to the HP Officejet while the power is - HP 7110 | HP Officejet 7100 series all-in-one - (English) Reference Guide - Page 84
HP Officejet. Both computers must have the HP Officejet software installed. The list below shows the supported combinations of communication between the HP Officejet and your computers. The following communication configurations can be used with your HP Officejet: • HP JetDirect 200m print server - HP 7110 | HP Officejet 7100 series all-in-one - (English) Reference Guide - Page 85
a modem, turn off its fax-receive feature. See your onscreen User's Guide for information on tone versus pulse dialing and phone services. remove and reinstall your hp officejet software Do not simply delete the HP Officejet program files from your hard drive. Be sure to remove them properly using - HP 7110 | HP Officejet 7100 series all-in-one - (English) Reference Guide - Page 86
:HP All-in-One Software folder. 2 Double-click on Uninstaller. 3 Follow the directions that appear on the screen. learn more See the additional setup information section in the onscreen User's Guide to learn more about: • Set up your HP Officejet for network printing • Understand point-and-print - HP 7110 | HP Officejet 7100 series all-in-one - (English) Reference Guide - Page 87
check ink level, 58 clean contacts, 66 replace ink cartridges, 63 change paper tray, 23 clean ink cartridge contacts, 66 printhead contacts, 67 printheads, 66 the exterior, 57 the glass, 57 the lid backing, 57 collate copies, 34 color fax, 46 improve printing, 59 intensity of copy, 28 CompactFlash - HP 7110 | HP Officejet 7100 series all-in-one - (English) Reference Guide - Page 88
header, fax, 52 help, 1 hp director, 10-12 hp officejet menu functions, 13 simple sharing, 78 software, 10 hp papers, tips on loading, 22 hp two-sided printing accessory, 33 I image, shift, 33 individual speed-dial settings, create, 50 ink cartridges check ink level, 58 clean, 66 refill, 70 replace - HP 7110 | HP Officejet 7100 series all-in-one - (English) Reference Guide - Page 89
, 40 photos from photo card, 39 proof sheet, 39 self-test report, 58 print cartridges, see ink cartridges printheads reference guide align, 65 clean, 66, 67 load, 61 replace, 61 replacement verification, 59 proof sheet print, 39 scan, 42 use, 41 Q quality, 27 quick start, 3 review the director, 10 - HP 7110 | HP Officejet 7100 series all-in-one - (English) Reference Guide - Page 90
index remove and reinstall software, 79 T-shirt transfer, 35 load, 22 tutorial, 3 before you begin, 3 front panel features, 3 make a copy, 5 two-sided copies, 9, 33 U USB cable installation, 78 V volume, adjust for fax, 50 84 hp officejet 7100 series - HP 7110 | HP Officejet 7100 series all-in-one - (English) Reference Guide - Page 91
- HP 7110 | HP Officejet 7100 series all-in-one - (English) Reference Guide - Page 92
- HP 7110 | HP Officejet 7100 series all-in-one - (English) Reference Guide - Page 93
- HP 7110 | HP Officejet 7100 series all-in-one - (English) Reference Guide - Page 94
- HP 7110 | HP Officejet 7100 series all-in-one - (English) Reference Guide - Page 95
- HP 7110 | HP Officejet 7100 series all-in-one - (English) Reference Guide - Page 96
everything you need to get the most value from your HP Officejet. • Technical Support • Supplies and Ordering Information • Project Tips • Ways to Enhance Your Product www.hp.com/support © 2002 Hewlett-Packard Company Printed in the U.S.A., Mexico, Germany, Singapore, or China. *C8380-90183* *C8380
-
 1
1 -
 2
2 -
 3
3 -
 4
4 -
 5
5 -
 6
6 -
 7
7 -
8
-
9
-
10
-
11
-
12
-
13
-
14
-
15
-
16
-
17
-
18
-
19
-
20
-
21
-
22
-
23
-
24
-
25
-
26
-
27
-
28
-
29
-
30
-
31
-
32
-
33
-
34
-
35
-
36
-
37
-
38
-
39
-
40
-
41
-
42
-
43
-
44
-
45
-
46
-
47
-
48
-
49
-
50
-
51
-
52
-
53
-
54
-
55
-
56
-
57
-
58
-
59
-
60
-
61
-
62
-
63
-
64
-
65
-
66
-
67
-
68
-
69
-
70
-
71
-
72
-
73
-
74
-
75
-
76
-
77
-
78
-
79
-
80
-
81
-
82
-
83
-
84
-
85
-
86
-
87
-
88
-
89
-
90
-
91
-
92
-
93
-
94
-
95
-
96
 |
 |

hp officejet
7100 series
all-in-one
reference guide