HP DesignJet Z2600 User guide - Page 62
Advanced print settings, Select print quality, Select paper size
 |
View all HP DesignJet Z2600 manuals
Add to My Manuals
Save this manual to your list of manuals |
Page 62 highlights
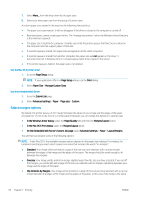
Advanced print settings The rest of this chapter explains the various print settings that you can use when printing with a printer driver, the Embedded Web Server or the HP DesignJet Utility. These methods offer a relatively large number of settings in order to satisfy all requirements. TIP: In general you are recommended to use the default settings unless you know that they do not meet your requirements. TIP: If you intend to reuse a particular group of settings repeatedly, you can save those settings under a name of your own choice and recall them later. A saved group of settings is known as a 'quick set' in the Windows printer driver, and as a 'preset' in the Embedded Web Server. Select print quality The printer has various print-quality options because best-quality printing requires some loss of speed, while fast printing implies some reduction in print quality. Therefore, the standard print-quality selector is a slider that allows you to choose between quality and speed. With some paper types, you can choose a compromise position between the two. Alternatively, you can select from the custom options: Best, Normal and Fast. If you select Fast, you can also select Economode, which uses a lower rendering resolution and consumes less ink. It therefore increases printing speed even further, but reduces print quality. Economode can be selected only from the custom options (not from the slider). There is also a supplementary custom option that may have an effect on print quality: Maximum detail. See High-quality printing on page 59. NOTE: In the Windows driver dialog, the rendering resolution for your job is displayed in the Custom Print Quality Options dialog box (select Custom options and then Settings). In the Mac OS X Print dialog, select Show Presets in the presets list, then choose the Paper/Quality list. You can select print-quality options in the following ways: ● In the Windows driver dialog: go to the Paper/Quality tab and look at the Print Quality section. If you select Standard Options, you will see a simple slider with which you can select speed or quality. If you select Custom Options, you will see the more specific options described above. ● In the Mac OS X Print dialog: go to the Paper/Quality panel and look at the Quality Options section. If you select Standard quality options, you will see a simple slider with which you can select speed or quality. If you select Custom quality options, you will see the more specific options described above. ● On the Embedded Web Server's Submit Job page: select Basic settings > Print quality. If you then select Standard options, you can choose between Speed and Quality. If you select Custom options, you will see the more specific options described above. ● Using the front panel: press , then , then Setup > Printing preferences > Print quality. NOTE: If the print quality is set from your computer, it overrides the print-quality setting in the front panel. NOTE: You cannot change the print quality of pages that the printer is already receiving or has already received (even if they have not started to print yet). Select paper size The paper size can be specified in the following ways. 54 Chapter 7 Printing ENWW
-
 1
1 -
2
-
3
-
4
-
5
-
6
-
7
-
8
-
9
-
10
-
11
-
12
-
13
-
14
-
15
-
16
-
17
-
18
-
19
-
20
-
21
-
22
-
23
-
24
-
25
-
26
-
27
-
28
-
29
-
30
-
31
-
32
-
33
-
34
-
35
-
36
-
37
-
38
-
39
-
40
-
41
-
42
-
43
-
44
-
45
-
46
-
47
-
48
-
49
-
50
-
51
-
52
-
53
-
54
-
55
-
56
-
 57
57 -
 58
58 -
 59
59 -
 60
60 -
 61
61 -
 62
62 -
 63
63 -
 64
64 -
 65
65 -
 66
66 -
 67
67 -
68
-
69
-
70
-
71
-
72
-
73
-
74
-
75
-
76
-
77
-
78
-
79
-
80
-
81
-
82
-
83
-
84
-
85
-
86
-
87
-
88
-
89
-
90
-
91
-
92
-
93
-
94
-
95
-
96
-
97
-
98
-
99
-
100
-
101
-
102
-
103
-
104
-
105
-
106
-
107
-
108
-
109
-
110
-
111
-
112
-
113
-
114
-
115
-
116
-
117
-
118
-
119
-
120
-
121
-
122
-
123
-
124
-
125
-
126
-
127
-
128
-
129
-
130
-
131
-
132
-
133
-
134
-
135
-
136
-
137
-
138
-
139
-
140
-
141
-
142
-
143
-
144
-
145
-
146
-
147
-
148
-
149
-
150
-
151
-
152
-
153
-
154
-
155
-
156
-
157
-
158
-
159
-
160
-
161
-
162
-
163
-
164
-
165
-
166
-
167
-
168
-
169
-
170
-
171
-
172
-
173
-
174
-
175
-
176
-
177
-
178
-
179
-
180
-
181
-
182
-
183
-
184
 |
 |
