HP LH4r HP Netserver LC 2000 Installation Guide - Page 15
Con the HP NetServer with Configuration Assistant from
 |
View all HP LH4r manuals
Add to My Manuals
Save this manual to your list of manuals |
Page 15 highlights
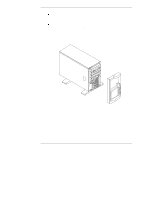
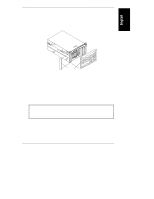
Chapter 1 Setting Up the HP NetServer 13. Connect the monitor, keyboard, and mouse to the rear of the HP NetServer. Refer to Chapter 9, "Connecting Monitor, Keyboard, Mouse, and UPS." 14. Connect all other external cables to the rear of the HP NetServer. 15. Obtain the release history of the HP NetServer Navigator CD-ROM provided with the HP NetServer, to ensure you have the latest Navigator CD-ROM. Refer to Chapter 10, "Configuring the HP NetServer." 16. Power up the HP NetServer. Refer to Chapter 2, "Controls, Ports, and Indicators." 17. Insert the Navigator CD-ROM and reboot the HP NetServer. 18. Check the Navigator README file for important installation information. Refer to Chapter 10, "Configuring the HP NetServer." 19. Configure the HP NetServer with Configuration Assistant from the Navigator CD-ROM, using the Express Configuration option. Refer to Chapter 10, "Configuring the HP NetServer." NOTE To fully configure the HP NetServer, all the rack components should be cabled and online (though not necessarily installed in the rack.) Use the HP NetServer LC 2000r Rack Cabling Reference Guide for more details. 20. Verify the HP NetServer's operation and troubleshoot as necessary. Your HP NetServer installation should be complete. If not, refer to Chapter 12, "Troubleshooting." 21. If you plan to ship the fully-configured HP NetServer LC 2000r to a different destination: a. Label each cable and component to facilitate re-assembly. b. Remove all components from the rack, including external mass storage. c. Repack the components in the original packing material, and prepare each one for shipment. CAUTION It is critical to disassemble and rebox all electronic components before reshipment. Electronic components (especially hard disk drives) can sustain damage when shipped in rack enclosures. 7
-
 1
1 -
2
-
3
-
4
-
5
-
6
-
7
-
8
-
9
-
 10
10 -
 11
11 -
 12
12 -
 13
13 -
 14
14 -
 15
15 -
 16
16 -
 17
17 -
 18
18 -
 19
19 -
 20
20 -
21
-
22
-
23
-
24
-
25
-
26
-
27
-
28
-
29
-
30
-
31
-
32
-
33
-
34
-
35
-
36
-
37
-
38
-
39
-
40
-
41
-
42
-
43
-
44
-
45
-
46
-
47
-
48
-
49
-
50
-
51
-
52
-
53
-
54
-
55
-
56
-
57
-
58
-
59
-
60
-
61
-
62
-
63
-
64
-
65
-
66
-
67
-
68
-
69
-
70
-
71
-
72
-
73
-
74
-
75
-
76
-
77
-
78
-
79
-
80
-
81
-
82
-
83
-
84
-
85
-
86
-
87
-
88
-
89
-
90
-
91
-
92
-
93
-
94
-
95
-
96
-
97
-
98
-
99
-
100
-
101
-
102
-
103
-
104
-
105
-
106
-
107
-
108
-
109
-
110
-
111
-
112
-
113
-
114
-
115
-
116
-
117
-
118
-
119
-
120
-
121
-
122
-
123
-
124
-
125
-
126
-
127
-
128
-
129
-
130
-
131
-
132
-
133
-
134
-
135
-
136
-
137
-
138
-
139
-
140
-
141
-
142
-
143
-
144
-
145
-
146
-
147
-
148
-
149
-
150
-
151
-
152
-
153
-
154
-
155
-
156
-
157
-
158
-
159
-
160
-
161
-
162
-
163
-
164
-
165
-
166
-
167
-
168
-
169
-
170
-
171
-
172
-
173
-
174
-
175
-
176
-
177
-
178
-
179
-
180
-
181
-
182
-
183
-
184
-
185
-
186
-
187
-
188
-
189
-
190
-
191
-
192
-
193
-
194
 |
 |
