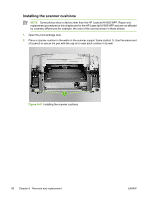
HP LaserJet M1005 Service Manual - Page 102
Rear cover and fuser cover,
 |
View all HP LaserJet M1005 manuals
Add to My Manuals
Save this manual to your list of manuals |
Page 102 highlights
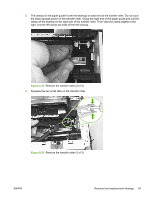
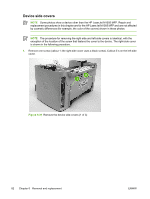
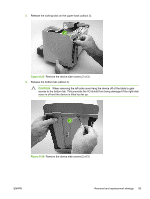
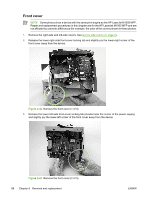
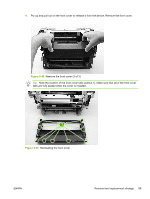
Rear cover and fuser cover NOTE Some photos show a device other than the HP LaserJet M1005 MFP. Repair and replacement procedures in this chapter are for the HP LaserJet M1005 MFP and are not affected by cosmetic differences (for example, the color of the covers) shown in these photos. 1. Remove the right-side and left-side covers. See Device side covers on page 82 2. Remove one screw (callout 1). Figure 6-40 Remove the rear cover and fuser cover (1 of 3) 3. Release the two rear-cover locking tabs (callout 2). Rotate the bottom of the rear cover up and away from the device, and remove it. Figure 6-41 Remove the rear cover and fuser cover (2 of 3) 86 Chapter 6 Removal and replacement ENWW
-
 1
1 -
2
-
3
-
4
-
5
-
6
-
7
-
8
-
9
-
10
-
11
-
12
-
13
-
14
-
15
-
16
-
17
-
18
-
19
-
20
-
21
-
22
-
23
-
24
-
25
-
26
-
27
-
28
-
29
-
30
-
31
-
32
-
33
-
34
-
35
-
36
-
37
-
38
-
39
-
40
-
41
-
42
-
43
-
44
-
45
-
46
-
47
-
48
-
49
-
50
-
51
-
52
-
53
-
54
-
55
-
56
-
57
-
58
-
59
-
60
-
61
-
62
-
63
-
64
-
65
-
66
-
67
-
68
-
69
-
70
-
71
-
72
-
73
-
74
-
75
-
76
-
77
-
78
-
79
-
80
-
81
-
82
-
83
-
84
-
85
-
86
-
87
-
88
-
89
-
90
-
91
-
92
-
93
-
94
-
95
-
96
-
 97
97 -
 98
98 -
 99
99 -
 100
100 -
 101
101 -
 102
102 -
 103
103 -
 104
104 -
 105
105 -
 106
106 -
 107
107 -
108
-
109
-
110
-
111
-
112
-
113
-
114
-
115
-
116
-
117
-
118
-
119
-
120
-
121
-
122
-
123
-
124
-
125
-
126
-
127
-
128
-
129
-
130
-
131
-
132
-
133
-
134
-
135
-
136
-
137
-
138
-
139
-
140
-
141
-
142
-
143
-
144
-
145
-
146
-
147
-
148
-
149
-
150
-
151
-
152
-
153
-
154
-
155
-
156
-
157
-
158
-
159
-
160
-
161
-
162
-
163
-
164
-
165
-
166
-
167
-
168
-
169
-
170
-
171
-
172
-
173
-
174
-
175
-
176
-
177
-
178
-
179
-
180
-
181
-
182
-
183
-
184
-
185
-
186
-
187
-
188
-
189
-
190
-
191
-
192
-
193
-
194
-
195
-
196
-
197
-
198
-
199
-
200
-
201
-
202
-
203
-
204
-
205
-
206
-
207
-
208
-
209
-
210
-
211
-
212
-
213
-
214
-
215
-
216
-
217
-
218
-
219
-
220
-
221
-
222
-
223
-
224
 |
 |
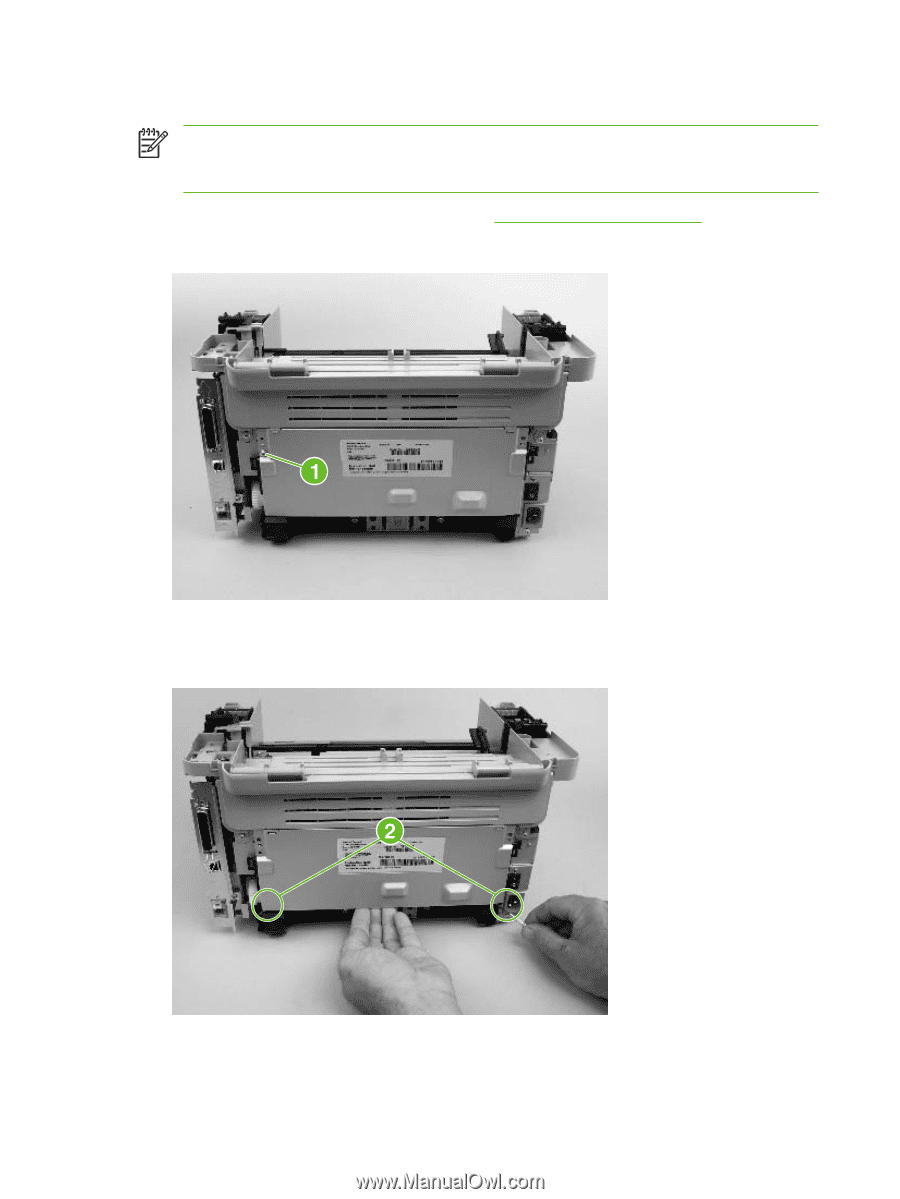
Rear cover and fuser cover
NOTE
Some photos show a device other than the HP LaserJet M1005 MFP. Repair and
replacement procedures in this chapter are for the HP LaserJet M1005 MFP and are not affected
by cosmetic differences (for example, the color of the covers) shown in these photos.
1.
Remove the right-side and left-side covers. See
Device side covers
on page
82
2.
Remove one screw (callout 1).
Figure 6-40
Remove the rear cover and fuser cover (1 of 3)
3.
Release the two rear-cover locking tabs (callout 2). Rotate the bottom of the rear cover up and
away from the device, and remove it.
Figure 6-41
Remove the rear cover and fuser cover (2 of 3)
86
Chapter 6
Removal and replacement
ENWW