HP Photosmart R717 HP Photosmart R717 Digital Camera with HP Instant Share - U
HP Photosmart R717 Manual
 |
View all HP Photosmart R717 manuals
Add to My Manuals
Save this manual to your list of manuals |
HP Photosmart R717 manual content summary:
- HP Photosmart R717 | HP Photosmart R717 Digital Camera with HP Instant Share - U - Page 1
HP Photosmart R717 Digital Camera with HP Instant Share User's Manual - HP Photosmart R717 | HP Photosmart R717 Digital Camera with HP Instant Share - U - Page 2
- HP Photosmart R717 | HP Photosmart R717 Digital Camera with HP Instant Share - U - Page 3
© Copyright 2005 Hewlett-Packard Development Company, L.P. The information contained herein is subject to change without notice. The only warranties for HP products and services are set forth in the express warranty statements accompanying such products and services. Nothing herein should - HP Photosmart R717 | HP Photosmart R717 Digital Camera with HP Instant Share - U - Page 4
- HP Photosmart R717 | HP Photosmart R717 Digital Camera with HP Instant Share - U - Page 5
Charge the Battery 15 5 Turn on the Camera 16 6 Choose the Language 16 7 Set the Region 17 8 Set the Date and Time 17 9 Install and Format a Memory Card (Optional 18 10 Install the Software 20 Windows 20 Macintosh 21 User's Manual on the CD 21 Camera Parts 22 Back of the Camera 22 Front - HP Photosmart R717 | HP Photosmart R717 Digital Camera with HP Instant Share - U - Page 6
Using the Capture Menu 61 Help for the Menu Options 62 EV Compensation 63 Adaptive Lighting 64 Image Quality 66 Custom Image Quality 69 White Balance 71 Manual White Balance 73 Auto Focus Area 74 AE Metering 76 ISO Speed 78 AE Bracketing 79 Color 81 6 HP Photosmart R717 User's Manual - HP Photosmart R717 | HP Photosmart R717 Digital Camera with HP Instant Share - U - Page 7
83 Contrast 84 Date & Time Imprint 85 3 Reviewing Images and Video Clips 87 Using Playback 87 Total Images Summary Screen 90 Viewing Thumbnails 91 Magnifying Images 92 Using the Playback Menu 93 Delete 96 Remove Red Eyes 98 Image Advice 99 Image Info 99 Preview Panorama 101 Rotate 102 - HP Photosmart R717 | HP Photosmart R717 Digital Camera with HP Instant Share - U - Page 8
without HP Image Zone Software 140 Using a Memory Card Reader 141 Configuring the Camera as a Disk Drive . 144 Problems and Solutions 145 Error Messages on the Camera 160 Error Messages on the Computer 172 Getting Assistance 174 HP Accessibility Website 174 HP Photosmart Website 175 Support - HP Photosmart R717 | HP Photosmart R717 Digital Camera with HP Instant Share - U - Page 9
Lithium Ion Batteries 191 Sleep Time-out for Power Conservation 192 B Purchasing Camera Accessories 193 C Caring for Your Camera 197 Basic Camera Care 197 Cleaning the Camera 198 Cleaning the Camera Lens 199 Cleaning the Camera Body and Image Display 199 D Specifications 201 Memory Capacity - HP Photosmart R717 | HP Photosmart R717 Digital Camera with HP Instant Share - U - Page 10
10 HP Photosmart R717 User's Manual - HP Photosmart R717 | HP Photosmart R717 Digital Camera with HP Instant Share - U - Page 11
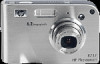
purchase of the HP Photosmart R717 digital camera and welcome to the world of digital photography! This manual explains camera features you can use to ensure great results while enjoying the photographic experience. Some of these features are: • HP adaptive lighting technology-Automatically bring - HP Photosmart R717 | HP Photosmart R717 Digital Camera with HP Instant Share - U - Page 12
dock inserts included in the box with the dock. When setting up the dock for use with this camera, make sure you use the dock insert that has the GREEN sticker on it. Follow the instructions in the dock User's Manual to connect the dock insert to the camera dock. 12 HP Photosmart R717 User's Manual - HP Photosmart R717 | HP Photosmart R717 Digital Camera with HP Instant Share - U - Page 13
strap mount on the side of the camera as shown. 3. Install the Battery Your camera can use either a rechargeable HP Photosmart R07 Lithium Ion battery (L1812A/L1812B) or a disposable Duracell® CP1 battery. 1. Open the Battery/ Memory Card door on the bottom of the camera by sliding the door to the - HP Photosmart R717 | HP Photosmart R717 Digital Camera with HP Instant Share - U - Page 14
, you can recharge the battery in the camera or in the optional R-series dock battery bay, or recharge the battery separately in the optional HP Photosmart quick recharger. For more information, see Appendix B, Purchasing Camera Accessories, starting on page193. 14 HP Photosmart R717 User's Manual - HP Photosmart R717 | HP Photosmart R717 Digital Camera with HP Instant Share - U - Page 15
the camera dock or in the HP Photosmart quick recharger (see Purchasing Camera Accessories on page 193). If your camera battery is a disposable Duracell® CP1 battery, skip this procedure. If the battery is a rechargeable Lithium Ion battery: 1. Plug the power cord into the HP AC power adapter. If - HP Photosmart R717 | HP Photosmart R717 Digital Camera with HP Instant Share - U - Page 16
and the Power/Memory light to the left of the switch turns on solid green. The HP logo also displays on the Image Display as the camera powers up. 6. Choose the Language The first time you turn the camera on, you in the Setup menu (see Language on page 131). 16 HP Photosmart R717 User's Manual - HP Photosmart R717 | HP Photosmart R717 Digital Camera with HP Instant Share - U - Page 17
and the format of the video signal for displaying camera images on a television (see TV image properties, which you can see in Playback Mode when the Playback Menu (see page 93) or HP Instant Share Menu (see page 106) is displayed, when viewing Image Info (see page 99) and when viewing the image - HP Photosmart R717 | HP Photosmart R717 Digital Camera with HP Instant Share - U - Page 18
the camera, all new images and video clips will be stored on the card. To use internal memory and view images stored there, remove the memory card. You can also transfer the images from the internal memory to the memory card (see Move Images to Card on page 132). 18 HP Photosmart R717 User's Manual - HP Photosmart R717 | HP Photosmart R717 Digital Camera with HP Instant Share - U - Page 19
while the camera is formatting the memory card. When the camera has completed the formatting, the Total Images Summary screen is displayed (see Total Images Summary Screen on page 90). To remove the memory card from the camera, first turn the camera off. Then open the Battery/Memory card door, press - HP Photosmart R717 | HP Photosmart R717 Digital Camera with HP Instant Share - U - Page 20
installation screen does not appear, click Start, click Run, type D:\Setup.exe, where D is the letter of your CD drive, then click OK. 3. When the HP Image Zone software has finished installing, re-enable the virus protection software you disabled in Step 1. 20 HP Photosmart R717 User's Manual - HP Photosmart R717 | HP Photosmart R717 Digital Camera with HP Instant Share - U - Page 21
instructions. 5. When the HP Image Zone software has finished installing, re-enable the virus protection software you disabled in Step 1. User's Manual on the CD A copy of this camera User's Manual in different languages is located on the HP Image Zone software CD. To view your camera User's Manual - HP Photosmart R717 | HP Photosmart R717 Digital Camera with HP Instant Share - U - Page 22
switch (page 16) Description • Solid-Camera is on. • Blinking rapidly-Camera is writing to memory or memory card. • Blinking slowly-Camera is charging the batteries using the optional HP AC power adapter. • Off-Camera is off. Turns the camera power on and off. 22 HP Photosmart R717 User's Manual - HP Photosmart R717 | HP Photosmart R717 Digital Camera with HP Instant Share - U - Page 23
, allows you to view still images and the first frames of video clips arranged in a matrix of nine thumbnail images per screen. • Zoom In- images on the Image Display. 6 button (pages 61, 93) Allows you to display camera menus, select menu options, and confirm certain actions on the Image - HP Photosmart R717 | HP Photosmart R717 Digital Camera with HP Instant Share - U - Page 24
Image Display. Allows you to frame pictures and video clips using Live View and review camera is processing a picture. • Both and AF blinking-An error has occurred that prevents the camera from taking the picture (for example, the memory card is full). 24 HP Photosmart R717 User's Manual - HP Photosmart R717 | HP Photosmart R717 Digital Camera with HP Instant Share - U - Page 25
clips. 3 Viewfinder Allows you to frame the subject of your (pages 33, 36) still images or video clips. 4 Self-Timer/Focus Blinks during the count-down before Assist light taking a picture when the camera is set to (page 58) Self-Timer or Self-Timer - 2 shots, or in low light situations - HP Photosmart R717 | HP Photosmart R717 Digital Camera with HP Instant Share - U - Page 26
the camera on a tripod. 8 Camera dock connector (page 193) Allows you to connect the camera to the optional HP Photosmart R-series dock. 9 Battery/Memory Allows access to insert and remove the card door battery and an optional memory card. (pages 13, 18) 26 HP Photosmart R717 User's Manual - HP Photosmart R717 | HP Photosmart R717 Digital Camera with HP Instant Share - U - Page 27
1 Mode button Allows you to select between different (page 49) shooting modes for taking still pictures. 2 Speaker Plays camera sounds and audio clips. 3 Shutter button • Focuses and takes a picture. (page 33) • Records audio clips. 4 Video button (page 36) Starts and stops recording - HP Photosmart R717 | HP Photosmart R717 Digital Camera with HP Instant Share - U - Page 28
Reviewing Images and Video Clips, starting on page 87. TIP: If you are in Playback or a menu and want to take a picture, quickly press the Shutter button halfway down and release it. The camera switches to Live View. Camera Menus Your camera change the setting. 28 HP Photosmart R717 User's Manual - HP Photosmart R717 | HP Photosmart R717 Digital Camera with HP Instant Share - U - Page 29
sequences, and delete images from the internal memory or optional memory card. For information about using this menu, see Using the Playback Menu on page 93. The HP Instant Share Menu lets you select images to be sent to printers, e-mail addresses, and other online services. For information about - HP Photosmart R717 | HP Photosmart R717 Digital Camera with HP Instant Share - U - Page 30
, starting on page 121. The Help Menu provides helpful information and tips on topics such as battery life, camera buttons, recording audio, reviewing images you have taken, and other useful topics. Use this menu when you do not have your User's Manual with you. 30 HP Photosmart R717 User's Manual - HP Photosmart R717 | HP Photosmart R717 Digital Camera with HP Instant Share - U - Page 31
whether a memory card is installed (indicated by the icon), the amount of power available (such as the battery full indicator; see Power Indicators on page 188), the number of pictures remaining, and the Image Quality setting (indicated in the example by the 6MP ). Viewing the On-Camera Demo - HP Photosmart R717 | HP Photosmart R717 Digital Camera with HP Instant Share - U - Page 32
32 HP Photosmart R717 User's Manual - HP Photosmart R717 | HP Photosmart R717 Digital Camera with HP Instant Share - U - Page 33
2 Taking Pictures and Recording Video Clips Taking Still Pictures You can take a picture almost any time the camera is on, regardless of what is being shown on the Image Display. To take a still picture: 1. Frame the subject for your picture in the viewfinder. 2. Hold the camera steady and press the - HP Photosmart R717 | HP Photosmart R717 Digital Camera with HP Instant Share - U - Page 34
recording audio, release the Shutter button; otherwise, the audio will continue recording up to 60 seconds or until the camera runs out of memory. To delete or record a new audio clip, use the Record Audio option in the Playback menu. See Record Audio on page 103. 34 HP Photosmart R717 User's Manual - HP Photosmart R717 | HP Photosmart R717 Digital Camera with HP Instant Share - U - Page 35
to its proper orientation when saving the file. TIP: You can also manually rotate still images using the Rotate option in the Playback Menu. See Rotate on page 102. NOTE: The orientation sensor is not used when recording video clips, nor in the Panorama or Document shooting modes. Taking Pictures - HP Photosmart R717 | HP Photosmart R717 Digital Camera with HP Instant Share - U - Page 36
to Self-Timer or Self-Timer - 2 Shots (see page 58), the camera will start recording 10 seconds after you press the Video button. With the Self-Timer - 2 Shots setting, the camera only records one video clip. NOTE: Zoom does not apply when recording video clips. 36 HP Photosmart R717 User's Manual - HP Photosmart R717 | HP Photosmart R717 Digital Camera with HP Instant Share - U - Page 37
in Live View when the camera settings are at their default values and an optional memory card is installed in the camera. If you change other camera settings, icons for those settings will also be displayed in the Live View screen. 1 23 4 5 6 7 Taking Pictures and Recording Video Clips 37 - HP Photosmart R717 | HP Photosmart R717 Digital Camera with HP Instant Share - U - Page 38
pictures count (actual number depends on the current Image Quality setting and how much space remains in memory) 5 6MP Image resolution setting (default is 6MP) 6 Compression setting (default is ) 7 Focus brackets (see Focusing the Camera on page 39) 38 HP Photosmart R717 User's Manual - HP Photosmart R717 | HP Photosmart R717 Digital Camera with HP Instant Share - U - Page 39
on page 37). When you press the Shutter button halfway down to take a still picture, the camera automatically measures and locks the focus and exposure in the focus region. The focus brackets in the Live View Shutter button and try one of the following: Taking Pictures and Recording Video Clips 39 - HP Photosmart R717 | HP Photosmart R717 Digital Camera with HP Instant Share - U - Page 40
; otherwise, the picture will likely be blurry. he camera shows the F-number and shutter speed it will be using when you press the Shutter button halfway down. The F-number and shutter speed will turn red if they are out of range for the picture being taken. 40 HP Photosmart R717 User's Manual - HP Photosmart R717 | HP Photosmart R717 Digital Camera with HP Instant Share - U - Page 41
re-frame or adjust your subject for proper positioning. 4. Press the Shutter button all the way down to take the picture. Taking Pictures and Recording Video Clips 41 - HP Photosmart R717 | HP Photosmart R717 Digital Camera with HP Instant Share - U - Page 42
50 cm (19.5 in) away. With this setting, the camera will not take a picture if it cannot find focus (the image in the Live View screen and by a meter that appears on the left side of the Live View screen. For more information, see Using Manual Focus on page 43. 42 HP Photosmart R717 User's Manual - HP Photosmart R717 | HP Photosmart R717 Digital Camera with HP Instant Share - U - Page 43
To use Manual Focus: 1. When in Live View, press the MF button until the Manual Focus icon appears in the Image Display. A meter appears on the left side of the Image Display to position, adjust the focus so that the image looks like it is in focus on the Live View screen. Next, press the - HP Photosmart R717 | HP Photosmart R717 Digital Camera with HP Instant Share - U - Page 44
or set the camera on a tripod or stable surface. Also try turning on the flash or turning on lights to add more light to the scene. TIP: Increasing ISO Speed can help reduce camera shake, but can result in increased noise in your images (see ISO Speed on page 78). 44 HP Photosmart R717 User's Manual - HP Photosmart R717 | HP Photosmart R717 Digital Camera with HP Instant Share - U - Page 45
is not available when recording video clips. Digital Zoom Unlike optical zoom, digital zoom uses no moving lens parts. You can use digital zoom when you have exhausted lever. 2. Press Zoom In again and continue to press it until the image you want to capture fills the yellow frame. If you zoom in too - HP Photosmart R717 | HP Photosmart R717 Digital Camera with HP Instant Share - U - Page 46
to be more grainy than the same image taken with optical zoom. In situations where you need higher quality (such as for printing), limit the use of digital zoom. NOTE: Digital zoom is not available while recording video clips, nor when in Panorama shooting mode. 46 HP Photosmart R717 User's Manual - HP Photosmart R717 | HP Photosmart R717 Digital Camera with HP Instant Share - U - Page 47
Image Display. The following table describes each of the flash settings on the camera. Setting Auto Flash Description The camera Flash On The camera always uses flash. Flash Off The camera will not use camera shake. Night The camera uses eye reduction). The camera then continues to expose - HP Photosmart R717 | HP Photosmart R717 Digital Camera with HP Instant Share - U - Page 48
modes, with the Burst setting, nor is it available while recording video clips. Red Eye The red-eye phenomenon is caused by light green or white in the captured image. When you use a flash setting with red-eye reduction, the camera flashes quickly up to three times HP Photosmart R717 User's Manual - HP Photosmart R717 | HP Photosmart R717 Digital Camera with HP Instant Share - U - Page 49
, the camera selects the camera until the desired shooting mode appears on the Image Display. The following table describes each of the shooting mode settings on the camera camera. Auto Mode works well for most shots in normal situations. The camera action. The camera uses fast camera combines a - HP Photosmart R717 | HP Photosmart R717 Digital Camera with HP Instant Share - U - Page 50
overlapping frames for stitching into one, large panoramic image using the HP Image Zone software. Flash is set to Flash Off in images in a museum, where the use of the flash is prohibited. In this mode, flash is set to Flash Off and Camera Sounds is set to Off. 50 HP Photosmart R717 User's Manual - HP Photosmart R717 | HP Photosmart R717 Digital Camera with HP Instant Share - U - Page 51
setting in Live View using the buttons, while the camera selects the best shutter speed. My Mode This is repeatedly use a group of preferred settings on your camera. See Using My Mode on page 55. If default Auto Mode setting when you turn the camera off. To save changed settings, use My Mode - HP Photosmart R717 | HP Photosmart R717 Digital Camera with HP Instant Share - U - Page 52
the Preview Panorama menu option in the Playback Menu (see page 101), or you can transfer the images in the panoramic sequence to your computer for automatic stitching together and then viewing or printing. NOTE: Digital zoom is not available in Panorama mode. 52 HP Photosmart R717 User's Manual - HP Photosmart R717 | HP Photosmart R717 Digital Camera with HP Instant Share - U - Page 53
with the first. 4. Press the Shutter button to take the second picture. After Instant Review, the camera switches to Live View with displayed in the Image Display. Again, the transparent overlay of the previous image is superimposed on the left third of the Live View screen to enable you to align - HP Photosmart R717 | HP Photosmart R717 Digital Camera with HP Instant Share - U - Page 54
Panorama on page 101. NOTE: The Panorama shooting mode requires the full version of the HP Image Zone software to automatically stitch images together on your computer (see Transferring Images to a Computer on page 115 and HP Image Zone Software on page 137). 54 HP Photosmart R717 User's Manual - HP Photosmart R717 | HP Photosmart R717 Digital Camera with HP Instant Share - U - Page 55
My Mode 1. Press the Mode button on the top of the camera to toggle through the shooting modes until you see My Mode and the icon in the Image Display. 2. Press the Menu. button to display the My Mode The sub-menu for that menu option is displayed. Taking Pictures and Recording Video Clips 55 - HP Photosmart R717 | HP Photosmart R717 Digital Camera with HP Instant Share - U - Page 56
in My Mode instead of Auto Mode each time you turn the camera on by selecting Start in My Mode. 1. Press the Mode button on the top of the camera until you see My Mode and the icon in the Image Display. 2. Press the Menu. button to display the My Mode Capture 56 HP Photosmart R717 User's Manual - HP Photosmart R717 | HP Photosmart R717 Digital Camera with HP Instant Share - U - Page 57
remove the check mark next to a setting so it will return to its default setting when you turn the camera off, or toggle the Start in My Mode setting to Yes. 5. Repeat Step 4 for each setting you , press the Live View button on the back of the camera. Taking Pictures and Recording Video Clips 57 - HP Photosmart R717 | HP Photosmart R717 Digital Camera with HP Instant Share - U - Page 58
audio with a still picture when using the self-timer settings, but you can add an audio clip later (see Record Audio on page 103). 58 HP Photosmart R717 User's Manual - HP Photosmart R717 | HP Photosmart R717 Digital Camera with HP Instant Share - U - Page 59
then blinks for 10 seconds before the camera starts recording the video. To stop recording the video clip, press the Video button again; otherwise, the video will continue recording until the camera runs out of memory. The video icon remains in the Image Display for a few seconds after recording - HP Photosmart R717 | HP Photosmart R717 Digital Camera with HP Instant Share - U - Page 60
camera takes up to 3 pictures as quickly as possible until you release the Shutter button or the camera runs out of memory. The Image camera off. To save changed settings, use My Mode (see page 55). NOTE: The Burst setting is not available while recording video HP Photosmart R717 User's Manual - HP Photosmart R717 | HP Photosmart R717 Digital Camera with HP Instant Share - U - Page 61
Using the Capture Menu The Capture Menu allows you to adjust various camera settings that affect the characteristics of the images and video clips you capture with your camera. 1. To display the Capture Menu, press the Live View button, and then press the button. If Live View is already on, simply - HP Photosmart R717 | HP Photosmart R717 Digital Camera with HP Instant Share - U - Page 62
Menu, highlight the EXIT option and press the button. For other ways to exit the menu, see Camera Menus on page 28. TIP: To retain preferred settings, use My Mode (see Selecting and Saving Help and return to the particular Capture Menu, press the button. 62 HP Photosmart R717 User's Manual - HP Photosmart R717 | HP Photosmart R717 Digital Camera with HP Instant Share - U - Page 63
use EV (Exposure Value) Compensation to override the automatic exposure setting that the camera makes. EV Compensation is useful in scenes that contain many light objects (like 0.0 setting when you turn the camera off. To save changed settings, use My Mode (see page 55). Taking Pictures and - HP Photosmart R717 | HP Photosmart R717 Digital Camera with HP Instant Share - U - Page 64
flash wouldn't reach. Here is an example of how Adaptive Lighting can enhance an image: Without Adaptive Lighting: With Adaptive Lighting: Adaptive Lighting is useful in situations like these: • Outdoor , or is severely backlit (for example, in front of a window) 64 HP Photosmart R717 User's Manual - HP Photosmart R717 | HP Photosmart R717 Digital Camera with HP Instant Share - U - Page 65
Lighting. 2. In the Adaptive Lighting sub- menu, use the buttons to highlight a setting. 3. Press the button to save the setting and return to the Capture Menu. The following table explains the settings in more detail: Setting Description Off The camera will process the image as normal. This - HP Photosmart R717 | HP Photosmart R717 Digital Camera with HP Instant Share - U - Page 66
a pre-defined setting and return to the Capture Menu. Or, when the Custom... menu option is highlighted, press the button to go to the Custom Image Quality sub-menu (see page 69). 66 HP Photosmart R717 User's Manual - HP Photosmart R717 | HP Photosmart R717 Digital Camera with HP Instant Share - U - Page 67
up to 20.3 by 25.4 cm (8 by 10 in). 2MP Images will be 2MP (low) resolution and have medium compression. This is a memory-efficient setting, recommended for printing images up to 12.7 by 17.8 cm (5 by 7 in). VGA Images will be 640 by 480 (lowest) resolution and have medium compression. This - HP Photosmart R717 | HP Photosmart R717 Digital Camera with HP Instant Share - U - Page 68
camera. The Image Quality setting will appear in the Live View screen. Except in My Mode (page 55), Image Quality remains in effect until it is changed again, even when you turn the camera off. NOTE: Image Quality settings do not apply when recording video clips. 68 HP Photosmart R717 User's Manual - HP Photosmart R717 | HP Photosmart R717 Digital Camera with HP Instant Share - U - Page 69
Image Quality setting, including individually setting the resolution and the compression of the images you capture. In the Custom Image Compression setting is (medium compression). 1. In the Image Quality sub-menu (page 66), select the Custom resolution 2MP-Low resolution VGA-Lowest resolution, - HP Photosmart R717 | HP Photosmart R717 Digital Camera with HP Instant Share - U - Page 70
memory and provides maximum quality 4. Press the button to save the custom Image Quality setting and return to the Capture Menu. The custom Image the camera off. NOTE: When you use digital zoom, the resolution changes as you zoom in (see Digital Zoom on page 45). 70 HP Photosmart R717 User's Manual - HP Photosmart R717 | HP Photosmart R717 Digital Camera with HP Instant Share - U - Page 71
camera reproduce colors more accurately and ensure that whites appear white in the final image. the Sun setting can produce a warmer look to the image. 1. In the Capture Menu (page 61), select camera automatically identifies and corrects for scene illuminance. This is the default setting. The camera - HP Photosmart R717 | HP Photosmart R717 Digital Camera with HP Instant Share - U - Page 72
. The White Balance setting remains in effect until it is changed again, or until it resets to the default Auto setting when you turn the camera off. To save changed settings, use My Mode (see page 55). 72 HP Photosmart R717 User's Manual - HP Photosmart R717 | HP Photosmart R717 Digital Camera with HP Instant Share - U - Page 73
Balance screen displays. The Live View portion of the screen shows the color tint from the previous Manual White Balance setting that was made. To change the Manual White Balance setting: 1. Point the camera at a white or gray target (such as a piece of paper), making sure that the entire screen - HP Photosmart R717 | HP Photosmart R717 Digital Camera with HP Instant Share - U - Page 74
region is divided into five narrow focus zones, as shown. • Selecting Multi causes the camera to search all five zones for focus, and focus on the closest object. • Selecting Spot causes the camera to search a single zone in the center of the region for focus. 74 HP Photosmart R717 User's Manual - HP Photosmart R717 | HP Photosmart R717 Digital Camera with HP Instant Share - U - Page 75
, starting from the closest distance. The camera locks on the first zone(s) that come into focus and surrounds the zone(s) with brackets. When the camera finds focus, green brackets frame the zone(s) in focus. If adjacent zones, or zones separated by a single zone (as shown on the left below), are - HP Photosmart R717 | HP Photosmart R717 Digital Camera with HP Instant Share - U - Page 76
exposure. Center- The camera uses a large area camera uses a small area in the center of the scene to measure and calculate exposure. This can be useful in backlit scenes or when the subject of the picture is very dark or light compared to the rest of the scene. 76 HP Photosmart R717 User's Manual - HP Photosmart R717 | HP Photosmart R717 Digital Camera with HP Instant Share - U - Page 77
press the Shutter button all the way down. When this setting is used, portions of the image may end up over- or underexposed. If the new setting is anything other than the Weighted setting when you turn the camera off. To save changed settings, use My Mode (see page 55). Taking Pictures and - HP Photosmart R717 | HP Photosmart R717 Digital Camera with HP Instant Share - U - Page 78
Auto setting, the camera selects the best ISO speed for the scene. Lower ISO speeds will capture images with the least amount camera off. To save changed settings, use My Mode (see page 55). NOTE: The ISO Speed setting does not apply when recording video clips. 78 HP Photosmart R717 User's Manual - HP Photosmart R717 | HP Photosmart R717 Digital Camera with HP Instant Share - U - Page 79
time. The entire 3-shot sequence is taken with one press of the Shutter button. Be sure to hold the camera still until all three pictures have been taken. After the three pictures have been taken, each image appears one at a time on the Image Display. Taking Pictures and Recording Video Clips 79 - HP Photosmart R717 | HP Photosmart R717 Digital Camera with HP Instant Share - U - Page 80
it is changed again, or until it resets to the default Off setting when you turn the camera off. To save changed settings, use My Mode (see page 55). NOTE: Flash is available AE Bracketing setting does not apply when recording video clips, nor in Panorama mode. 80 HP Photosmart R717 User's Manual - HP Photosmart R717 | HP Photosmart R717 Digital Camera with HP Instant Share - U - Page 81
you to control the color in which your images will be captured. For example, when you set Color to Sepia, your images will be captured in brown colors to , or until it resets to the default Full Color setting when you turn the camera off. To save changed settings, use My Mode (see page 55). NOTE: - HP Photosmart R717 | HP Photosmart R717 Digital Camera with HP Instant Share - U - Page 82
the setting will appear in the Live View screen. The Saturation setting remains in effect until it is changed again, even when you turn the camera off. 82 HP Photosmart R717 User's Manual - HP Photosmart R717 | HP Photosmart R717 Digital Camera with HP Instant Share - U - Page 83
helps explain the settings in more detail: Setting Description Low The edges in your images will be softer, with less grain (or noise). You can use this setting even when you turn the camera off. NOTE: The Sharpness setting does not apply when recording video clips. Taking Pictures and Recording - HP Photosmart R717 | HP Photosmart R717 Digital Camera with HP Instant Share - U - Page 84
will be between the dark and light colors in your captured images, including the amount of detail there will be in the highlights and shadows within the images. 1. In the Capture Menu (page 61), select Contrast. is changed again, even when you turn the camera off. 84 HP Photosmart R717 User's Manual - HP Photosmart R717 | HP Photosmart R717 Digital Camera with HP Instant Share - U - Page 85
settings, the date or date and time will be imprinted on all subsequent still images that are captured, not to previously captured images. After you have taken a picture using either the Date Only or Date & Time setting and return to the Capture Menu. Taking Pictures and Recording Video Clips 85 - HP Photosmart R717 | HP Photosmart R717 Digital Camera with HP Instant Share - U - Page 86
camera will not imprint a date or date & time on the image. Date Only The camera will permanently imprint the date in the lower left-hand corner of the image. Date & Time The camera & Time setting does not apply when recording video clips, nor in Panorama Mode. 86 HP Photosmart R717 User's Manual - HP Photosmart R717 | HP Photosmart R717 Digital Camera with HP Instant Share - U - Page 87
camera. See Viewing Thumbnails on page 91 and Magnifying Images on page 92. In addition, the Playback Menu allows you to delete images or video clips, manipulate images, such as removing red eyes from images and rotating images, and even get HP Image Advice (an analysis of images for any problems - HP Photosmart R717 | HP Photosmart R717 Digital Camera with HP Instant Share - U - Page 88
few seconds when you enter Playback to indicate that you can scroll through the images or video clips using the buttons. 4 3 Indicates this image has been selected to be sent to 3 destinations using HP Instant Share (see Using HP Instant Share on page 105). 88 HP Photosmart R717 User's Manual - HP Photosmart R717 | HP Photosmart R717 Digital Camera with HP Instant Share - U - Page 89
printing 2 copies using HP Instant Share (see Using HP Instant Share on page 105). 6 17 of 43 Shows the number of this image or video clip out of the total number of images and video clips that are stored in memory. 7 0:29 • Shows the recorded length of this audio or video clip. • Indicates this - HP Photosmart R717 | HP Photosmart R717 Digital Camera with HP Instant Share - U - Page 90
(such as the full battery level indicator; see Power Indicators on page 188). NOTE: For information about selecting images for printing or sharing, see Sending Individual Images to Destinations on page 110 and Sending All Images to Destinations on page 112. 90 HP Photosmart R717 User's Manual - HP Photosmart R717 | HP Photosmart R717 Digital Camera with HP Instant Share - U - Page 91
yellow border in Thumbnail view) is displayed in full view on the Image Display again. At the bottom of each thumbnail, icons identify information for the current image (for example, that the image is part of a panoramic sequence or the image is a video clip). Reviewing Images and Video Clips 91 - HP Photosmart R717 | HP Photosmart R717 Digital Camera with HP Instant Share - U - Page 92
and magnified image. buttons to pan around the 3. Use Zoom In and Zoom Out decrease the magnification. to increase or 4. Press the Playback. button to exit Magnify view and return to NOTE: You can magnify only still images; video clips cannot be magnified. 92 HP Photosmart R717 User's Manual - HP Photosmart R717 | HP Photosmart R717 Digital Camera with HP Instant Share - U - Page 93
you to delete still images or video clips, remove red eyes from still images, undelete images, and format the camera's internal memory or optional memory card. Additionally, you can view advice for improving a selected image, display image capture information, rotate images, record audio and attach - HP Photosmart R717 | HP Photosmart R717 Digital Camera with HP Instant Share - U - Page 94
problems with focus, exposure, and so forth. Also provides recommendations on how to improve similar images in the future (see Image Advice on page 99). Image Info-Allows you to view all of the settings that were used when capturing this image (see Image Info on page 99). 94 HP Photosmart R717 User - HP Photosmart R717 | HP Photosmart R717 Digital Camera with HP Instant Share - U - Page 95
clip to attach to this still image (see Record Audio on page 103). EXIT-Exits the Playback Menu. NOTE: When the Power/Memory light is blinking green, you can only scroll through and delete files. Other operations are grayed out until processing is complete. Reviewing Images and Video Clips 95 - HP Photosmart R717 | HP Photosmart R717 Digital Camera with HP Instant Share - U - Page 96
, and then formats the internal memory or memory card. To help prevent corrupted cards and images, use Format Card to format optional memory cards before you use them for the first time, and when you want to delete all of the images and video clips stored on them. 96 HP Photosmart R717 User's Manual - HP Photosmart R717 | HP Photosmart R717 Digital Camera with HP Instant Share - U - Page 97
of the panorama tags for that panoramic sequence are removed. Each image becomes an individual still image. However, if you delete an image from the beginning or end of the panorama, and there are at least 2 images remaining, the panoramic sequence is preserved. Reviewing Images and Video Clips 97 - HP Photosmart R717 | HP Photosmart R717 Digital Camera with HP Instant Share - U - Page 98
Menu, press the button. • Cancel-Returns to the Playback Menu without saving the red eye changes. NOTE: Remove Red Eyes is only available for still images that were taken with a flash. This option is not available for video clips. 98 HP Photosmart R717 User's Manual - HP Photosmart R717 | HP Photosmart R717 Digital Camera with HP Instant Share - U - Page 99
Image Info, the Image Info screen displays. This screen shows all of the settings that were used when capturing the currently displayed image or video clip. The following table explains the information that is displayed for each image when you select the Image Info option. Reviewing Images and Video - HP Photosmart R717 | HP Photosmart R717 Digital Camera with HP Instant Share - U - Page 100
) 4 All non-default Capture Menu settings 5 Displays only when an optional memory card is installed in the camera 6 File name of the image in internal memory or on an optional memory card 7 File size of the image in internal memory or on an optional memory card 100 HP Photosmart R717 User's Manual - HP Photosmart R717 | HP Photosmart R717 Digital Camera with HP Instant Share - U - Page 101
the image. NOTE: To create a permanently stitched panoramic sequence, use the full version of the HP Image Zone software that came with your camera (see Use the buttons to scroll to the left and right of the image to review the entire panoramic sequence. Press the button to exit the Preview Panorama - HP Photosmart R717 | HP Photosmart R717 Digital Camera with HP Instant Share - U - Page 102
. The image rotates in the Image Display. 3. After you have rotated the image to the desired orientation, press the button to save the new orientation. NOTE: Rotate is not available for video clips nor for still images that are part of a panoramic sequence. 102 HP Photosmart R717 User's Manual - HP Photosmart R717 | HP Photosmart R717 Digital Camera with HP Instant Share - U - Page 103
record for up to 60 seconds or until the camera runs out of memory, whichever comes first. NOTE: Audio clips can be attached to single panorama images in a sequence, but are not attached to the the buttons. NOTE: Record Audio is not available for video clips. Reviewing Images and Video Clips 103 - HP Photosmart R717 | HP Photosmart R717 Digital Camera with HP Instant Share - U - Page 104
104 HP Photosmart R717 User's Manual - HP Photosmart R717 | HP Photosmart R717 Digital Camera with HP Instant Share - U - Page 105
page 108). 2. Select images in your camera to send to online destinations (see page 110 and page 112). NOTE: You must have the full version of the HP Image Zone software on your computer to use HP Instant Share features.Computer System Requirements on page 137 If your computer uses Windows as its - HP Photosmart R717 | HP Photosmart R717 Digital Camera with HP Instant Share - U - Page 106
2 3 4 3. Use the buttons to scroll through the HP Instant Share Menu options. 4. Press the button to select a highlighted option. 5. To exit the HP Instant Share Menu, select the EXIT menu option. For other ways to exit a menu, see Camera Menus on page 28. 106 HP Photosmart R717 User's Manual - HP Photosmart R717 | HP Photosmart R717 Digital Camera with HP Instant Share - U - Page 107
an optional memory card to a selected destination (see Sending All Images to Destinations on page 112). HP Instant Share Setup... allows you to add specific e-mail addresses and other HP Instant Share destinations to the HP Instant Share Menu (see Setting Up Online Destinations in the Camera on page - HP Photosmart R717 | HP Photosmart R717 Digital Camera with HP Instant Share - U - Page 108
the camera to your computer. 4. Without turning off the camera, connect it to your computer using the USB cable that came with your camera. Connect the larger end of the cable to your computer, and the smaller end to the USB connector on the side of the camera. 108 HP Photosmart R717 User's Manual - HP Photosmart R717 | HP Photosmart R717 Digital Camera with HP Instant Share - U - Page 109
is with the optional HP Photosmart R-series dock-simply put the camera in the dock and press the Save/Print button on the dock. 5. The next step is slightly different on a Windows and Macintosh computer: • Windows: Connecting the camera to the computer activates the HP Instant Share Setup program - HP Photosmart R717 | HP Photosmart R717 Digital Camera with HP Instant Share - U - Page 110
images to any number of HP Instant Share destinations. You cannot send video clips. 1. Turn on the camera, press the button, and use the buttons to scroll to the HP destination in the HP Instant Share Menu. To deselect the destination, press the button again. 110 HP Photosmart R717 User's Manual - HP Photosmart R717 | HP Photosmart R717 Digital Camera with HP Instant Share - U - Page 111
or by pressing the Live View button. 7. Connect the camera to your computer as explained in Transferring Images to a Computer on page 115. The images will automatically be sent to their respective HP Instant Share destinations. • Images that were selected to be sent to e-mail destinations are - HP Photosmart R717 | HP Photosmart R717 Digital Camera with HP Instant Share - U - Page 112
the Share All Images sub-menu, set the number of copies to 0 (zero), then press the button again. b. If you selected any other destination, a appears over that destination in the Share All Images sub-menu. To deselect the destination, press the button again. 112 HP Photosmart R717 User's Manual - HP Photosmart R717 | HP Photosmart R717 Digital Camera with HP Instant Share - U - Page 113
selecting the EXIT menu option or by pressing the Live View button. 6. Connect the camera to your computer as explained in Transferring Images to a Computer on page 115. The images will automatically be sent to their respective HP Instant Share destinations (see the last step in Sending Individual - HP Photosmart R717 | HP Photosmart R717 Digital Camera with HP Instant Share - U - Page 114
114 HP Photosmart R717 User's Manual - HP Photosmart R717 | HP Photosmart R717 Digital Camera with HP Instant Share - U - Page 115
perform this task using either a memory card reader (see Using a Memory Card Reader on page 141) or the optional HP Photosmart R-series dock (see the dock User's Manual). 1. Confirm the following: • Either the HP Image Zone software or the HP Image Zone Express software is installed on your computer - HP Photosmart R717 | HP Photosmart R717 Digital Camera with HP Instant Share - U - Page 116
end of the USB cable to the USB connector on the camera. 4. Turn on the camera. • HP Image Zone Software on page 137On Windows: The HP Image Transfer software provides the download functionality. In the Transfer Images from Camera/Card screen, click Start Transfer. The images are transferred to - HP Photosmart R717 | HP Photosmart R717 Digital Camera with HP Instant Share - U - Page 117
, if needed. 2. Connect your camera to the printer. a. Make sure the camera's USB Configuration setting is set to Digital Camera (see USB Configuration on page 129). b. Using the USB cable that came with your camera, connect the larger, flat end of the USB cable to the corresponding connector on the - HP Photosmart R717 | HP Photosmart R717 Digital Camera with HP Instant Share - U - Page 118
either all images in the camera (see page 112) or just selected images (see page 110). However, printing directly from the camera has the following limitations (to avoid these limitations, use the HP Image Zone software; see Chapter 4, Using HP Instant Share): 118 HP Photosmart R717 User's Manual - HP Photosmart R717 | HP Photosmart R717 Digital Camera with HP Instant Share - U - Page 119
and insert it into the printer's memory card slot. See your printer's manual for specific instructions. • If you have an optional HP Photosmart R-series dock, you can connect the camera and the printer using the dock. See the dock User's Manual for instructions. Transferring and Printing Images 119 - HP Photosmart R717 | HP Photosmart R717 Digital Camera with HP Instant Share - U - Page 120
the HP Image Zone software on your computer. 2. In the My Images tab (Windows) or HP Gallery (Macintosh), select the panoramic image you want to print. The Print Images application is launched, which provides the options and functionality for printing the image. 120 HP Photosmart R717 User's Manual - HP Photosmart R717 | HP Photosmart R717 Digital Camera with HP Instant Share - U - Page 121
Setup Menu The Setup Menu allows you to adjust a number of camera settings, such as the camera sounds, date and time, and the configuration of the USB or TV connection. 1. To display the Setup Menu, first display any other menu (see Camera Menus on page 28) and then use the buttons to scroll to - HP Photosmart R717 | HP Photosmart R717 Digital Camera with HP Instant Share - U - Page 122
brightness of the Image Display for the viewing conditions. You can use this setting to increase the brightness for harsh lighting environments, or reduce the brightness to extend battery life. The until it is changed again, even when you turn the camera off. 122 HP Photosmart R717 User's Manual - HP Photosmart R717 | HP Photosmart R717 Digital Camera with HP Instant Share - U - Page 123
turn it on, press a button, or take a picture. Camera sounds are not the audio sounds recorded with images or video clips. The default Camera Sounds setting is High. 1. In the Setup Menu (page 121), select Camera Sounds. 2. In the Camera Sounds sub-menu, highlight a setting. 3. Press the button to - HP Photosmart R717 | HP Photosmart R717 Digital Camera with HP Instant Share - U - Page 124
and return to the Setup Menu. NOTE: HP recommends leaving this setting at Auto, since turning it off hinders the ability of the camera to focus correctly in low light. The new setting remains in effect until it is changed again, even when you turn the camera off. 124 HP Photosmart R717 User's Manual - HP Photosmart R717 | HP Photosmart R717 Digital Camera with HP Instant Share - U - Page 125
remains in effect until it is changed again, even when you turn the camera off. TIP: Setting the Instant Review duration to a longer setting gives you more time to review an image. You can exit Instant Review and return to Live View by pressing the Shutter button halfway down. NOTE: Selecting - HP Photosmart R717 | HP Photosmart R717 Digital Camera with HP Instant Share - U - Page 126
Setup Menu (page 121), select Digital Zoom. 2. In the Digital Zoom sub-menu, highlight a setting. 3. Press the button to save the setting and return to the Setup Menu. The new setting remains in effect until it is changed again, even when you turn the camera off. 126 HP Photosmart R717 User's Manual - HP Photosmart R717 | HP Photosmart R717 Digital Camera with HP Instant Share - U - Page 127
On This setting allows you to have the camera automatically display Live View every time you turn the camera on, or to have the Image Display turned off every time. The default Live you turn the camera off. TIP: Setting Live View at Power On to Off can save battery power. Using the Setup Menu 127 - HP Photosmart R717 | HP Photosmart R717 Digital Camera with HP Instant Share - U - Page 128
zones, after the camera camera off. The Date & Time settings also remain current as long as the camera battery that is installed has a charge, or the battery is removed for less than 10 minutes, or the camera is connected to an optional HP AC power adapter. 128 HP Photosmart R717 User's Manual - HP Photosmart R717 | HP Photosmart R717 Digital Camera with HP Instant Share - U - Page 129
to use this setting with a Windows 98 computer that does not have the HP Image Zone software installed on it. 3. Press the button to save the setting and return to the Setup Menu. The new setting remains in effect until it is changed again, even when you turn the camera off. Using the Setup Menu - HP Photosmart R717 | HP Photosmart R717 Digital Camera with HP Instant Share - U - Page 130
on connecting the camera to a TV, see the dock User's Manual. NOTE: When viewing images on a TV, the rate at which images are displayed can be affected by the speed of an optional memory card, or by the quantity and size of images or video clips being viewed. 130 HP Photosmart R717 User's Manual - HP Photosmart R717 | HP Photosmart R717 Digital Camera with HP Instant Share - U - Page 131
Language This setting allows you to set the language used in the camera interface, such as the text in menus. 1. In the Setup Menu (page 121), select . 2. In the Language . The new setting remains in effect until it is changed again, even when you turn the camera off. Using the Setup Menu 131 - HP Photosmart R717 | HP Photosmart R717 Digital Camera with HP Instant Share - U - Page 132
memory card, none of the images will be moved. During the move, a progress bar is shown. All of the images that are successfully moved to the memory card are then deleted from the camera's internal memory. When the move is complete, you return to the Setup Menu. 132 HP Photosmart R717 User's Manual - HP Photosmart R717 | HP Photosmart R717 Digital Camera with HP Instant Share - U - Page 133
all camera settings to their default value in the Capture Menu and Setup Menu (except Date & Time, Language, TV Configuration, and USB Configuration). 4. Press the button to reset settings and return to the Setup Menu. 5. If you removed an optional memory card in Step 1, replace the memory card - HP Photosmart R717 | HP Photosmart R717 Digital Camera with HP Instant Share - U - Page 134
134 HP Photosmart R717 User's Manual - HP Photosmart R717 | HP Photosmart R717 Digital Camera with HP Instant Share - U - Page 135
and Support This chapter contains information on the following topics: • Resetting the camera (page 136) • HP Image Zone software, including system requirements and HP Image Zone Express (page 137) • Using the camera without installing the HP Image Zone software (page 139) • Possible problems - HP Photosmart R717 | HP Photosmart R717 Digital Camera with HP Instant Share - U - Page 136
. 6. After verifying that the camera works without an optional memory card, reinsert the card if you removed one in Step 2. Resetting the camera returns all settings to their factory defaults. Images stored in memory or on an optional memory card are retained. 136 HP Photosmart R717 User's Manual - HP Photosmart R717 | HP Photosmart R717 Digital Camera with HP Instant Share - U - Page 137
has less than 64MB of RAM, you cannot install the HP Image Zone software. You can still use your camera, but you will not be able to use the HP Instant Share feature on the camera. See Using Your Camera without Installing the HP Image Zone Software on page 139. Troubleshooting and Support 137 - HP Photosmart R717 | HP Photosmart R717 Digital Camera with HP Instant Share - U - Page 138
in the panorama unstitched and then use a separately purchased image editing software package to stitch them together. • You can transfer video clips to your computer using HP Image Zone Express. However, you must view them using another viewer software package. 138 HP Photosmart R717 User's Manual - HP Photosmart R717 | HP Photosmart R717 Digital Camera with HP Instant Share - U - Page 139
Installing the HP Image Zone Software If you do not, or cannot, install the HP Image Zone software (either the full version or HP Image Zone Express) for some reason, you can still use your camera to take pictures and video clips. However, some of the things you can do with the camera will be - HP Photosmart R717 | HP Photosmart R717 Digital Camera with HP Instant Share - U - Page 140
computer directly or via the optional R-series dock). If you do not, or cannot, install HP Image Zone on your computer, there are two ways to transfer images from your camera to the computer: using a memory card reader, or configuring the camera as a disk drive. 140 HP Photosmart R717 User's Manual - HP Photosmart R717 | HP Photosmart R717 Digital Camera with HP Instant Share - U - Page 141
and HP Photosmart printers have memory card slots built into them, and you can use these memory card slots as you would use a regular memory card reader to save images to the computer. Transferring Images to a Windows Computer Using a Memory Card Reader 1. Remove the memory card from your camera and - HP Photosmart R717 | HP Photosmart R717 Digital Camera with HP Instant Share - U - Page 142
on the card, you can either delete the images or format the card (under the Delete option in the Playback Menu in the camera). NOTE: It is recommended that you format the card rather than delete the images because it will help prevent corrupted images or cards. 142 HP Photosmart R717 User's Manual - HP Photosmart R717 | HP Photosmart R717 Digital Camera with HP Instant Share - U - Page 143
copy the images manually, look on the desktop for a disk drive icon which represents the memory card, then copy the images from there to your local hard drive. For more information about how to copy files, visit Mac help, the help system included with your computer. Troubleshooting and Support 143 - HP Photosmart R717 | HP Photosmart R717 Digital Camera with HP Instant Share - U - Page 144
Removal warning, disregard the warning. NOTE: On Macintosh computers, if either Image Capture or iPhoto do not launch automatically, look on the desktop for a disk drive icon with the label HP_R717. For more information about how to copy files, visit Mac help. 144 HP Photosmart R717 User's Manual - HP Photosmart R717 | HP Photosmart R717 Digital Camera with HP Instant Share - U - Page 145
AC power adapter is connected to the camera and is plugged into a working electrical outlet. The optional HP AC power adapter is not functioning correctly. Ensure that the HP AC power adapter is not damaged or defective and is plugged into a working electrical outlet. Troubleshooting and Support - HP Photosmart R717 | HP Photosmart R717 Digital Camera with HP Instant Share - U - Page 146
has drained on its own because it has not been used lately. A Lithium Ion battery discharges on its own when not in use and when not installed in the camera. So, if you have not used it in two months or more, it may benefit from being charged (see page 183). 146 HP Photosmart R717 User's Manual - HP Photosmart R717 | HP Photosmart R717 Digital Camera with HP Instant Share - U - Page 147
this camera (see page 193). The battery is damaged or bad. A Lithium Ion battery degrades over time and can fail. If the camera detects a problem with the battery, it will not start charging or will stop charging prematurely. Purchase a new battery (see page 193). Troubleshooting and Support 147 - HP Photosmart R717 | HP Photosmart R717 Digital Camera with HP Instant Share - U - Page 148
turn the Image Display off if it is on. The camera is processing an image. Wait until the Power/Memory light turns solid green, indicating the camera has completed processing the previously taken image. The battery is Replace or recharge the battery. drained. 148 HP Photosmart R717 User's Manual - HP Photosmart R717 | HP Photosmart R717 Digital Camera with HP Instant Share - U - Page 149
Problem Possible cause Solution The camera does not respond when I press a button (continued). The camera has stopped operating. • Reset the camera (if the AC adapter is connected to the camera, disconnect it first). See page 136. • Reset the camera • Check to see if the memory card is defective - HP Photosmart R717 | HP Photosmart R717 Digital Camera with HP Instant Share - U - Page 150
; see page 41). Make sure the subject of the picture is within the Macro (closeup) range (see page 42). The camera is still saving the last picture you took. Wait a few seconds for the camera to finish processing the last image before taking another picture. 150 HP Photosmart R717 User's Manual - HP Photosmart R717 | HP Photosmart R717 Digital Camera with HP Instant Share - U - Page 151
Display is not the battery is battery. If the Image Display working. too low, the does not turn on, remove the battery is battery and connect to the completely HP AC power adapter to see drained, or the if the Image Display turns on. camera has • If the Image Display does not stopped - HP Photosmart R717 | HP Photosmart R717 Digital Camera with HP Instant Share - U - Page 152
source different angle. other than the • Avoid pointing the camera flash provided directly toward a bright light too much light. or reflective surface on a sunny day. • Decrease the EV Compensation (see page 63). • Use AE Bracketing (see page 79). 152 HP Photosmart R717 User's Manual - HP Photosmart R717 | HP Photosmart R717 Digital Camera with HP Instant Share - U - Page 153
Problem Possible cause Solution My image is too bright (continued). The scene had many dark AE Bracketing (see page 79). • Use Adaptive Lighting (see page 64). The Display Brightness needs to be adjusted. Set the Display Brightness to Medium in the Setup Menu. Troubleshooting and Support 153 - HP Photosmart R717 | HP Photosmart R717 Digital Camera with HP Instant Share - U - Page 154
(see page 63). My image is grainy. The ISO Speed Use a lower ISO Speed setting setting was too (see page 78). high. There was not enough light. • Wait for natural lighting conditions to improve. • Add indirect lighting. • Use the flash (see page 47). 154 HP Photosmart R717 User's Manual - HP Photosmart R717 | HP Photosmart R717 Digital Camera with HP Instant Share - U - Page 155
the camera is warm after using it for a long time, consider turning off the Image Display to minimize heating. The image compression of the Image Quality setting (4MP , 2MP , or VGA ) was too high. Use an Image Quality setting with compression (see page 71). Troubleshooting and Support - HP Photosmart R717 | HP Photosmart R717 Digital Camera with HP Instant Share - U - Page 156
Reset the camera (see page 136). The camera responds very sluggishly when trying to review images. A slow optional memory card (like an MMC card) can affect processing times. See Storage on page 203 and Memory Capacity on page 207 for tips about memory cards. 156 HP Photosmart R717 User's Manual - HP Photosmart R717 | HP Photosmart R717 Digital Camera with HP Instant Share - U - Page 157
of time (15 minutes or longer). This is normal. However, if anything seems out of the ordinary, turn off the camera, unplug the camera from the HP AC power adapter, and allow the camera to cool. Then examine the camera and the battery for signs of possible damage. Troubleshooting and Support 157 - HP Photosmart R717 | HP Photosmart R717 Digital Camera with HP Instant Share - U - Page 158
HP Image Zone software (see page 20), or see Using Your Camera without Installing the HP Image Zone Software on page 139. The computer is unable to understand the Picture Transfer Protocol (PTP) standard. Set your camera to act as a Disk Drive (see page 144). 158 HP Photosmart R717 User's Manual - HP Photosmart R717 | HP Photosmart R717 Digital Camera with HP Instant Share - U - Page 159
-static discharge may have interrupted the transfer. Close the HP Image Zone Transfer software, disconnect the camera from the computer (or remove it from the camera dock), and reset the camera (see page 136). Then, restart the image transfer process (see page 115). Troubleshooting and Support 159 - HP Photosmart R717 | HP Photosmart R717 Digital Camera with HP Instant Share - U - Page 160
is installed in the camera. Retry charging the battery a couple of times. If that fails, purchase a new battery and try again (see page 193). Battery is defective. Battery is shorted Purchase a new battery or severely (see page 193). overdischarged. 160 HP Photosmart R717 User's Manual - HP Photosmart R717 | HP Photosmart R717 Digital Camera with HP Instant Share - U - Page 161
the camera to finish processing before taking another picture or pressing another button. The camera is recharging the flash. It takes longer to charge the flash when the battery is low. If you see this message a lot, you may need to replace or recharge the battery. Troubleshooting and Support - HP Photosmart R717 | HP Photosmart R717 Digital Camera with HP Instant Share - U - Page 162
camera • Use Focus Lock (see cannot find focus page 41). Point at a in the Macro part of the scene that is focus range, brighter or has a high possibly due to contrast edge. low contrast. • Make sure the subject is within Macro range (see page 42). 162 HP Photosmart R717 User's Manual - HP Photosmart R717 | HP Photosmart R717 Digital Camera with HP Instant Share - U - Page 163
to failure. The card may be corrupted or an unsupported type. • Ensure that the memory card is the proper type for your camera (see page 203). If it is the proper type, try formatting it. If it will not format, it is probably corrupted. Replace the memory card. Troubleshooting and Support 163 - HP Photosmart R717 | HP Photosmart R717 Digital Camera with HP Instant Share - U - Page 164
is installed. Transfer images, video clips, and/or audio files from the camera to your computer, then delete enough files in internal memory or on the memory card to make enough room for the audio recording (see page 96). Or replace the card with a new one. 164 HP Photosmart R717 User's Manual - HP Photosmart R717 | HP Photosmart R717 Digital Camera with HP Instant Share - U - Page 165
instructions on the Image Display (remove the card from the camera if you do not want it to be formatted). Formatting the memory card will delete all files on the card. Unable to format. The optional memory card that is installed is corrupted. Replace the memory card. Troubleshooting and Support - HP Photosmart R717 | HP Photosmart R717 Digital Camera with HP Instant Share - U - Page 166
No printable images in memory. or No printable images on card. The camera has no still images. Video clips cannot be printed directly from the camera. Disconnect the camera from the printer, then take still images before reconnecting the camera to the printer. 166 HP Photosmart R717 User's Manual - HP Photosmart R717 | HP Photosmart R717 Digital Camera with HP Instant Share - U - Page 167
on the optional memory card to save the image after redeye removal. Transfer images from the camera to your computer, then delete all images in internal memory or on the memory card (see page 96). Then remove red-eye from the image using the HP Image Zone software. Troubleshooting and Support 167 - HP Photosmart R717 | HP Photosmart R717 Digital Camera with HP Instant Share - U - Page 168
Turn the camera off, if it is have experienced on, and then on again. If a transient that does not fix the problem. problem, try resetting the camera (see page 136). If the problem persists, note the error code and then call HP Support (see page 174). 168 HP Photosmart R717 User's Manual - HP Photosmart R717 | HP Photosmart R717 Digital Camera with HP Instant Share - U - Page 169
front of the printer. If your printer does not have a connector for this type of USB cable connection, then it is not a PictBridge-certified printer, and it is not a supported printer with your camera. The printer must have the official PictBridge logo . Selected print size is larger than selected - HP Photosmart R717 | HP Photosmart R717 Digital Camera with HP Instant Share - U - Page 170
not supported. The paper type and/or size in the printer is not supported. Load the printer with paper whose type and size is supported. There is a problem with some images using the current cartridge, but their color and quality may not be of high quality. 170 HP Photosmart R717 User's Manual - HP Photosmart R717 | HP Photosmart R717 Digital Camera with HP Instant Share - U - Page 171
• Make sure the cable is connected between the printer and the camera or the optional HP Photosmart R-series dock. If that does not work, turn off the camera and disconnect it from the USB cable. Turn the printer cartridge, turn the printer off, then turn it back on. Troubleshooting and Support 171 - HP Photosmart R717 | HP Photosmart R717 Digital Camera with HP Instant Share - U - Page 172
printer, and print an image. This will verify that the optional memory card, USB connection, and the USB cable are functioning correctly. The cable is not connected correctly. Make sure that the cable is firmly connected to the computer and camera. 172 HP Photosmart R717 User's Manual - HP Photosmart R717 | HP Photosmart R717 Digital Camera with HP Instant Share - U - Page 173
. You are using Press the Save/Print button the on the dock. HP Photosmart R- series dock and forgot to press the Save/Print button. The optional memory card that is installed is locked. Switch the locking tab on the memory card to the unlocked position. Troubleshooting and Support 173 - HP Photosmart R717 | HP Photosmart R717 Digital Camera with HP Instant Share - U - Page 174
for your digital camera, including support website information, an explanation of the support process, and support phone numbers. HP Accessibility Website Customers with disabilities can get help by visiting www.hp.com/hpinfo/community/accessibility/prodserv. 174 HP Photosmart R717 User's Manual - HP Photosmart R717 | HP Photosmart R717 Digital Camera with HP Instant Share - U - Page 175
specified: 1. Review the troubleshooting section of this User's Manual (see Problems and Solutions on page 145). 2. Access the HP Customer Care website for support. If you have access to the Internet, you can obtain a wide range of information about your digital camera. Visit the HP website for - HP Photosmart R717 | HP Photosmart R717 Digital Camera with HP Instant Share - U - Page 176
, Middle East, and United States. Telephone support is free for one year from date of purchase throughout most of Europe. It is free for two years from the date of purchase for the following countries in Europe: Czech Republic, Slovakia, Turkey, and Portugal. 176 HP Photosmart R717 User's Manual - HP Photosmart R717 | HP Photosmart R717 Digital Camera with HP Instant Share - U - Page 177
will be charged to your credit card. If you think your HP product needs service, please call HP Total Care and a Total Care Representative will help you determine your service options. Phone Support in Europe, the Middle East, and Africa HP Customer Support phone numbers and policies may change - HP Photosmart R717 | HP Photosmart R717 Digital Camera with HP Instant Share - U - Page 178
0900 2020 165 (Euro 0.10/minute) +234 1 3204 999 +47 815 62 070 +48 22 5666 000 808 201 492 +40 (21) 315 4442 178 HP Photosmart R717 User's Manual - HP Photosmart R717 | HP Photosmart R717 Digital Camera with HP Instant Share - U - Page 179
Arab Emirates 800 4520 (in-country toll-free) United Kingdom +44 (0)870 010 4320 West Africa +351 213 17 63 80 (French-speaking countries only) Troubleshooting and Support 179 - HP Photosmart R717 | HP Photosmart R717 Digital Camera with HP Instant Share - U - Page 180
800-360-999 +86 (21) 3881 4518 01-800-51-HP-INVENT 0-800-011-4114 or 1-800-711-2884 999-119 (Andinatel) +1-800-711-2884 (Andinatel) 1-800-225-528 (Pacifitel) +1-800-711-2884 (Pacifitel) 1-800-999-5105 +852 2802 4098 1 600 447737 +62 (21) 350 3408 1-800-711-2884 180 HP Photosmart R717 User's Manual - HP Photosmart R717 | HP Photosmart R717 Digital Camera with HP Instant Share - U - Page 181
Taiwan +886 0 800 010055 Thailand +66 (0)2 353 9000 Trinidad & Tobago 1-800-711-2884 United States +1 (800) 474-6836 Venezuela 0-800-4746-8368 Vietnam +84 88234530 Troubleshooting and Support 181 - HP Photosmart R717 | HP Photosmart R717 Digital Camera with HP Instant Share - U - Page 182
182 HP Photosmart R717 User's Manual - HP Photosmart R717 | HP Photosmart R717 Digital Camera with HP Instant Share - U - Page 183
time (more than two months), HP recommends that you remove the battery unless you are using a rechargeable battery and are leaving the camera docked or connected to an HP AC power adapter. • When inserting the battery in the camera, always be sure to orient the battery as directed by the markings in - HP Photosmart R717 | HP Photosmart R717 Digital Camera with HP Instant Share - U - Page 184
This minimizes the number of times the lens must extend and retract. • Use the HP AC power adapter or optional HP Photosmart R-series dock when the camera will be on for extended periods of time, such as when you transfer images to your computer or when printing. 184 HP Photosmart R717 User's Manual - HP Photosmart R717 | HP Photosmart R717 Digital Camera with HP Instant Share - U - Page 185
other metal objects. Placing a Lithium Ion battery with coins is especially dangerous to the user! To avoid injury, do not drop this battery into a change-filled pocket. • Do not pierce the battery with nails, strike the battery with a hammer, step on the battery, or otherwise subject it to strong - HP Photosmart R717 | HP Photosmart R717 Digital Camera with HP Instant Share - U - Page 186
battery life Good Low temperature/winter use Fair Infrequent use (without dock) Fair Infrequent use (with dock) Good Spare battery (for long-term storage) Poor Want to recharge battery Yes CP1 Fair Good Fair Fair Fair Good Fair Good Good Good No 186 HP Photosmart R717 User's Manual - HP Photosmart R717 | HP Photosmart R717 Digital Camera with HP Instant Share - U - Page 187
table shows the minimum, maximum, and average number of shots that may be obtained using the rechargeable HP Photosmart R07 Lithium Ion battery and the disposable Duracell® CP1 battery. Battery type Minimum number of shots Lithium Ion 104 CP1 81 Maximum number of shots 234 171 Approximate - HP Photosmart R717 | HP Photosmart R717 Digital Camera with HP Instant Share - U - Page 188
Ion battery. • The battery gauge is most accurate after a few minutes of use. When the camera is turned off, the battery recovers and the initial gauge reading when the camera is turned on again may not be as accurate as that obtained after a few minutes of use. 188 HP Photosmart R717 User's Manual - HP Photosmart R717 | HP Photosmart R717 Digital Camera with HP Instant Share - U - Page 189
charge time In camera with HP AC power adapter connected or while camera is in the dock 4-6 hours Signal when charging has completed Power/Memory light on camera turns off, or the Power light on the dock turns on solid green. On the Image Display of the camera, the battery gauge changes to - HP Photosmart R717 | HP Photosmart R717 Digital Camera with HP Instant Share - U - Page 190
is installed in a camera or not. If a Lithium Ion battery has not been used for more than two months, recharge it before using it again. Even if you are not using your battery, it is a good idea to charge it every six months to a year to prolong its useful life. 190 HP Photosmart R717 User's Manual - HP Photosmart R717 | HP Photosmart R717 Digital Camera with HP Instant Share - U - Page 191
they are stored and used at high temperatures. If battery life has become unacceptably reduced over time, replace the battery with an HP Photosmart R07 Lithium Ion battery for HP Photosmart R-series cameras (L1812A/L1812B). • The camera, the dock, or the quick recharger may be warm while operating - HP Photosmart R717 | HP Photosmart R717 Digital Camera with HP Instant Share - U - Page 192
the camera again; the button pressed will determine what appears in the Image Display. If no buttons are pressed during the sleep state, the camera will turn off after an additional 5 minutes, unless it is connected to a computer, printer, or HP AC power adapter. 192 HP Photosmart R717 User's Manual - HP Photosmart R717 | HP Photosmart R717 Digital Camera with HP Instant Share - U - Page 193
ca (Canada) • www.hp.com/eur/hpoptions (Europe) • www.hp.com/apac/homeandoffice (Asia Pacific) Below are some accessories for this digital camera. These camera accessories may not be available in all regions. • HP Photosmart R-series dock- C8887A/C8887B Charge your camera battery plus a spare in the - HP Photosmart R717 | HP Photosmart R717 Digital Camera with HP Instant Share - U - Page 194
Photosmart R-series cameras-L1812A/L1812B High-capacity battery that can be recharged hundreds of times. • HP Photosmart 3.3V AC power adapter for HP Photosmart R-series cameras-C8912B/C8912C This is the only power adapter supported for use with Rseries cameras. 194 HP Photosmart R717 User's Manual - HP Photosmart R717 | HP Photosmart R717 Digital Camera with HP Instant Share - U - Page 195
• HP Photosmart 1GB SD memory card-L1876A/ L1876B • HP Photosmart premium case for HP Photosmart R-series cameras-L1811A Protect your HP Photosmart R-series camera with this padded leather case. Designed to fit HP digital cameras, the case features a storage pouch for memory cards, extra batteries - HP Photosmart R717 | HP Photosmart R717 Digital Camera with HP Instant Share - U - Page 196
, the case features a neck strap and belt loop, and a unique SD card organizer. • www.casesonline.com-Go to www.casesonline.com to design your own custom case to fit your HP Photosmart R-series camera. Choose the style, material, and color for your camera case. 196 HP Photosmart R717 User's Manual - HP Photosmart R717 | HP Photosmart R717 Digital Camera with HP Instant Share - U - Page 197
Image Display, and lens regularly with cleaning supplies designed specifically for cameras. See Cleaning the Camera on page 198. • Keep your camera and accessories in a padded case with a good strap for easy transport. Most HP digital camera cases have built-in pockets for batteries and memory cards - HP Photosmart R717 | HP Photosmart R717 Digital Camera with HP Instant Share - U - Page 198
at photospecialty stores. You can also purchase these items in a camera-cleaning kit. NOTE: You should purchase lens-cleaning tissue that has not been chemically treated. Some chemically treated lens tissue can cause scratching of the lens and Image Display. 198 HP Photosmart R717 User's Manual - HP Photosmart R717 | HP Photosmart R717 Digital Camera with HP Instant Share - U - Page 199
to remove any fingerprints, dust, moisture, and so forth that have accumulated on the camera body and Image Display. 1. Blow gently on the Image Display to eliminate dust. 2. Wipe the entire surface of the camera and the Image Display using a clean, dry, soft cloth. NOTE: You can also wipe the - HP Photosmart R717 | HP Photosmart R717 Digital Camera with HP Instant Share - U - Page 200
200 HP Photosmart R717 User's Manual - HP Photosmart R717 | HP Photosmart R717 Digital Camera with HP Instant Share - U - Page 201
6.4MP (2934 by 2170) total pixel count • 6.2MP (2864 by 2160) effective pixel count Video clips: • 320 by 240 total pixel count, 30 f/4.8 • Telephoto-f/4.9 to f/8.4 None Optical real image zoom type viewfinder, 3x magnification, without diopter adjust 3x optical, 8x digital zoom Specifications 201 - HP Photosmart R717 | HP Photosmart R717 Digital Camera with HP Instant Share - U - Page 202
Feature Focus Shutter speed Tripod mount Built-in flash Flash working range External flash Flash settings Image Display Description Normal (default): • Wide-500 mm (20 in) to infinity • Telephoto- LCD with backlight, 130,572 pixels (558 by 234) total pixel count 202 HP Photosmart R717 User's Manual - HP Photosmart R717 | HP Photosmart R717 Digital Camera with HP Instant Share - U - Page 203
runs out of memory • Video-30 frames per second (includes audio), until the camera runs out of memory • 32MB internal flash memory • Slot for memory card • This camera supports both standard and high speed Secure Digital (SD) and MultiMediaCard (MMC) memory cards (SD memory cards from 8MB to - HP Photosmart R717 | HP Photosmart R717 Digital Camera with HP Instant Share - U - Page 204
Image Quality settings • 6MP • 6MP • 4MP • 2MP • VGA • Custom... (default) White Balance Auto (default), Sun, Shade, Tungsten, settings Fluorescent, Manual ISO Speed settings Auto (default), 50, 100, 200, 400 AE Metering Center-Weighted (default), Average, Spot 204 HP Photosmart R717 User - HP Photosmart R717 | HP Photosmart R717 Digital Camera with HP Instant Share - U - Page 205
Resolution options Image Quality, Custom... setting: 6MP, 4MP, 2MP, VGA Interfaces • USB mini A/B connector to a computer or PictBridge-certified printer • DPS (Direct Printing Standard) • USB to HP Photosmart printers • DC input 3.3 Vdc @ 2500 mA • HP Photosmart R-series dock Specifications 205 - HP Photosmart R717 | HP Photosmart R717 Digital Camera with HP Instant Share - U - Page 206
series dock Recharging in camera with the HP AC power adapter or optional HP Photosmart R-series dock: average charge time 6 hours. Measurements with camera off and lens retracted: 98.5 mm (L) by 35.3 mm (W) by 60 mm (H) 3.88 in (L) by 1.39 in (W) by 2.36 in (H) 206 HP Photosmart R717 User's Manual - HP Photosmart R717 | HP Photosmart R717 Digital Camera with HP Instant Share - U - Page 207
stored in the internal memory in the camera or on an optional memory card will vary, depending on the content of each still image and the length of the recorded audio clip. 6MP 6MP 4MP 2MP VGA (default) 8 images (2.5MB each) 14 images (1.4MB each) 20 images (990KB each 31 images (834KB each) 189 - HP Photosmart R717 | HP Photosmart R717 Digital Camera with HP Instant Share - U - Page 208
208 HP Photosmart R717 User's Manual - HP Photosmart R717 | HP Photosmart R717 Digital Camera with HP Instant Share - U - Page 209
194 accessories for camera 193 Action mode, setting 49 Adaptive Lighting, setting 64 AE Bracketing 79 AE Metering, setting 76 AF viewfinder light 24 aperture, setting 51 arrow buttons on Controller 23 audio clips, record 34, 103 Auto Focus Area, setting 74 automatic exposure, override 49 B batteries - HP Photosmart R717 | HP Photosmart R717 Digital Camera with HP Instant Share - U - Page 210
, custom 70 computer, connect camera to 115 connections as a Picture Transfer Protocol (PTP) device 129 as a USB Mass Storage Device Class (MSDC) 129 to computer 115 to printer 117 connectors AC power adapter 26 camera dock 26 USB 26 conserving battery life 184 210 HP Photosmart R717 User's Manual - HP Photosmart R717 | HP Photosmart R717 Digital Camera with HP Instant Share - U - Page 211
setting 42 Manual Focus setting 42, 43 Normal Focus setting 42 range 202 settings 42 Focus Assist light description 25 setting 124 format internal memory 96 memory card 18, 96 H help from customer support 175 Help menu, description 30 Help, on-camera 62 HP AC power adapter connector on camera 26 - HP Photosmart R717 | HP Photosmart R717 Digital Camera with HP Instant Share - U - Page 212
74 brightening 63 Color setting 81 color tint 73 Contrast setting 84 Custom Image Quality setting 69 darkening 63 Date & Time Imprint 85 Image Quality setting 66 ISO Speed setting 78 magnifying 92 number remaining 31, 38, 90 number saved in internal memory 207 212 HP Photosmart R717 User's Manual - HP Photosmart R717 | HP Photosmart R717 Digital Camera with HP Instant Share - U - Page 213
91 too dark/light 63 transferring camera to computer 115 White Balance setting 71 images per battery type 187 Infinity focus setting 42 install battery 13 memory card 18 software 20, 21 wrist strap 13 Instant Review, setting 125 internal memory format 96 image capacity of 207 pictures remaining 31 - HP Photosmart R717 | HP Photosmart R717 Digital Camera with HP Instant Share - U - Page 214
31, 38, 90 number of images in internal memory 207 O ON/OFF switch, description 22 on-camera demo, viewing 31 online destinations, setting 108 online Help for Capture Menu options 62 optical zoom 45 over-exposing an image 63 override automatic exposure 49 214 HP Photosmart R717 User's Manual - HP Photosmart R717 | HP Photosmart R717 Digital Camera with HP Instant Share - U - Page 215
print images directly to printer 117 using HP Instant Share 105 problems, troubleshooting 135 product support 175 purchasing camera accessories 193 R range Exposure Compensation 204 flash 202 F-number 201 focus 202 focus settings 42 recharging Lithium Ion battery 189 record audio clips 34, 103 video - HP Photosmart R717 | HP Photosmart R717 Digital Camera with HP Instant Share - U - Page 216
on Zoom lever 23 viewing 91 Time & Date, setting 17, 128 Timer/Burst button 23 total images summary screen 90 transfer images to computer 115 tripod mount, description 26 troubleshoot problems 135 turn on/off power 16 TV (television) Configuration setting 130 216 HP Photosmart R717 User's Manual - HP Photosmart R717 | HP Photosmart R717 Digital Camera with HP Instant Share - U - Page 217
, recording 36 Video viewfinder light 24 viewfinder lights 24 using 39 Z zoom digital 45 optical 45 specifications 201 Zoom lever, description 23 Zoom Out and Zoom In controls 23 W web sites for HP 175 White Balance, setting 71 Windows computer Image Zone Express 138 install software 20 setting
-
 1
1 -
 2
2 -
 3
3 -
 4
4 -
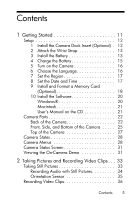 5
5 -
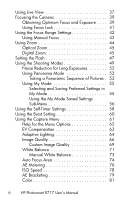 6
6 -
 7
7 -
8
-
9
-
10
-
11
-
12
-
13
-
14
-
15
-
16
-
17
-
18
-
19
-
20
-
21
-
22
-
23
-
24
-
25
-
26
-
27
-
28
-
29
-
30
-
31
-
32
-
33
-
34
-
35
-
36
-
37
-
38
-
39
-
40
-
41
-
42
-
43
-
44
-
45
-
46
-
47
-
48
-
49
-
50
-
51
-
52
-
53
-
54
-
55
-
56
-
57
-
58
-
59
-
60
-
61
-
62
-
63
-
64
-
65
-
66
-
67
-
68
-
69
-
70
-
71
-
72
-
73
-
74
-
75
-
76
-
77
-
78
-
79
-
80
-
81
-
82
-
83
-
84
-
85
-
86
-
87
-
88
-
89
-
90
-
91
-
92
-
93
-
94
-
95
-
96
-
97
-
98
-
99
-
100
-
101
-
102
-
103
-
104
-
105
-
106
-
107
-
108
-
109
-
110
-
111
-
112
-
113
-
114
-
115
-
116
-
117
-
118
-
119
-
120
-
121
-
122
-
123
-
124
-
125
-
126
-
127
-
128
-
129
-
130
-
131
-
132
-
133
-
134
-
135
-
136
-
137
-
138
-
139
-
140
-
141
-
142
-
143
-
144
-
145
-
146
-
147
-
148
-
149
-
150
-
151
-
152
-
153
-
154
-
155
-
156
-
157
-
158
-
159
-
160
-
161
-
162
-
163
-
164
-
165
-
166
-
167
-
168
-
169
-
170
-
171
-
172
-
173
-
174
-
175
-
176
-
177
-
178
-
179
-
180
-
181
-
182
-
183
-
184
-
185
-
186
-
187
-
188
-
189
-
190
-
191
-
192
-
193
-
194
-
195
-
196
-
197
-
198
-
199
-
200
-
201
-
202
-
203
-
204
-
205
-
206
-
207
-
208
-
209
-
210
-
211
-
212
-
213
-
214
-
215
-
216
-
217
 |
 |

User’s Manual
HP Photosmart R717
Digital Camera with HP Instant Share