HP Photosmart R717 HP Photosmart R717 Digital Camera with HP Instant Share - U - Page 58
Using the Self-Timer Settings
 |
View all HP Photosmart R717 manuals
Add to My Manuals
Save this manual to your list of manuals |
Page 58 highlights
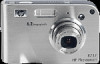
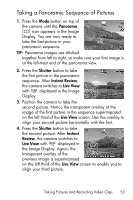
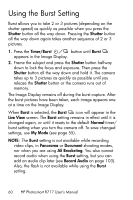
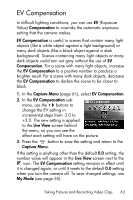
Using the Self-Timer Settings 1. Secure the camera to a tripod or set it on a stable surface. 2. Press the Self-Timer/Burst or Self-Timer - 2 Shots Display. button until Self-Timer appears in the Image 3. Frame the subject in either the viewfinder or in Live View (see Using Live View on page 37). 4. The next steps depend on whether you are capturing one or two still pictures, or are recording a video clip. For Still Pictures: a. Press the Shutter button halfway down. The camera measures and then locks the focus and exposure. The camera will hold these settings until it takes the picture. b. Press the Shutter button all the way down. A countdown appears on the screen and the Self-Timer/ Focus Assist light blinks for 10 seconds before the camera takes the picture. If you set the camera to SelfTimer - 2 Shots, after the first picture is taken, the SelfTimer/Focus Assist light blinks for a few more seconds until the second picture is taken. TIP: If you immediately press the Shutter button all the way down, the camera will lock focus and exposure just before the end of the 10-second countdown. This is useful when one or more subjects will be entering the picture during the 10-second countdown period. TIP: You cannot record audio with a still picture when using the self-timer settings, but you can add an audio clip later (see Record Audio on page 103). 58 HP Photosmart R717 User's Manual
-
 1
1 -
2
-
3
-
4
-
5
-
6
-
7
-
8
-
9
-
10
-
11
-
12
-
13
-
14
-
15
-
16
-
17
-
18
-
19
-
20
-
21
-
22
-
23
-
24
-
25
-
26
-
27
-
28
-
29
-
30
-
31
-
32
-
33
-
34
-
35
-
36
-
37
-
38
-
39
-
40
-
41
-
42
-
43
-
44
-
45
-
46
-
47
-
48
-
49
-
50
-
51
-
52
-
 53
53 -
 54
54 -
 55
55 -
 56
56 -
 57
57 -
 58
58 -
 59
59 -
 60
60 -
 61
61 -
 62
62 -
 63
63 -
64
-
65
-
66
-
67
-
68
-
69
-
70
-
71
-
72
-
73
-
74
-
75
-
76
-
77
-
78
-
79
-
80
-
81
-
82
-
83
-
84
-
85
-
86
-
87
-
88
-
89
-
90
-
91
-
92
-
93
-
94
-
95
-
96
-
97
-
98
-
99
-
100
-
101
-
102
-
103
-
104
-
105
-
106
-
107
-
108
-
109
-
110
-
111
-
112
-
113
-
114
-
115
-
116
-
117
-
118
-
119
-
120
-
121
-
122
-
123
-
124
-
125
-
126
-
127
-
128
-
129
-
130
-
131
-
132
-
133
-
134
-
135
-
136
-
137
-
138
-
139
-
140
-
141
-
142
-
143
-
144
-
145
-
146
-
147
-
148
-
149
-
150
-
151
-
152
-
153
-
154
-
155
-
156
-
157
-
158
-
159
-
160
-
161
-
162
-
163
-
164
-
165
-
166
-
167
-
168
-
169
-
170
-
171
-
172
-
173
-
174
-
175
-
176
-
177
-
178
-
179
-
180
-
181
-
182
-
183
-
184
-
185
-
186
-
187
-
188
-
189
-
190
-
191
-
192
-
193
-
194
-
195
-
196
-
197
-
198
-
199
-
200
-
201
-
202
-
203
-
204
-
205
-
206
-
207
-
208
-
209
-
210
-
211
-
212
-
213
-
214
-
215
-
216
-
217
 |
 |