Netgear AC1750 User Manual - Page 112
Set Up the Router’s iTunes Server With the Remote App
 |
View all Netgear AC1750 manuals
Add to My Manuals
Save this manual to your list of manuals |
Page 112 highlights
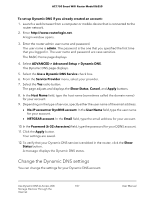
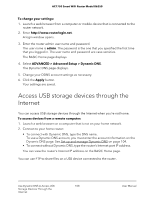
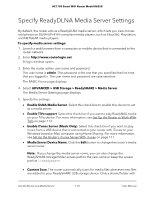
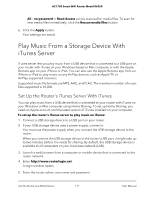
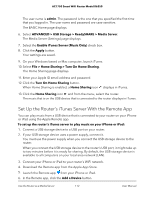
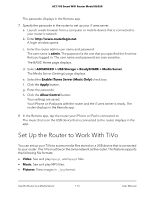
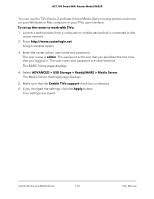
AC1750 Smart WiFi Router Model R6350 The user name is admin. The password is the one that you specified the first time that you logged in. The user name and password are case-sensitive. The BASIC Home page displays. 6. Select ADVANCED > USB Storage > ReadySHARE > Media Server. The Media Server (Settings) page displays. 7. Select the Enable iTunes Server (Music Only) check box. 8. Click the Apply button. Your settings are saved. 9. On your Windows-based or Mac computer, launch iTunes. 10. Select File > Home Sharing > Turn On Home Sharing. The Home Sharing page displays. 11. Enter your Apple ID email address and password. 12. Click the Turn On Home Sharing button. When Home Sharing is enabled, a Home Sharing icon displays in iTunes. 13. Click the Home Sharing icon and from the menu, select the router. The music that is on the USB device that is connected to the router displays in iTunes. Set Up the Router's iTunes Server With the Remote App You can play music from a USB device that is connected to your router on your iPhone or iPad using the Apple Remote app. To set up the router's iTunes server to play music on your iPhone or iPad: 1. Connect a USB storage device to a USB port on your router. 2. If your USB storage device uses a power supply, connect it. You must use the power supply when you connect the USB storage device to the router. When you connect the USB storage device to the router's USB port, it might take up to two minutes before it is ready for sharing. By default, the USB storage device is available to all computers on your local area network (LAN). 3. Connect your iPhone or iPad to your router's WiFi network. 4. Download the Remote app from the Apple App Store. 5. Launch the Remote app from your iPhone or iPad. 6. In the Remote app, click the Add a Device button. Use the Router as a Media Server 112 User Manual
-
 1
1 -
2
-
3
-
4
-
5
-
6
-
7
-
8
-
9
-
10
-
11
-
12
-
13
-
14
-
15
-
16
-
17
-
18
-
19
-
20
-
21
-
22
-
23
-
24
-
25
-
26
-
27
-
28
-
29
-
30
-
31
-
32
-
33
-
34
-
35
-
36
-
37
-
38
-
39
-
40
-
41
-
42
-
43
-
44
-
45
-
46
-
47
-
48
-
49
-
50
-
51
-
52
-
53
-
54
-
55
-
56
-
57
-
58
-
59
-
60
-
61
-
62
-
63
-
64
-
65
-
66
-
67
-
68
-
69
-
70
-
71
-
72
-
73
-
74
-
75
-
76
-
77
-
78
-
79
-
80
-
81
-
82
-
83
-
84
-
85
-
86
-
87
-
88
-
89
-
90
-
91
-
92
-
93
-
94
-
95
-
96
-
97
-
98
-
99
-
100
-
101
-
102
-
103
-
104
-
105
-
106
-
 107
107 -
 108
108 -
 109
109 -
 110
110 -
 111
111 -
 112
112 -
 113
113 -
 114
114 -
 115
115 -
 116
116 -
 117
117 -
118
-
119
-
120
-
121
-
122
-
123
-
124
-
125
-
126
-
127
-
128
-
129
-
130
-
131
-
132
-
133
-
134
-
135
-
136
-
137
-
138
-
139
-
140
-
141
-
142
-
143
-
144
-
145
-
146
-
147
-
148
-
149
-
150
-
151
-
152
-
153
-
154
-
155
-
156
-
157
-
158
-
159
-
160
-
161
-
162
-
163
-
164
-
165
-
166
-
167
-
168
-
169
-
170
-
171
-
172
-
173
-
174
-
175
-
176
-
177
-
178
-
179
-
180
-
181
-
182
-
183
-
184
-
185
-
186
-
187
-
188
-
189
-
190
-
191
-
192
-
193
-
194
-
195
-
196
-
197
-
198
-
199
-
200
-
201
-
202
-
203
-
204
 |
 |