Netgear AC1750 User Manual - Page 157
Manage the WPS Settings
 |
View all Netgear AC1750 manuals
Add to My Manuals
Save this manual to your list of manuals |
Page 157 highlights
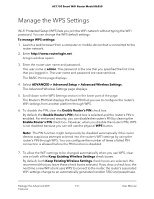
AC1750 Smart WiFi Router Model R6350 Manage the WPS Settings Wi-Fi Protected Setup (WPS) lets you join the WiFi network without typing the WiFi password. You can change the WPS default settings. To manage WPS settings: 1. Launch a web browser from a computer or mobile device that is connected to the router network. 2. Enter http://www.routerlogin.net. A login window opens. 3. Enter the router user name and password. The user name is admin. The password is the one that you specified the first time that you logged in. The user name and password are case-sensitive. The BASIC Home page displays. 4. Select ADVANCED > Advanced Setup > Advanced Wireless Settings. The Advanced Wireless Settings page displays. 5. Scroll down to the WPS Settings section in the lower part of the page. The Router's PIN field displays the fixed PIN that you use to configure the router's WiFi settings from another platform through WPS. 6. To disable the PIN, clear the Enable Router's PIN check box. By default, the Enable Router's PIN check box is selected and the router's PIN is enabled. For enhanced security, you can disable the router's PIN by clearing the Enable Router's PIN check box. However, when you disable the router's PIN, WPS is not disabled because you can still use the physical WPS button. Note: The PIN function might temporarily be disabled automatically if the router detects suspicious attempts to break into the router's WiFi settings by using the router's PIN through WPS. You can configure the number of times a failed PIN connection is allowed before the PIN function is disabled. 7. To allow the WiFi settings to be changed automatically when you use WPS, clear one or both of the Keep Existing Wireless Settings check boxes. By default, both Keep Existing Wireless Settings check boxes are selected. We recommend that you leave these check boxes selected. If you clear a check box, the next time a new WiFi client uses WPS to connect to the router, the router's associated WiFi settings change to an automatically generated random SSID and passphrase. Manage the Advanced WiFi 157 Features User Manual
-
 1
1 -
2
-
3
-
4
-
5
-
6
-
7
-
8
-
9
-
10
-
11
-
12
-
13
-
14
-
15
-
16
-
17
-
18
-
19
-
20
-
21
-
22
-
23
-
24
-
25
-
26
-
27
-
28
-
29
-
30
-
31
-
32
-
33
-
34
-
35
-
36
-
37
-
38
-
39
-
40
-
41
-
42
-
43
-
44
-
45
-
46
-
47
-
48
-
49
-
50
-
51
-
52
-
53
-
54
-
55
-
56
-
57
-
58
-
59
-
60
-
61
-
62
-
63
-
64
-
65
-
66
-
67
-
68
-
69
-
70
-
71
-
72
-
73
-
74
-
75
-
76
-
77
-
78
-
79
-
80
-
81
-
82
-
83
-
84
-
85
-
86
-
87
-
88
-
89
-
90
-
91
-
92
-
93
-
94
-
95
-
96
-
97
-
98
-
99
-
100
-
101
-
102
-
103
-
104
-
105
-
106
-
107
-
108
-
109
-
110
-
111
-
112
-
113
-
114
-
115
-
116
-
117
-
118
-
119
-
120
-
121
-
122
-
123
-
124
-
125
-
126
-
127
-
128
-
129
-
130
-
131
-
132
-
133
-
134
-
135
-
136
-
137
-
138
-
139
-
140
-
141
-
142
-
143
-
144
-
145
-
146
-
147
-
148
-
149
-
150
-
151
-
 152
152 -
 153
153 -
 154
154 -
 155
155 -
 156
156 -
 157
157 -
 158
158 -
 159
159 -
 160
160 -
 161
161 -
 162
162 -
163
-
164
-
165
-
166
-
167
-
168
-
169
-
170
-
171
-
172
-
173
-
174
-
175
-
176
-
177
-
178
-
179
-
180
-
181
-
182
-
183
-
184
-
185
-
186
-
187
-
188
-
189
-
190
-
191
-
192
-
193
-
194
-
195
-
196
-
197
-
198
-
199
-
200
-
201
-
202
-
203
-
204
 |
 |