Netgear R6120 User Manual - Page 45
Specify a Trusted Computer, Set Up a Schedule for Keyword Blocking and Outbound Firewall Rules
 |
View all Netgear R6120 manuals
Add to My Manuals
Save this manual to your list of manuals |
Page 45 highlights
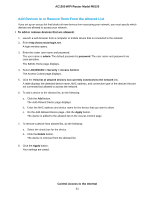
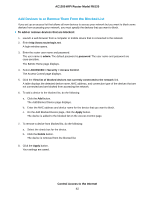
AC1200 WiFi Router Model R6120 Specify a Trusted Computer You can exempt one trusted device from blocking and logging. The device that you exempt must be assigned a fixed (static) IP address. To specify a trusted device: 1. Launch a web browser from a computer or mobile device that is connected to the network. 2. Enter http://www.routerlogin.net. A login window opens. 3. Enter the router user name and password. The user name is admin. The default password is password. The user name and password are case-sensitive. The BASIC Home page displays. 4. Select ADVANCED > Security > Block Sites. The Block Sites page displays. 5. Scroll down and select the Allow trusted IP address to visit blocked sites check box. 6. In the Trusted IP Address field, enter the IP address of the trusted device. The first three octets of the IP address are automatically populated and depend on the IP address that is assigned to the router on the LAN Setup page. 7. Click the Apply button. Your settings are saved. Set Up a Schedule for Keyword Blocking and Outbound Firewall Rules You can set up a schedule that you can apply to keyword blocking and outbound firewall rules. The schedule can specify the days and times that these features are active. After you set up the schedule, if you want it to become active, you must apply it to keyword blocking (see Set Up Blocking on page 43). Without a schedule, you can only enable or disable these features. By default, no schedule is set. To set up a schedule: 1. Launch a web browser from a computer or mobile device that is connected to the network. 2. Enter http://www.routerlogin.net. A login window opens. 3. Enter the router user name and password. The user name is admin. The default password is password. The user name and password are case-sensitive. The BASIC Home page displays. 4. Select ADVANCED > Security > Schedule. Control Access to the Internet 45
-
 1
1 -
2
-
3
-
4
-
5
-
6
-
7
-
8
-
9
-
10
-
11
-
12
-
13
-
14
-
15
-
16
-
17
-
18
-
19
-
20
-
21
-
22
-
23
-
24
-
25
-
26
-
27
-
28
-
29
-
30
-
31
-
32
-
33
-
34
-
35
-
36
-
37
-
38
-
39
-
 40
40 -
 41
41 -
 42
42 -
 43
43 -
 44
44 -
 45
45 -
 46
46 -
 47
47 -
 48
48 -
 49
49 -
 50
50 -
51
-
52
-
53
-
54
-
55
-
56
-
57
-
58
-
59
-
60
-
61
-
62
-
63
-
64
-
65
-
66
-
67
-
68
-
69
-
70
-
71
-
72
-
73
-
74
-
75
-
76
-
77
-
78
-
79
-
80
-
81
-
82
-
83
-
84
-
85
-
86
-
87
-
88
-
89
-
90
-
91
-
92
-
93
-
94
-
95
-
96
-
97
-
98
-
99
-
100
-
101
-
102
-
103
-
104
-
105
-
106
-
107
-
108
-
109
-
110
-
111
-
112
-
113
-
114
-
115
-
116
-
117
-
118
-
119
-
120
-
121
-
122
-
123
-
124
-
125
-
126
-
127
-
128
-
129
-
130
-
131
-
132
-
133
-
134
-
135
-
136
-
137
-
138
-
139
-
140
 |
 |