Netgear R6120 User Manual - Page 78
Use the Scan Feature of a Multifunction USB Printer, Manage the NETGEAR USB Control Center Settings
 |
View all Netgear R6120 manuals
Add to My Manuals
Save this manual to your list of manuals |
Page 78 highlights
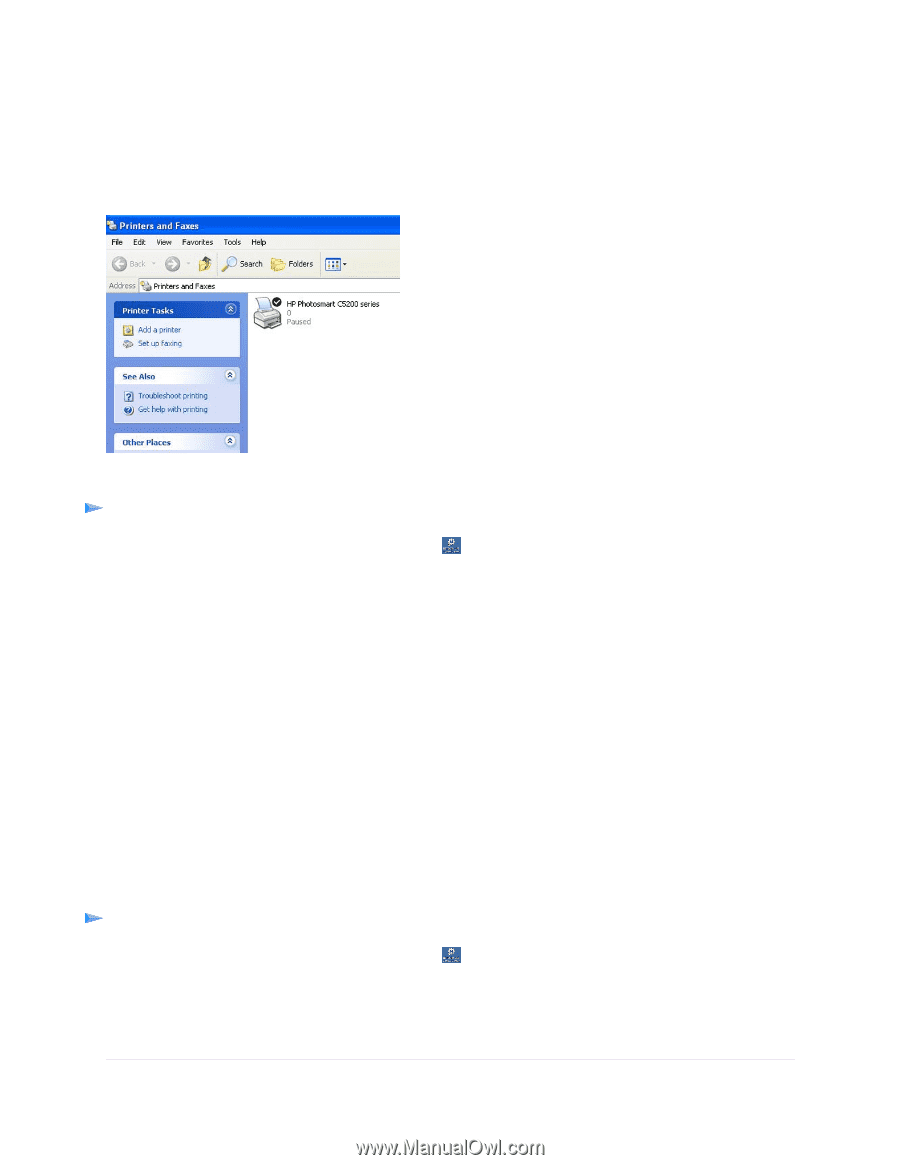
AC1200 WiFi Router Model R6120 Use the Scan Feature of a Multifunction USB Printer If your USB printer supports scanning, you can also use the USB printer for scanning. For example, the USB printer displayed in the Windows Printers and Faxes window is ready for print jobs. Figure 6. Printers and Faxes window To use the scan feature of a multifunction USB printer: 1. Click the NETGEAR USB Control Center icon . The NETGEAR USB Control Center opens. 2. Make sure that the printer status shows as Available. 3. Click the Network Scanner button. The scanner page displays so that you can use the USB printer for scanning. Manage the NETGEAR USB Control Center Settings You can stop the NETGEAR USB Control Center from starting automatically when you log in to Windows. You can also change the language and specify the time-out to release the printer connection. Turn Off Automatic Startup of the NETGEAR USB Control Center You can stop the NETGEAR USB Control Center from starting automatically when you log in to Windows. To turn off the automatic startup of the NETGEAR USB Control Center: 1. Click the NETGEAR USB Control Center icon . The NETGEAR USB Control Center opens. 2. Select Tools > Configuration. The Control Center Configuration window opens. Share a USB Printer 78
-
 1
1 -
2
-
3
-
4
-
5
-
6
-
7
-
8
-
9
-
10
-
11
-
12
-
13
-
14
-
15
-
16
-
17
-
18
-
19
-
20
-
21
-
22
-
23
-
24
-
25
-
26
-
27
-
28
-
29
-
30
-
31
-
32
-
33
-
34
-
35
-
36
-
37
-
38
-
39
-
40
-
41
-
42
-
43
-
44
-
45
-
46
-
47
-
48
-
49
-
50
-
51
-
52
-
53
-
54
-
55
-
56
-
57
-
58
-
59
-
60
-
61
-
62
-
63
-
64
-
65
-
66
-
67
-
68
-
69
-
70
-
71
-
72
-
 73
73 -
 74
74 -
 75
75 -
 76
76 -
 77
77 -
 78
78 -
 79
79 -
 80
80 -
 81
81 -
 82
82 -
 83
83 -
84
-
85
-
86
-
87
-
88
-
89
-
90
-
91
-
92
-
93
-
94
-
95
-
96
-
97
-
98
-
99
-
100
-
101
-
102
-
103
-
104
-
105
-
106
-
107
-
108
-
109
-
110
-
111
-
112
-
113
-
114
-
115
-
116
-
117
-
118
-
119
-
120
-
121
-
122
-
123
-
124
-
125
-
126
-
127
-
128
-
129
-
130
-
131
-
132
-
133
-
134
-
135
-
136
-
137
-
138
-
139
-
140
 |
 |