Nokia E75 Nokia E75 User Guide in English and in Spanish - Page 138
Remote configuration
 |
UPC - 758478017975
View all Nokia E75 manuals
Add to My Manuals
Save this manual to your list of manuals |
Page 138 highlights
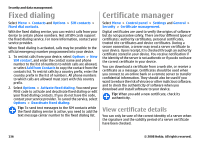
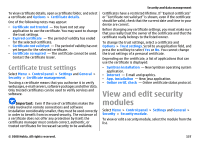
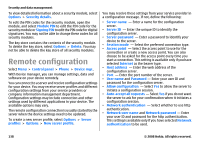
Security and data management To view detailed information about a security module, select Options > Security details. To edit the PIN codes for the security module, open the module, and select Module PIN to edit the PIN code for the security module or Signing PIN to edit the PIN code for digital signatures. You may not be able to change these codes for all security modules. The key store contains the contents of the security module. To delete the key store, select Options > Delete. You may not be able to delete the key store of all security modules. Remote configuration Select Menu > Control panel > Phone > Device mgr.. With Device manager, you can manage settings, data and software on your device remotely. You can connect to a server and receive configuration settings for your device. You may receive server profiles and different configuration settings from your service providers or company information management department. Configuration settings may include connection and other settings used by different applications in your device. The available options may vary. The remote configuration connection is usually started by the server when the device settings need to be updated. To create a new server profile, select Options > Server profiles > Options > New server profile. You may receive these settings from your service provider in a configuration message. If not, define the following: • Server name - Enter a name for the configuration server. • Server ID - Enter the unique ID to identify the configuration server. • Server password - Enter a password to identify your device to the server. • Session mode - Select the preferred connection type. • Access point - Select the access point to use for the connection or create a new access point. You can also choose to be asked for the access point every time you start a connection. This setting is available only if you have selected Internet as the bearer type. • Host address - Enter the web address of the configuration server. • Port - Enter the port number of the server. • User name and Password - Enter your user ID and password for the configuration server. • Allow configuration - Select Yes to allow the server to initiate a configuration session. • Auto-accept all requests - Select Yes if you do not want the server to ask for your confirmation when it initiates a configuration session. • Network authentication - Select whether to use http authentication. • Network user name and Network password - Enter your user ID and password for the http authentication. This setting is available only if you have selected Network authentication to be used. 138 © 2008 Nokia. All rights reserved.
-
 1
1 -
2
-
3
-
4
-
5
-
6
-
7
-
8
-
9
-
10
-
11
-
12
-
13
-
14
-
15
-
16
-
17
-
18
-
19
-
20
-
21
-
22
-
23
-
24
-
25
-
26
-
27
-
28
-
29
-
30
-
31
-
32
-
33
-
34
-
35
-
36
-
37
-
38
-
39
-
40
-
41
-
42
-
43
-
44
-
45
-
46
-
47
-
48
-
49
-
50
-
51
-
52
-
53
-
54
-
55
-
56
-
57
-
58
-
59
-
60
-
61
-
62
-
63
-
64
-
65
-
66
-
67
-
68
-
69
-
70
-
71
-
72
-
73
-
74
-
75
-
76
-
77
-
78
-
79
-
80
-
81
-
82
-
83
-
84
-
85
-
86
-
87
-
88
-
89
-
90
-
91
-
92
-
93
-
94
-
95
-
96
-
97
-
98
-
99
-
100
-
101
-
102
-
103
-
104
-
105
-
106
-
107
-
108
-
109
-
110
-
111
-
112
-
113
-
114
-
115
-
116
-
117
-
118
-
119
-
120
-
121
-
122
-
123
-
124
-
125
-
126
-
127
-
128
-
129
-
130
-
131
-
132
-
 133
133 -
 134
134 -
 135
135 -
 136
136 -
 137
137 -
 138
138 -
 139
139 -
 140
140 -
 141
141 -
 142
142 -
 143
143 -
144
-
145
-
146
-
147
-
148
-
149
-
150
-
151
-
152
-
153
-
154
-
155
-
156
-
157
-
158
-
159
-
160
-
161
-
162
-
163
-
164
-
165
-
166
-
167
-
168
-
169
-
170
-
171
-
172
-
173
-
174
-
175
-
176
-
177
-
178
-
179
-
180
-
181
-
182
-
183
-
184
-
185
-
186
-
187
-
188
-
189
-
190
-
191
-
192
-
193
-
194
-
195
-
196
-
197
-
198
-
199
-
200
-
201
-
202
-
203
-
204
-
205
-
206
-
207
-
208
-
209
-
210
-
211
-
212
-
213
-
214
-
215
-
216
-
217
-
218
-
219
-
220
-
221
-
222
-
223
-
224
-
225
-
226
-
227
-
228
-
229
-
230
-
231
-
232
-
233
-
234
-
235
-
236
-
237
-
238
-
239
-
240
-
241
-
242
-
243
-
244
-
245
-
246
-
247
-
248
-
249
-
250
-
251
-
252
-
253
-
254
-
255
-
256
-
257
-
258
-
259
-
260
-
261
-
262
-
263
-
264
-
265
-
266
-
267
-
268
-
269
-
270
-
271
-
272
-
273
-
274
-
275
-
276
-
277
-
278
-
279
-
280
-
281
-
282
-
283
-
284
-
285
-
286
-
287
-
288
-
289
-
290
-
291
-
292
-
293
-
294
-
295
-
296
-
297
-
298
-
299
-
300
-
301
-
302
-
303
-
304
-
305
-
306
-
307
-
308
-
309
-
310
-
311
-
312
-
313
-
314
-
315
-
316
-
317
-
318
-
319
-
320
-
321
-
322
-
323
-
324
-
325
-
326
-
327
-
328
-
329
-
330
-
331
-
332
-
333
-
334
-
335
-
336
-
337
-
338
-
339
-
340
-
341
-
342
-
343
-
344
-
345
-
346
-
347
-
348
-
349
-
350
-
351
-
352
-
353
-
354
-
355
-
356
-
357
-
358
-
359
-
360
-
361
-
362
-
363
-
364
-
365
-
366
-
367
-
368
-
369
-
370
-
371
-
372
-
373
-
374
-
375
-
376
-
377
-
378
-
379
-
380
-
381
-
382
-
383
-
384
-
385
-
386
-
387
-
388
-
389
-
390
-
391
-
392
-
393
-
394
-
395
-
396
-
397
 |
 |