Samsung SCH R500 User Manual (ENGLISH) - Page 50
Options, Messages, Send Message, Picture Message, Create Pic Msg, Subject
 |
View all Samsung SCH R500 manuals
Add to My Manuals
Save this manual to your list of manuals |
Page 50 highlights
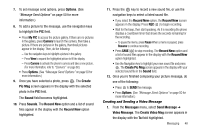
• To change the text input method, do one of the following: - Repeatedly press and hold the + key until the desired text input method is indicated by the left soft key label. - Press the Left soft key ( ), use the navigation keys to select the desired text input method, and press . • Press the Left soft key ( entry methods: ) to select one of the following text - T9 Word - Abc - ABC - 123 - Symbols 5. At any point while composing a message, you can set message send options by pressing the Options (right) soft key ( ). (See "Message Send Options" on page 50 for more information.) 6. Once you're finished composing your message, press the SEND key ( ) to send your message. Creating and Sending a Picture Message 1. From the Messages menu, select Send Message ➔ Picture Message. The Create Pic Msg screen appears in the display with the To field highlighted. 47 2. Address your message by selecting contacts and/or entering number(s) or e-mail address(es) of message recipient(s). (See Step 2 of "Creating and Sending a Text Message" on page 46 for more information on addressing your message.) 3. After addressing your picture message, the Subject field becomes highlighted. 4. Enter the Subject text using the keypad. (See Step 4 of "Creating and Sending a Text Message" on page 46 for more information on choosing a text entry method, also see "Entering Text" on page 30 for more information on using text entry methods.) 5. Press the Navigation key Down. The Text field becomes highlighted. 6. Enter the message text using the keypad. (See Step 4 of "Creating and Sending a Text Message" on page 46 for more information on choosing a text entry method, also see "Entering Text" on page 30 for more information on using text entry methods.)
-
 1
1 -
2
-
3
-
4
-
5
-
6
-
7
-
8
-
9
-
10
-
11
-
12
-
13
-
14
-
15
-
16
-
17
-
18
-
19
-
20
-
21
-
22
-
23
-
24
-
25
-
26
-
27
-
28
-
29
-
30
-
31
-
32
-
33
-
34
-
35
-
36
-
37
-
38
-
39
-
40
-
41
-
42
-
43
-
44
-
 45
45 -
 46
46 -
 47
47 -
 48
48 -
 49
49 -
 50
50 -
 51
51 -
 52
52 -
 53
53 -
 54
54 -
 55
55 -
56
-
57
-
58
-
59
-
60
-
61
-
62
-
63
-
64
-
65
-
66
-
67
-
68
-
69
-
70
-
71
-
72
-
73
-
74
-
75
-
76
-
77
-
78
-
79
-
80
-
81
-
82
-
83
-
84
-
85
-
86
-
87
-
88
-
89
-
90
-
91
-
92
-
93
-
94
-
95
-
96
-
97
-
98
-
99
-
100
-
101
-
102
-
103
-
104
-
105
-
106
-
107
-
108
-
109
-
110
-
111
-
112
-
113
-
114
-
115
-
116
-
117
-
118
-
119
-
120
-
121
-
122
-
123
-
124
-
125
-
126
-
127
-
128
-
129
-
130
-
131
-
132
-
133
-
134
-
135
-
136
-
137
-
138
-
139
-
140
-
141
-
142
-
143
-
144
-
145
-
146
-
147
-
148
-
149
-
150
-
151
-
152
-
153
-
154
-
155
-
156
 |
 |
