Samsung SCH R500 User Manual (ENGLISH) - Page 96
Options, Tools/Utilities, Calendar, Go to Date, New Event, Alert, Reminder
 |
View all Samsung SCH R500 manuals
Add to My Manuals
Save this manual to your list of manuals |
Page 96 highlights
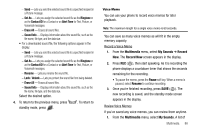
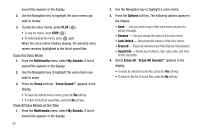
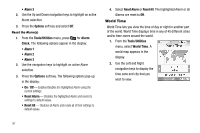
2. Use the following keys to move around within the calendar: • Press the Volume key Up ( ) to view previous months. • Press the Volume key Down ( ) to view future months. • Use the Navigation key to move to an individual day, one day or one week at a time. • Press the Options soft key while viewing the calendar. The following options appear in the display: - Go to Date - Lets you jump to any date you specify. - Go to Today - Lets you jump to the current date. - Erase Old - Lets you erase past events. - Erase all - Lets you erase all events. Use the Navigation key to highlight the desired option, then press the key to select the highlighted option and perform the related process. Add a New Event 1. From the Tools/Utilities menu, select Calendar. A calendar appears in the display with the current date highlighted. The month and year also appear. 2. Use the Navigation key, Volume key, or the Go to Date option to highlight the date of the new event. 3. Press the Add soft key. The New Event screen appears in the display. 93 4. Enter a name for the event. (For more information, refer to "Entering Text" on page 30.) 5. Use the Up and Down navigation keys to highlight the Start and End dates and times fields. 6. Enter the Start and End dates and times for the event using the keypad. Enter the dates and times for the event using 2 digits for day, month, hour, and minute entries. Use 4 digits for year entries. 7. Use the Left and Right navigation keys to change between AM and PM, or press abc for AM or press pqrs for PM. 8. When you're finished entering the dates and times, use the Up and Down navigation keys to highlight the Alert field. Use the Left and Right navigation keys to select a type of alert. 9. Use the Up and Down navigation keys to highlight the Reminder field. Use the Left and Right navigation keys to select the Reminder off or to select a reminder interval.
-
 1
1 -
2
-
3
-
4
-
5
-
6
-
7
-
8
-
9
-
10
-
11
-
12
-
13
-
14
-
15
-
16
-
17
-
18
-
19
-
20
-
21
-
22
-
23
-
24
-
25
-
26
-
27
-
28
-
29
-
30
-
31
-
32
-
33
-
34
-
35
-
36
-
37
-
38
-
39
-
40
-
41
-
42
-
43
-
44
-
45
-
46
-
47
-
48
-
49
-
50
-
51
-
52
-
53
-
54
-
55
-
56
-
57
-
58
-
59
-
60
-
61
-
62
-
63
-
64
-
65
-
66
-
67
-
68
-
69
-
70
-
71
-
72
-
73
-
74
-
75
-
76
-
77
-
78
-
79
-
80
-
81
-
82
-
83
-
84
-
85
-
86
-
87
-
88
-
89
-
90
-
 91
91 -
 92
92 -
 93
93 -
 94
94 -
 95
95 -
 96
96 -
 97
97 -
 98
98 -
 99
99 -
 100
100 -
 101
101 -
102
-
103
-
104
-
105
-
106
-
107
-
108
-
109
-
110
-
111
-
112
-
113
-
114
-
115
-
116
-
117
-
118
-
119
-
120
-
121
-
122
-
123
-
124
-
125
-
126
-
127
-
128
-
129
-
130
-
131
-
132
-
133
-
134
-
135
-
136
-
137
-
138
-
139
-
140
-
141
-
142
-
143
-
144
-
145
-
146
-
147
-
148
-
149
-
150
-
151
-
152
-
153
-
154
-
155
-
156
 |
 |