Samsung SCH R500 User Manual (ENGLISH) - Page 73
Options, Settings, Auto Save, Icon Display, Display All, Guideline, No Icons, Metering, Average,
 |
View all Samsung SCH R500 manuals
Add to My Manuals
Save this manual to your list of manuals |
Page 73 highlights
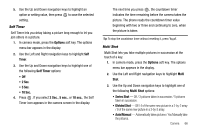
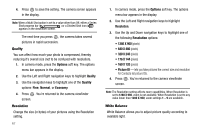
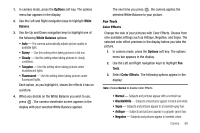
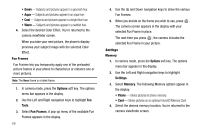
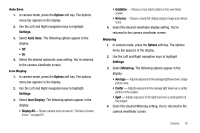
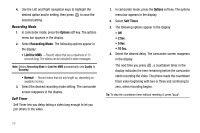
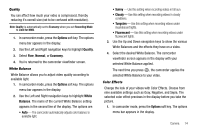
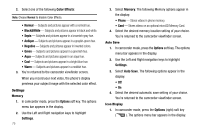
Auto Save 1. In camera mode, press the Options soft key. The options menu bar appears in the display. 2. Use the Left and Right navigation keys to highlight Settings. 3. Select Auto Save. The following options appear in the display: • Off • On 4. Select the desired automatic save setting. You're returned to the camera viewfinder screen. Icon Display 1. In camera mode, press the Options soft key. The options menu bar appears in the display. 2. Use the Left and Right navigation keys to highlight Settings. 3. Select Icon Display. The following options appear in the display: • Display All - Shows camera icons as seen in "Camera Screen Icons" on page 63. • Guideline - Shows a cross hatch pattern in the view finder screen. • No Icons - Shows a nearly full-display subject image and without icons. 4. Select the desired viewfinder display setting. You're returned to the camera viewfinder screen. Metering 1. In camera mode, press the Options soft key. The options menu bar appears in the display. 2. Use the Left and Right navigation keys to highlight Settings. 3. Select Metering. The following options appear in the display: • Average - Adjusts exposure to the average light level over a large picture area. • Center - Adjusts exposure to the average light level over a center portion of the subject. • Spot - Adjusts exposure to the light level over a small portion of the subject. 4. Select the desired Metering setting. You're returned to the camera viewfinder screen. Camera 70
-
 1
1 -
2
-
3
-
4
-
5
-
6
-
7
-
8
-
9
-
10
-
11
-
12
-
13
-
14
-
15
-
16
-
17
-
18
-
19
-
20
-
21
-
22
-
23
-
24
-
25
-
26
-
27
-
28
-
29
-
30
-
31
-
32
-
33
-
34
-
35
-
36
-
37
-
38
-
39
-
40
-
41
-
42
-
43
-
44
-
45
-
46
-
47
-
48
-
49
-
50
-
51
-
52
-
53
-
54
-
55
-
56
-
57
-
58
-
59
-
60
-
61
-
62
-
63
-
64
-
65
-
66
-
67
-
 68
68 -
 69
69 -
 70
70 -
 71
71 -
 72
72 -
 73
73 -
 74
74 -
 75
75 -
 76
76 -
 77
77 -
 78
78 -
79
-
80
-
81
-
82
-
83
-
84
-
85
-
86
-
87
-
88
-
89
-
90
-
91
-
92
-
93
-
94
-
95
-
96
-
97
-
98
-
99
-
100
-
101
-
102
-
103
-
104
-
105
-
106
-
107
-
108
-
109
-
110
-
111
-
112
-
113
-
114
-
115
-
116
-
117
-
118
-
119
-
120
-
121
-
122
-
123
-
124
-
125
-
126
-
127
-
128
-
129
-
130
-
131
-
132
-
133
-
134
-
135
-
136
-
137
-
138
-
139
-
140
-
141
-
142
-
143
-
144
-
145
-
146
-
147
-
148
-
149
-
150
-
151
-
152
-
153
-
154
-
155
-
156
 |
 |
