Samsung SGH-I437 User Manual Ver.li6_f3 (English(north America)) - Page 105
Using Email, Creating an Email Account
 |
View all Samsung SGH-I437 manuals
Add to My Manuals
Save this manual to your list of manuals |
Page 105 highlights
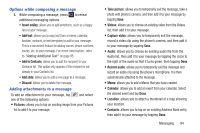
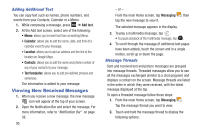
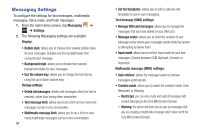
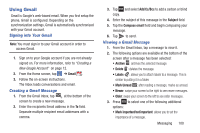
- Free: you may add any content to the message. Push message settings: • Push messages: allows you to receive push messages from the network. Cell Broadcast (CB) settings: • CB activation: allows you to receive Cell Broadcast (CB) messages. • Channel configuration: allows you to set up the channel that you will receive CB messages on. Notifications settings: • Notifications: allows you to see message notifications on your status bar. • Select ringtone: allows you to set the ringtone for your message notifications. Using Email Email enables you to review and create email using various email services. You can also receive text message alerts when you receive an important email. Creating an Email Account 1. From the Home screen, tap ➔ Email . Your accounts screen displays with an Email setup screen displayed. 2. Enter you email address in the Email address field. 3. Enter your password in the Password field. 4. If you want to see your password as it is being typed, tap Show password to create a checkmark. 5. Tap Next. 6. At the Account options screen, tap the Email check frequency drop-down list box and select how often you would like your email to be checked. 7. Tap any of the other options you would like to create a checkmark. 8. Tap Next. 9. Enter a name for this email account (optional). 10. Tap Done. Creating a Corporate Email Account Use the following procedure to configure your phone to synchronize with a corporate email account. 1. From the Home screen, tap ➔ Email . Your accounts screen displays with an Email setup screen displayed. Messaging 98
-
 1
1 -
2
-
3
-
4
-
5
-
6
-
7
-
8
-
9
-
10
-
11
-
12
-
13
-
14
-
15
-
16
-
17
-
18
-
19
-
20
-
21
-
22
-
23
-
24
-
25
-
26
-
27
-
28
-
29
-
30
-
31
-
32
-
33
-
34
-
35
-
36
-
37
-
38
-
39
-
40
-
41
-
42
-
43
-
44
-
45
-
46
-
47
-
48
-
49
-
50
-
51
-
52
-
53
-
54
-
55
-
56
-
57
-
58
-
59
-
60
-
61
-
62
-
63
-
64
-
65
-
66
-
67
-
68
-
69
-
70
-
71
-
72
-
73
-
74
-
75
-
76
-
77
-
78
-
79
-
80
-
81
-
82
-
83
-
84
-
85
-
86
-
87
-
88
-
89
-
90
-
91
-
92
-
93
-
94
-
95
-
96
-
97
-
98
-
99
-
 100
100 -
 101
101 -
 102
102 -
 103
103 -
 104
104 -
 105
105 -
 106
106 -
 107
107 -
 108
108 -
 109
109 -
 110
110 -
111
-
112
-
113
-
114
-
115
-
116
-
117
-
118
-
119
-
120
-
121
-
122
-
123
-
124
-
125
-
126
-
127
-
128
-
129
-
130
-
131
-
132
-
133
-
134
-
135
-
136
-
137
-
138
-
139
-
140
-
141
-
142
-
143
-
144
-
145
-
146
-
147
-
148
-
149
-
150
-
151
-
152
-
153
-
154
-
155
-
156
-
157
-
158
-
159
-
160
-
161
-
162
-
163
-
164
-
165
-
166
-
167
-
168
-
169
-
170
-
171
-
172
-
173
-
174
-
175
-
176
-
177
-
178
-
179
-
180
-
181
-
182
-
183
-
184
-
185
-
186
-
187
-
188
-
189
-
190
-
191
-
192
-
193
-
194
-
195
-
196
-
197
-
198
-
199
-
200
-
201
-
202
-
203
-
204
-
205
-
206
-
207
-
208
-
209
-
210
-
211
-
212
-
213
-
214
-
215
-
216
-
217
-
218
-
219
-
220
-
221
-
222
-
223
 |
 |
