Sony PDWHD1500 User Manual (PDW-HD1500 Operation Manual for Firmware Version 1 - Page 65
Using the function to find scenes, To display the expand thumbnail screen of
 |
View all Sony PDWHD1500 manuals
Add to My Manuals
Save this manual to your list of manuals |
Page 65 highlights
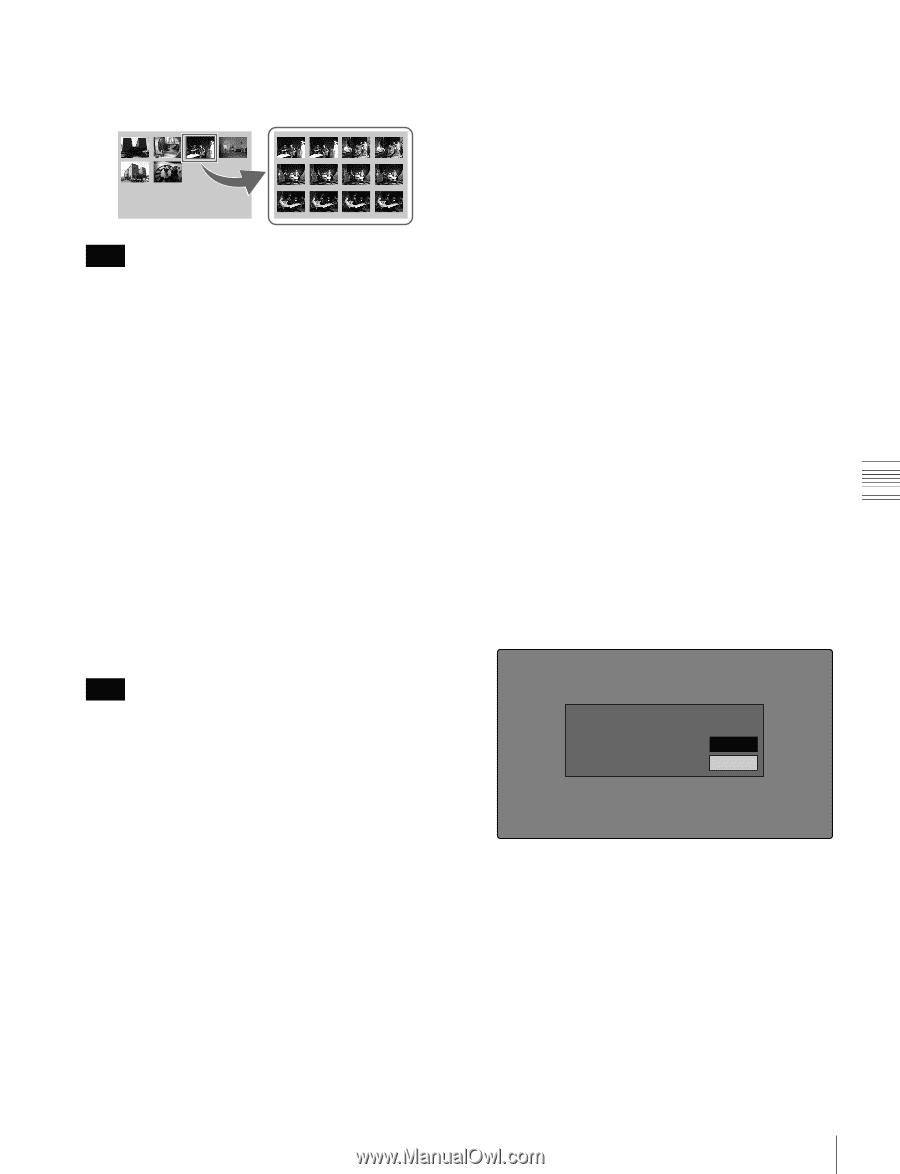
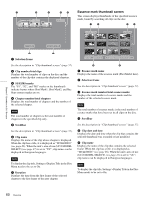
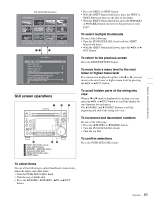
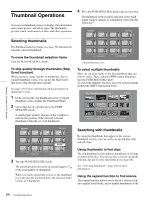
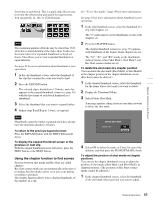
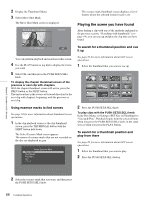
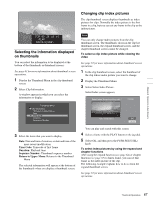
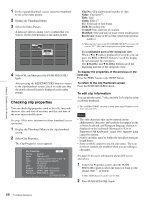
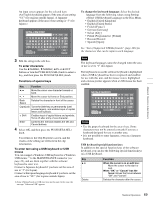
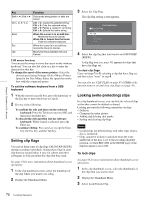
Chapter 5 Operations in GUI Screens first frame in each block. This is a quick and efficient way to review the selected clip and search for target scenes. You can specify 12, 144, or 1728 divisions. Note The maximum number of blocks may be other than 1728 when the recorded duration of the clip is short. In this case, the frame interval of expanded thumbnails is fixed at 1 frame. This allows you to view expanded thumbnails at equal intervals. See page 63 for more information about thumbnail screen operations. 1 In the clip thumbnail screen, select the thumbnail of the clip that contains the scene you want to find. 2 Press the EXPAND button. The selected clip is divided into 12 blocks, and a list appears in the expand thumbnail screen (see page 59) with the first frame of each block displayed as a thumbnail. 3 Select the thumbnail that you want to expand further. 4 Repeat steps 2 and 3 up to 2 times, as required. Note Thumbnails cannot be further expanded when they already have the minimum duration (1 frame). To return to the previous expansion level Press the EXPAND button with the SHIFT button held down. To display the expand thumbnail screen of the previous or next clip With the expand thumbnail screen still active, press the PREV button or the NEXT button. Using the chapter function to find scenes Sections between shot marks and Rec Start are called chapters. Rec Start essence marks are set automatically at the start of recording, but shot marks can be set at any scene during recording or playback. The chapter function allows you to display thumbnails of the chapters in a clip. See "To set shot marks" (page 49) for more information. See page 63 for more information about thumbnail screen operations. 1 In the clip thumbnail screen, select the thumbnail of a clip with chapters set. The "S" mark appears on the thumbnails of clips with chapters set. 2 Press the CHAPTER button. The chapter thumbnail screen (see page 59) appears, with thumbnails of the frames where chapters are set. The "S1", "S2", and "RS" marks on the thumbnails indicate frames where Shot Mark1, Shot Mark2, and Rec Start essence marks are set. To delete the shot mark at a chapter position You can delete the shot mark (Shot Mark1 or Shot Mark2) at the chapter position in the chapter thumbnail screen. (Rec Satrt cannot be deleted.). 1 In the chapter thumbnail screen, select the thumbnail for the frame whose shot mark you want to delete. 2 Display the Thumbnail Menu. 3 Select Delete Shot Mark. A message appears asking if you are sure that you want to delete the shot mark. Clip List:E0001 002/013 TC 00:00:00:00 TC 00D:00e:0le4:1te4 ShToCt00M:00a:1r2k:04 TC 00:00:20:13 TC 00:00:28:08 Delete 002? TC 00:00:35:15 OK TC 00:00:46:0C8 ancTCe0l0:00:53:22 TC 00:00:59:16 TC 00:01:06:18 TC 00:01:13:11 TC 00:01:17:27 DATE&TIME 28 JUL 2006 19:55 TOTAL DUR 00:01:31:16 4 Select OK to delete the mark, or Cancel to cancel the deletion, and then press the PUSH SET(S.SEL) knob. To adjust the position of shot marks at chapter positions You can use the chapter thumbnail screen to adjust the position of shot marks (Shot Mark1 and Shot Mark2) at chapter positions. (The positions of Rec Start essence marks cannot be adjusted.) 1 In the chapter thumbnail screen, select the thumbnail of the shot mark whose position you want to adjust. 65 Thumbnail Operations
-
 1
1 -
2
-
3
-
4
-
5
-
6
-
7
-
8
-
9
-
10
-
11
-
12
-
13
-
14
-
15
-
16
-
17
-
18
-
19
-
20
-
21
-
22
-
23
-
24
-
25
-
26
-
27
-
28
-
29
-
30
-
31
-
32
-
33
-
34
-
35
-
36
-
37
-
38
-
39
-
40
-
41
-
42
-
43
-
44
-
45
-
46
-
47
-
48
-
49
-
50
-
51
-
52
-
53
-
54
-
55
-
56
-
57
-
58
-
59
-
 60
60 -
 61
61 -
 62
62 -
 63
63 -
 64
64 -
 65
65 -
 66
66 -
 67
67 -
 68
68 -
 69
69 -
 70
70 -
71
-
72
-
73
-
74
-
75
-
76
-
77
-
78
-
79
-
80
-
81
-
82
-
83
-
84
-
85
-
86
-
87
-
88
-
89
-
90
-
91
-
92
-
93
-
94
-
95
-
96
-
97
-
98
-
99
-
100
-
101
-
102
-
103
-
104
-
105
-
106
-
107
-
108
-
109
-
110
-
111
-
112
-
113
-
114
-
115
-
116
-
117
-
118
-
119
-
120
-
121
-
122
-
123
-
124
-
125
-
126
-
127
-
128
-
129
-
130
-
131
-
132
-
133
-
134
-
135
-
136
-
137
-
138
-
139
-
140
-
141
-
142
-
143
-
144
-
145
-
146
-
147
-
148
-
149
-
150
-
151
-
152
-
153
-
154
-
155
-
156
-
157
-
158
 |
 |