Sony PDWHD1500 User Manual (PDW-HD1500 Operation Manual for Firmware Version 1 - Page 77
To change the starting timecode of clip, lists, To save clip lists, DateNewest First
 |
View all Sony PDWHD1500 manuals
Add to My Manuals
Save this manual to your list of manuals |
Page 77 highlights
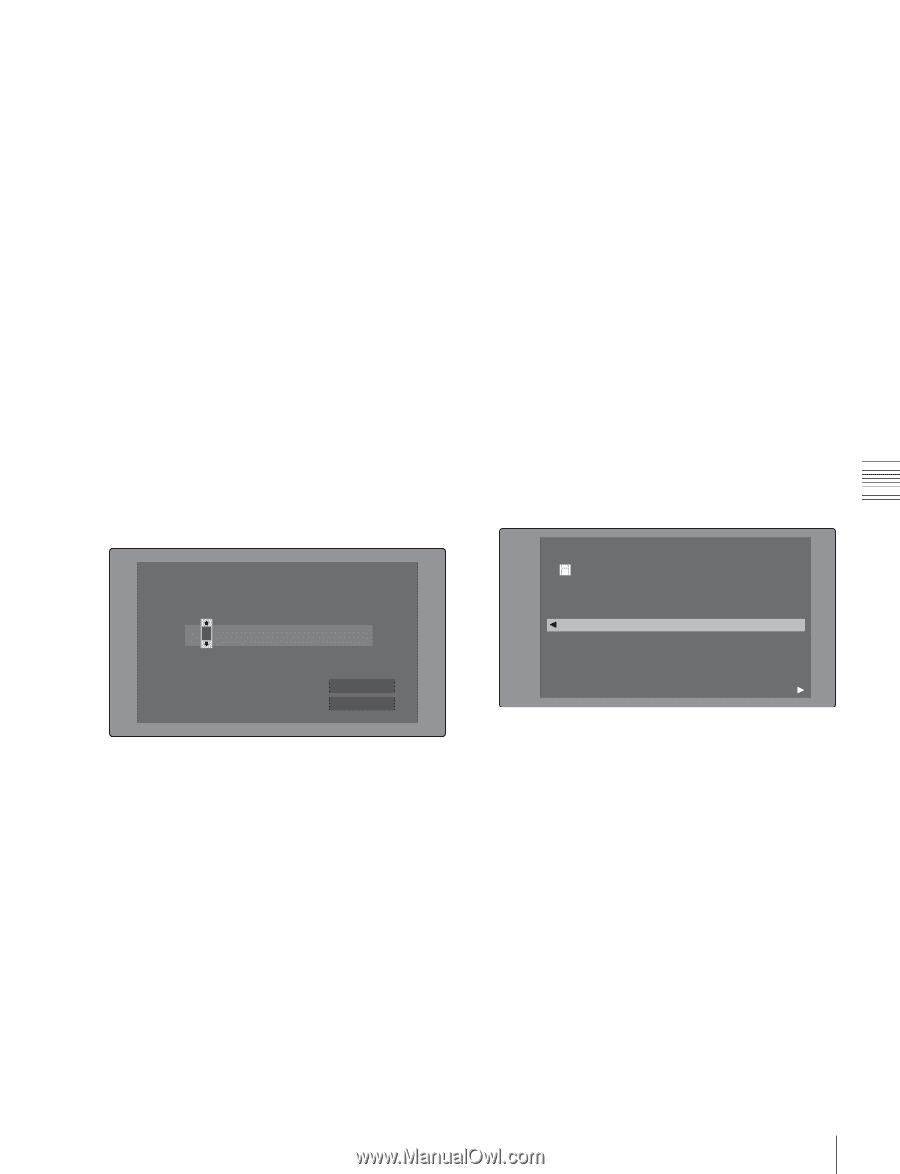
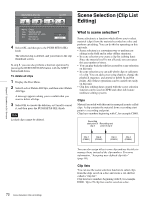
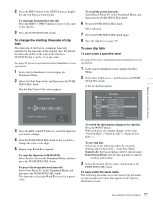
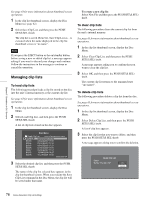
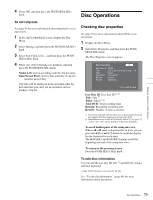
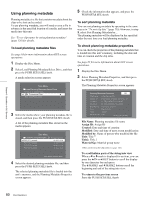
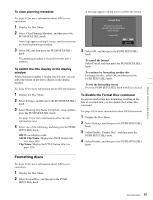
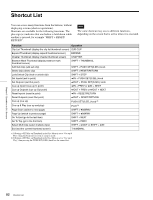
Chapter 5 Operations in GUI Screens 2 Press the PREV button or the NEXT button to display the sub clip that you want to play. To start play from the first sub clip Press the SHIFT + PREV buttons to move to the start of the clip list. 3 Press the PUSH SET(S.SEL) knob. To change the starting timecode of clip lists The timecode of clip lists is continuous timecode, unrelated to the timecode of the original clips. By default the timecode (LTC) of the start of the clip list is 00:00:00:00, but it can be set to any value. See page 63 for more information about thumbnail screen operations. 1 In the clip list thumbnail screen, display the Thumbnail Menu. 2 Select Set Start Time Code, and then press the PUSH SET(S.SEL) knob. The Set Start Time Code screen appears. Set Start Time Code TC 2 2 : 3 4 . 5 6 : 1 7 H MIN SEC FRM Preset TC 00:00:00:00 OK Cancel 3 Press the B/IN or b/OUT button to select the digit that you want to change. 4 Turn the PUSH SET(S.SEL) konb or the jog dial to change the value of the digit. 5 Repeat steps 3 and 4 as required. To reset the timecode to 00:00:00:00 Select Reset to Zero in the Thumbnail Menu, and then press the PUSH SET(S.SEL) knob. To preset the frequently used timecode Select Save Preset TC in the Thumbnail Menu, and then press the PUSH SET(S.SEL) knob. The timecode set in steps 4 and 5 is saved as a preset value. To recall the preset timecode Select Recall Preset TC in the Thumbnail Menu, and then press the PUSH SET(S.SEL) knob. 6 Press the PUSH SET(S.SEL) knob. OK is selected. 7 Press the PUSH SET(S.SEL) knob again. 8 Save the clip list (see page 77). To save clip lists To save under a specified name See page 63 for more information about thumbnail screen operations. 1 In the clip list thumbnail screen, display the Disc Menu. 2 Select Save Clip List as..., and then press the PUSH SET(S.SEL) knob. A list of clip lists appears. Disc Menu Save Clip List as... Name & Date/Sorted by Name DVD og BI... 08 AUG2007 11:50 E0003 03 AUG2007 17:51 E0004 03 AUG2007 17:51 E0005 03 AUG2007 17:51 E0006 03 AUG2007 17:51 E0007 03 AUG2007 17:51 E0095 18 MAY2006 10:25 E0098 13 JUN2006 13:43 Display Select To switch the information displayed for clip lists Press the b/OUT button. With each press, the display changes in the order: "Name & Date" >"Name & Title" >"Name & Sort Date" >... To sort clip lists Select one of the following orders by selecting Settings >Sort Clip List by... in the Disc Menu. Name(A-Z): Sort in ascending order by clip list name. Date(Newest First): Sort by date and time of clip list creation, newest first. 3 Select the desired clip list name, and then press the PUSH SET(S.SEL) knob. To save under the same name The following procedure saves the current clip list under its current name (the name that appears in the clip list thumbnail screen). 77 Scene Selection (Clip List Editing)
-
 1
1 -
2
-
3
-
4
-
5
-
6
-
7
-
8
-
9
-
10
-
11
-
12
-
13
-
14
-
15
-
16
-
17
-
18
-
19
-
20
-
21
-
22
-
23
-
24
-
25
-
26
-
27
-
28
-
29
-
30
-
31
-
32
-
33
-
34
-
35
-
36
-
37
-
38
-
39
-
40
-
41
-
42
-
43
-
44
-
45
-
46
-
47
-
48
-
49
-
50
-
51
-
52
-
53
-
54
-
55
-
56
-
57
-
58
-
59
-
60
-
61
-
62
-
63
-
64
-
65
-
66
-
67
-
68
-
69
-
70
-
71
-
 72
72 -
 73
73 -
 74
74 -
 75
75 -
 76
76 -
 77
77 -
 78
78 -
 79
79 -
 80
80 -
 81
81 -
 82
82 -
83
-
84
-
85
-
86
-
87
-
88
-
89
-
90
-
91
-
92
-
93
-
94
-
95
-
96
-
97
-
98
-
99
-
100
-
101
-
102
-
103
-
104
-
105
-
106
-
107
-
108
-
109
-
110
-
111
-
112
-
113
-
114
-
115
-
116
-
117
-
118
-
119
-
120
-
121
-
122
-
123
-
124
-
125
-
126
-
127
-
128
-
129
-
130
-
131
-
132
-
133
-
134
-
135
-
136
-
137
-
138
-
139
-
140
-
141
-
142
-
143
-
144
-
145
-
146
-
147
-
148
-
149
-
150
-
151
-
152
-
153
-
154
-
155
-
156
-
157
-
158
 |
 |