Dell 2130 Color Laser User Guide - Page 13
Using the Duplex Function, Using the Output Tray
 |
View all Dell 2130 Color Laser manuals
Add to My Manuals
Save this manual to your list of manuals |
Page 13 highlights
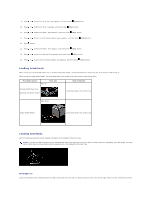
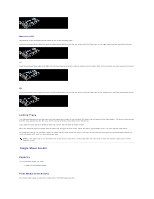
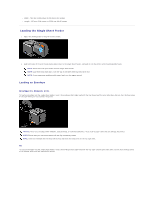
NOTICE: Never use envelopes with windows, coated linings, or self-stick adhesives. These lead to paper jams and can damage the printer. NOTE: Ensure that you load an envelope with the flap completely opened. NOTE: Insert an envelope with the flap side face up and with the stamp area on the bottom right side. Using the Duplex Function Duplex printing (or two-sided printing) allows you to print on both sides of a sheet of paper automatically. Duplex printing is only available when the optional duplexer is installed on the printer. For information on how to install the duplexer, see "Installing a Duplexer". For sizes that are acceptable for duplexer, see "Supported Paper Sizes". Using Booklet Print To use booklet print, you must select either Flip on Short Edge or Flip on Long Edge from the Duplex menu in the printer properties dialog box and then select Booklet Creation in the Booklet/Poster/Mixed Document dialog box displayed by clicking the Booklet/Poster/Mixed Document button. From the Duplex menu, you can define the way 2-sided print pages are bound, and how the printing on the back of the sheet (even-numbered pages) is oriented in relation to the printing on the front (odd-numbered pages). Assumes binding along the long edge of the page (left edge for portrait orientation and top edge for landscape orientation). The following illustration shows long-edge binding for portrait and landscape pages: Flip on Long Edge Assumes binding along the short edge of the page (top edge for portrait orientation and left edge for landscape orientation). The following illustration shows short-edge binding for portrait and landscape pages: Flip on Short Edge Using the Output Tray The output tray holds up to: l 150 sheets of plain paper
-
 1
1 -
2
-
3
-
4
-
5
-
6
-
7
-
 8
8 -
 9
9 -
 10
10 -
 11
11 -
 12
12 -
 13
13 -
 14
14 -
 15
15 -
 16
16 -
 17
17 -
 18
18 -
19
-
20
-
21
-
22
-
23
-
24
-
25
-
26
-
27
-
28
-
29
-
30
-
31
-
32
-
33
-
34
-
35
-
36
-
37
-
38
-
39
-
40
-
41
-
42
-
43
-
44
-
45
-
46
-
47
-
48
-
49
-
50
-
51
-
52
-
53
-
54
-
55
-
56
-
57
-
58
-
59
-
60
-
61
-
62
-
63
-
64
-
65
-
66
-
67
-
68
-
69
-
70
-
71
-
72
-
73
-
74
-
75
-
76
-
77
-
78
-
79
-
80
-
81
-
82
-
83
-
84
-
85
-
86
-
87
-
88
-
89
-
90
-
91
-
92
-
93
-
94
-
95
-
96
-
97
-
98
-
99
-
100
-
101
-
102
-
103
-
104
-
105
-
106
-
107
-
108
-
109
-
110
-
111
-
112
-
113
-
114
-
115
-
116
-
117
-
118
-
119
-
120
-
121
-
122
-
123
-
124
-
125
-
126
-
127
-
128
-
129
-
130
-
131
-
132
-
133
-
134
-
135
-
136
-
137
-
138
-
139
-
140
-
141
-
142
-
143
-
144
-
145
-
146
-
147
-
148
-
149
-
150
-
151
-
152
-
153
-
154
-
155
-
156
-
157
-
158
-
159
-
160
-
161
-
162
-
163
-
164
-
165
-
166
-
167
-
168
-
169
-
170
-
171
-
172
-
173
-
174
-
175
-
176
-
177
-
178
-
179
-
180
-
181
-
182
-
183
-
184
-
185
-
186
-
187
-
188
-
189
-
190
-
191
-
192
-
193
-
194
-
195
-
196
-
197
-
198
-
199
-
200
-
201
-
202
-
203
-
204
 |
 |
