Dell 2130 Color Laser User Guide - Page 89
Option Problem, Other Problems, Contacting Service
 |
View all Dell 2130 Color Laser manuals
Add to My Manuals
Save this manual to your list of manuals |
Page 89 highlights
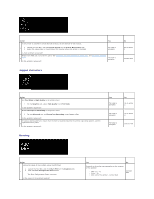
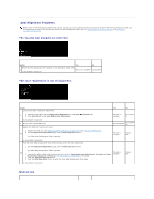
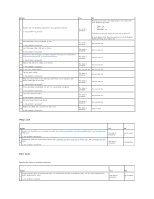
Replace the PHD unit if you have a spare. See "Replacing the Print Head Device (PHD) Unit" and "Installing the PHD Unit". 2 Is the problem recovered? The task is complete. Contact Dell. Multi-feed jam Action Yes No Ensure that the standard 250-sheet tray or optional 250-sheet feeder inserted properly. 1 Is the problem recovered? The task is complete. Go to action 2. 2 Is that the print media damp? Go to action 3a. Go to action 3b. Use print media that is not damp. 3a Is the problem recovered? The task is complete. Go to action 3b. Fan the print media. 3b Is the problem recovered? The task is complete. Go to action 4. Wipe the retard roller in the standard 250-sheet tray or optional 250-sheet feeder with a dry cloth. 4 The task is complete. Contact Dell. Is the problem recovered? Option Problem If an option does not operate correctly following installation or stops working: l Turn off the printer, wait for 10 seconds, and then turn on the printer. If this does not fix the problem, unplug the printer, and check the connection between the option and the printer. l Print the printer settings page to see if the option is listed in the Installed Options list. If the option is not listed, reinstall it. See "Printing a Printer Settings Page". l Ensure the option is selected in the printer driver you are using. The following table lists printer's option and corrective action for related problem. If the suggested corrective action does not correct the problem, call customer service. Problem Action Optional 250-sheet feeder l Ensure the optional 250-sheet feeder is correctly connected to the printer. Reinstall the feeder. See "Removing the Optional 250-Sheet Feeder" and "Installing the Optional 250-Sheet Feeder". l Ensure the print media is loaded correctly. See "Loading Print Media in the Standard 250-Sheet Tray and Optional 250-Sheet Feeder" for more information. Duplexer Memory Network protocol adapter Wireless printer adapter Ensure the duplexer is correctly installed. Reinstall the duplexer. See "Removing a Duplexer" and "Installing a Duplexer". Ensure the memory is securely connected to the memory connector. Ensure the network protocol adapter is securely inserted to the correct slot. Ensure the wireless printer adapter is securely inserted to the correct slot. Other Problems Problem Condensation has occurred inside the printer. Action This usually occurs within several hours after you heat the room in winter. This also occurs when the printer is operating in a location where relative humidity reaches 85% or more. Adjust the humidity or relocate the printer to an appropriate environment. Contacting Service When you call for printer service, be prepared to describe the problem you are experiencing or the error message on the display. You need to know your printer's model type and serial number. See the label located inside the side door of your printer.
-
 1
1 -
2
-
3
-
4
-
5
-
6
-
7
-
8
-
9
-
10
-
11
-
12
-
13
-
14
-
15
-
16
-
17
-
18
-
19
-
20
-
21
-
22
-
23
-
24
-
25
-
26
-
27
-
28
-
29
-
30
-
31
-
32
-
33
-
34
-
35
-
36
-
37
-
38
-
39
-
40
-
41
-
42
-
43
-
44
-
45
-
46
-
47
-
48
-
49
-
50
-
51
-
52
-
53
-
54
-
55
-
56
-
57
-
58
-
59
-
60
-
61
-
62
-
63
-
64
-
65
-
66
-
67
-
68
-
69
-
70
-
71
-
72
-
73
-
74
-
75
-
76
-
77
-
78
-
79
-
80
-
81
-
82
-
83
-
 84
84 -
 85
85 -
 86
86 -
 87
87 -
 88
88 -
 89
89 -
 90
90 -
 91
91 -
 92
92 -
 93
93 -
 94
94 -
95
-
96
-
97
-
98
-
99
-
100
-
101
-
102
-
103
-
104
-
105
-
106
-
107
-
108
-
109
-
110
-
111
-
112
-
113
-
114
-
115
-
116
-
117
-
118
-
119
-
120
-
121
-
122
-
123
-
124
-
125
-
126
-
127
-
128
-
129
-
130
-
131
-
132
-
133
-
134
-
135
-
136
-
137
-
138
-
139
-
140
-
141
-
142
-
143
-
144
-
145
-
146
-
147
-
148
-
149
-
150
-
151
-
152
-
153
-
154
-
155
-
156
-
157
-
158
-
159
-
160
-
161
-
162
-
163
-
164
-
165
-
166
-
167
-
168
-
169
-
170
-
171
-
172
-
173
-
174
-
175
-
176
-
177
-
178
-
179
-
180
-
181
-
182
-
183
-
184
-
185
-
186
-
187
-
188
-
189
-
190
-
191
-
192
-
193
-
194
-
195
-
196
-
197
-
198
-
199
-
200
-
201
-
202
-
203
-
204
 |
 |
