Dell 2130 Color Laser User Guide - Page 93
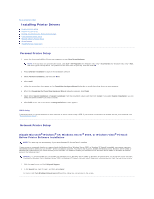
Remote Network Printer Setup
 |
View all Dell 2130 Color Laser manuals
Add to My Manuals
Save this manual to your list of manuals |
Page 93 highlights
To set up e-mail alerts: 1. Launch the Dell Printer Configuration Web Tool. 2. Click E-Mail Alert link. 3. Under Setup E-Mail Lists and Alerts, enter the Primary SMTP Gateway, the Reply Address, and enter your email address or the key operator's email address in the email list box. 4. Click Apply New Settings. NOTE: The SMTP server will display Connection in Progress until an error occurs. Remote Network Printer Setup Before Installation Before you start remote installation, perform the following procedures. Allow Print Spooler to Accept Client Connections NOTE: This step is required for Windows Vista, Windows Vista 64-bit Edition, Windows XP 64-bit Edition, Windows Server 2003, Windows Server 2003 64-bit Edition, Windows Server 2008, and Windows Server 2008 64-bit Edition. 1. Click start® All Programs (for Windows Vista only)® Accessories (for Windows Vista only)® Run. 2. Type gpedit.msc, and then click OK. 3. Click Computer Configuration® Administrative Templates® Printers. 4. Right-click Allow Print Spooler to accept client connections and select Properties. 5. From the Setting tab, select Enabled, and then click OK. 6. Restart the computer. Share the Firewall File and Printer NOTE: This step is required for Windows Vista, Windows Vista 64-bit Edition, Windows XP 64-bit Edition, Windows XP 32-bit Edition, Windows Server 2008, and Windows Server 2008 64-bit Edition. For Windows Vista: 1. Click Start® Control Panel. 2. Select Security. 3. Click Windows Firewall. 4. Click Change settings. 5. Click Continue. 6. From the Exceptions tab, check the File and Printer Sharing check box, and then click OK. For Windows Server 2008: 1. Click Start® Control Panel. 2. Double-Click Windows Firewall.
-
 1
1 -
2
-
3
-
4
-
5
-
6
-
7
-
8
-
9
-
10
-
11
-
12
-
13
-
14
-
15
-
16
-
17
-
18
-
19
-
20
-
21
-
22
-
23
-
24
-
25
-
26
-
27
-
28
-
29
-
30
-
31
-
32
-
33
-
34
-
35
-
36
-
37
-
38
-
39
-
40
-
41
-
42
-
43
-
44
-
45
-
46
-
47
-
48
-
49
-
50
-
51
-
52
-
53
-
54
-
55
-
56
-
57
-
58
-
59
-
60
-
61
-
62
-
63
-
64
-
65
-
66
-
67
-
68
-
69
-
70
-
71
-
72
-
73
-
74
-
75
-
76
-
77
-
78
-
79
-
80
-
81
-
82
-
83
-
84
-
85
-
86
-
87
-
 88
88 -
 89
89 -
 90
90 -
 91
91 -
 92
92 -
 93
93 -
 94
94 -
 95
95 -
 96
96 -
 97
97 -
 98
98 -
99
-
100
-
101
-
102
-
103
-
104
-
105
-
106
-
107
-
108
-
109
-
110
-
111
-
112
-
113
-
114
-
115
-
116
-
117
-
118
-
119
-
120
-
121
-
122
-
123
-
124
-
125
-
126
-
127
-
128
-
129
-
130
-
131
-
132
-
133
-
134
-
135
-
136
-
137
-
138
-
139
-
140
-
141
-
142
-
143
-
144
-
145
-
146
-
147
-
148
-
149
-
150
-
151
-
152
-
153
-
154
-
155
-
156
-
157
-
158
-
159
-
160
-
161
-
162
-
163
-
164
-
165
-
166
-
167
-
168
-
169
-
170
-
171
-
172
-
173
-
174
-
175
-
176
-
177
-
178
-
179
-
180
-
181
-
182
-
183
-
184
-
185
-
186
-
187
-
188
-
189
-
190
-
191
-
192
-
193
-
194
-
195
-
196
-
197
-
198
-
199
-
200
-
201
-
202
-
203
-
204
 |
 |
