Dell 2130 Color Laser User Guide - Page 165
Copy Printer Settings
 |
View all Dell 2130 Color Laser manuals
Add to My Manuals
Save this manual to your list of manuals |
Page 165 highlights
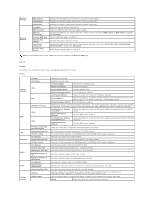
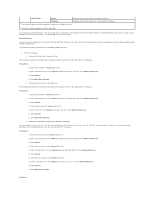
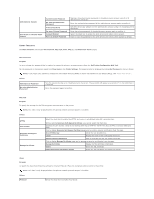
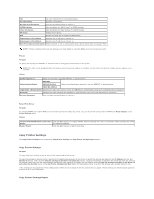
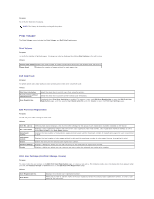
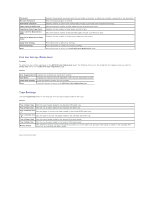
IKE Use a pre shared key for IKE authentication. Pre-Shared Key Specifies a shared key. Re-enter Pre-Shared Key Enter the shared key again to confirm it. IKE SA Lifetime Sets the lifetime for IKE SA from 5 to 28800 minutes. IPsec SA Lifetime Sets the lifetime for IPsec SA from 5 to 2880 minutes. DH Group Selects the DH group. PFS Selects the check box to enable the PFS setting. Remote peers IPv4 address Specifies the IP address to connect to. Remote peers IPv6 address Specifies the IP address to connect to. Non IPsec communication policy Selects whether or not to communicate with a device which does not support IPsec. NOTE: If IPsec is enabled with incorrect settings, you must disable it using the IPsec menu on the operator panel. 802.1x Purpose: To specify the settings for IEEE 802.1x authentication for encrypted communication to the printer. NOTE: This item is only displayed when the optional network protocol adapter is installed, and also when the optional wireless printer adapter is not installed. Values: Enable IEEE 802.1x Select the check box to enable IEEE 802.1x authentication. EAP-MD5 Authentication Method EAP-MS-CHAPv2 Select the authentication method to use for IEEE 802.1x authentication. PEAP/MS-CHAPv2 Login Name: (Device Name) Specifies the login name (device name) for IEEE 802.1x authentication using up to 128 alphanumeric characters. Password Specifies the login password for IEEE 802.1x authentication using up to 128 alphanumeric characters. Re-enter Password Enter the login password again to confirm it. Reset Print Server Purpose: To initialize NVRAM (non-volatile RAM) for the network feature and reboot the printer. You can also initialize the printer's NVRAM from Reset Defaults in the Printer Settings menu. Values: Initialize NIC NVRAM Memory and restart Click the Start button to initialize NVRAM. Network settings will revert to the factory default settings and reboot printer. the network capability. Restart Printer Click the Start button to reboot the printer. Copy Printer Settings The Copy Printer Settings menu includes the Copy Printer Settings and Copy Printer Settings Report pages. Copy Printer Settings Purpose: To copy the printer settings to one or more of the same model of the printer. To copy the settings to another printer, specify the IP address and password of the printer to which the settings are copied in the IP Address text box and Password text box. Then, click the Copy the settings to the Host in the above list. button. Copying the settings is complete. The connection time-out period is 60 seconds. After that, you can check whether the settings were copied to this page. And you need to click the Copy the settings to the Host in the above list and reboot the machine button of the Dell Printer Configuration Web Tool in the destination printer to verify if the settings were actually copied or not. If the settings can be copied but printer configuration is different, the settings of only the same items are copied. Printer settings are simultaneously copied to printers of up to 10 IP addresses. Copy Printer Settings Report
-
 1
1 -
2
-
3
-
4
-
5
-
6
-
7
-
8
-
9
-
10
-
11
-
12
-
13
-
14
-
15
-
16
-
17
-
18
-
19
-
20
-
21
-
22
-
23
-
24
-
25
-
26
-
27
-
28
-
29
-
30
-
31
-
32
-
33
-
34
-
35
-
36
-
37
-
38
-
39
-
40
-
41
-
42
-
43
-
44
-
45
-
46
-
47
-
48
-
49
-
50
-
51
-
52
-
53
-
54
-
55
-
56
-
57
-
58
-
59
-
60
-
61
-
62
-
63
-
64
-
65
-
66
-
67
-
68
-
69
-
70
-
71
-
72
-
73
-
74
-
75
-
76
-
77
-
78
-
79
-
80
-
81
-
82
-
83
-
84
-
85
-
86
-
87
-
88
-
89
-
90
-
91
-
92
-
93
-
94
-
95
-
96
-
97
-
98
-
99
-
100
-
101
-
102
-
103
-
104
-
105
-
106
-
107
-
108
-
109
-
110
-
111
-
112
-
113
-
114
-
115
-
116
-
117
-
118
-
119
-
120
-
121
-
122
-
123
-
124
-
125
-
126
-
127
-
128
-
129
-
130
-
131
-
132
-
133
-
134
-
135
-
136
-
137
-
138
-
139
-
140
-
141
-
142
-
143
-
144
-
145
-
146
-
147
-
148
-
149
-
150
-
151
-
152
-
153
-
154
-
155
-
156
-
157
-
158
-
159
-
 160
160 -
 161
161 -
 162
162 -
 163
163 -
 164
164 -
 165
165 -
 166
166 -
 167
167 -
 168
168 -
 169
169 -
 170
170 -
171
-
172
-
173
-
174
-
175
-
176
-
177
-
178
-
179
-
180
-
181
-
182
-
183
-
184
-
185
-
186
-
187
-
188
-
189
-
190
-
191
-
192
-
193
-
194
-
195
-
196
-
197
-
198
-
199
-
200
-
201
-
202
-
203
-
204
 |
 |
