Dell 2130 Color Laser User Guide - Page 87
Jam/Alignment Problems
 |
View all Dell 2130 Color Laser manuals
Add to My Manuals
Save this manual to your list of manuals |
Page 87 highlights
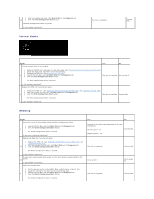
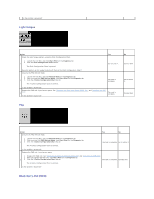
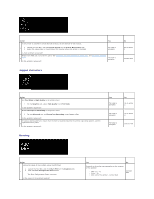
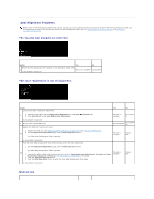
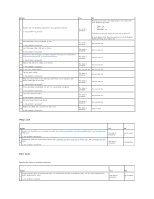
Jam/Alignment Problems NOTE: Some of the following procedures that use the Tool Box can also be performed using the operator panel or Dell Printer Configuration Web Tool. For information on how to use the operator panel and Dell Configuration Web Tool, see "Understanding the Printer Menus" and "Dell Printer Configuration Web Tool". The top and side margins are incorrect. Action Yes No Ensure that the margins are set correctly on the application being used. 1 The task is complete. Contact Dell. Is the problem recovered? The color registration is out of alignment. Action Execute auto color registration adjustment. Yes No 1. Launch the Tool Box, and click Registration Adjustment on the Printer Maintenance tab. 1 2. Click Auto Correct under Color Registration Adjustments. The task is complete. Go to action 2. Is the problem recovered? 2 Do you have a spare PHD unit? Replace the PHD unit if you have a spare. Go to action Go to action 3a. 3b. 1. Replace the PHD unit. See "Replacing the Print Head Device (PHD) Unit" and "Installing the PHD Unit". 2. On the Registration Adjustment page, click the Color Regi Chart button. 3a The Color Regi Configuration Chart is printed. The task is complete. Contact Dell. Is the problem recovered? Print the Color Regi Configuration Chart and manually correct the color registration. 1. On the Registration Adjustment page, click the Color Regi Chart button. The Color Regi Configuration Chart is printed. The task is 3b 2. Identify the offset values from the chart and enter them in Color Registration Adjustment 1 (Lateral) and Color complete. Registration Adjustment 2 (Process). See "Adjusting Color Registration" for details. 3. Click the Apply New Settings button. 4. Click the Color Regi Chart button to print the Color Regi Configuration Chart again. Contact Dell. Is the problem recovered? Misfeed jam
-
 1
1 -
2
-
3
-
4
-
5
-
6
-
7
-
8
-
9
-
10
-
11
-
12
-
13
-
14
-
15
-
16
-
17
-
18
-
19
-
20
-
21
-
22
-
23
-
24
-
25
-
26
-
27
-
28
-
29
-
30
-
31
-
32
-
33
-
34
-
35
-
36
-
37
-
38
-
39
-
40
-
41
-
42
-
43
-
44
-
45
-
46
-
47
-
48
-
49
-
50
-
51
-
52
-
53
-
54
-
55
-
56
-
57
-
58
-
59
-
60
-
61
-
62
-
63
-
64
-
65
-
66
-
67
-
68
-
69
-
70
-
71
-
72
-
73
-
74
-
75
-
76
-
77
-
78
-
79
-
80
-
81
-
 82
82 -
 83
83 -
 84
84 -
 85
85 -
 86
86 -
 87
87 -
 88
88 -
 89
89 -
 90
90 -
 91
91 -
 92
92 -
93
-
94
-
95
-
96
-
97
-
98
-
99
-
100
-
101
-
102
-
103
-
104
-
105
-
106
-
107
-
108
-
109
-
110
-
111
-
112
-
113
-
114
-
115
-
116
-
117
-
118
-
119
-
120
-
121
-
122
-
123
-
124
-
125
-
126
-
127
-
128
-
129
-
130
-
131
-
132
-
133
-
134
-
135
-
136
-
137
-
138
-
139
-
140
-
141
-
142
-
143
-
144
-
145
-
146
-
147
-
148
-
149
-
150
-
151
-
152
-
153
-
154
-
155
-
156
-
157
-
158
-
159
-
160
-
161
-
162
-
163
-
164
-
165
-
166
-
167
-
168
-
169
-
170
-
171
-
172
-
173
-
174
-
175
-
176
-
177
-
178
-
179
-
180
-
181
-
182
-
183
-
184
-
185
-
186
-
187
-
188
-
189
-
190
-
191
-
192
-
193
-
194
-
195
-
196
-
197
-
198
-
199
-
200
-
201
-
202
-
203
-
204
 |
 |
