Epson PowerLite Pro G5750WU User's Guide - Page 156
The image is too light or dark, or colors are incorrect., There is no sound
 |
View all Epson PowerLite Pro G5750WU manuals
Add to My Manuals
Save this manual to your list of manuals |
Page 156 highlights
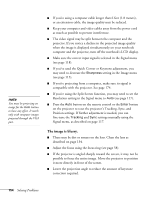
note Because of the different technologies used, your projected image may not exactly match the colors on your notebook or computer monitor. The image is too light or dark, or colors are incorrect. ■ Use the Color Mode option in the projector's Image menu to adjust the color (see page 114). ■ If you're displaying video, adjust the Color Adjustment and Color Mode settings on the Image menu. You can also try adjusting the Color Saturation, ABS Color Temp, and Tint settings on the Image menu. ■ Try adjusting the Brightness and Contrast settings on the Image menu. ■ Try adjusting the Power Consumption setting (see page 119). ■ Check your computer display settings to correct the color balance. ■ The projector's lamp may need to be replaced. See page 138 for instructions. ■ Make sure the correct input signal is selected in the Signal menu (see page 118). ■ Make sure that all cables are connected to the proper ports and connected securely. There is no sound, or the sound is not loud enough. ■ Use the Volume buttons on the remote control to adjust the volume, or adjust the Volume setting in the Settings menu (see page 120). ■ Make sure A/V Mute is not enabled. (The A/V Mute button may have been pressed.) ■ If your presentation includes computer audio, make sure the volume control on your computer is not turned all the way down or muted. In Windows, you may be able to check this by clicking the volume control in your Windows system tray (lower right corner of the screen). On a Mac, you may be able to adjust the volume from your menu bar (top right corner of the screen) or via the volume control function keys. ■ If you're using a DVD player or other video source, make sure the cables are connected correctly, as described on page 46. 156 Solving Problems
-
 1
1 -
2
-
3
-
4
-
5
-
6
-
7
-
8
-
9
-
10
-
11
-
12
-
13
-
14
-
15
-
16
-
17
-
18
-
19
-
20
-
21
-
22
-
23
-
24
-
25
-
26
-
27
-
28
-
29
-
30
-
31
-
32
-
33
-
34
-
35
-
36
-
37
-
38
-
39
-
40
-
41
-
42
-
43
-
44
-
45
-
46
-
47
-
48
-
49
-
50
-
51
-
52
-
53
-
54
-
55
-
56
-
57
-
58
-
59
-
60
-
61
-
62
-
63
-
64
-
65
-
66
-
67
-
68
-
69
-
70
-
71
-
72
-
73
-
74
-
75
-
76
-
77
-
78
-
79
-
80
-
81
-
82
-
83
-
84
-
85
-
86
-
87
-
88
-
89
-
90
-
91
-
92
-
93
-
94
-
95
-
96
-
97
-
98
-
99
-
100
-
101
-
102
-
103
-
104
-
105
-
106
-
107
-
108
-
109
-
110
-
111
-
112
-
113
-
114
-
115
-
116
-
117
-
118
-
119
-
120
-
121
-
122
-
123
-
124
-
125
-
126
-
127
-
128
-
129
-
130
-
131
-
132
-
133
-
134
-
135
-
136
-
137
-
138
-
139
-
140
-
141
-
142
-
143
-
144
-
145
-
146
-
147
-
148
-
149
-
150
-
 151
151 -
 152
152 -
 153
153 -
 154
154 -
 155
155 -
 156
156 -
 157
157 -
 158
158 -
 159
159 -
 160
160 -
 161
161 -
162
-
163
-
164
-
165
-
166
-
167
-
168
-
169
-
170
-
171
-
172
-
173
-
174
-
175
-
176
-
177
-
178
-
179
-
180
-
181
-
182
-
183
-
184
-
185
-
186
-
187
-
188
-
189
-
190
-
191
-
192
-
193
-
194
-
195
-
196
-
197
-
198
-
199
-
200
-
201
-
202
-
203
-
204
-
205
-
206
-
207
-
208
-
209
-
210
-
211
-
212
-
213
-
214
-
215
-
216
-
217
 |
 |
